More Than Just Looks – The True Value of Clean Furniture
Clean upholstery and furniture are far more than just a testament to a tidy home; they are cornerstone elements of a healthy, comfortable, and inviting living space. The state of your furniture profoundly influences the overall well-being of your household. Regular, thorough cleaning significantly impacts indoor air quality by systematically removing common allergens such as dust mites, pet dander, mold spores, and pollen that inevitably accumulate in fabrics and crevices. This reduction in airborne irritants is particularly beneficial for individuals who suffer from allergies, asthma, or other respiratory conditions, helping to create a sanctuary where breathing is easier and comfort is enhanced.
Beyond the considerable health advantages, a consistent and appropriate cleaning regimen plays a vital role in extending the lifespan of your cherished furniture pieces. Over time, unnoticed dirt, dust, and grime act as microscopic abrasives, gradually breaking down delicate fibers and compromising the integrity of finishes. By diligently removing these damaging particles, you are not just cleaning; you are actively preserving your furniture, safeguarding your investment, and ensuring it remains beautiful and functional for years to come.
Decoding Your Furniture’s Language: Understanding Fabric Cleaning Codes
Before any cleaning solution touches your upholstery, the single most critical preliminary step is to locate and consult the manufacturer’s care tag. These tags typically feature standardized cleaning codes—a concise language developed by the industry to guide consumers and professionals alike in the safe and effective care of upholstered items. Adhering to these codes is paramount, as they serve as your primary roadmap to preventing accidental and often irreversible damage.
Manufacturers provide these cleaning codes not merely as suggestions but as crucial directives. This system acts as a safeguard for them against liability for damage caused by improper cleaning, and for the consumer, it is the first and most important line of defense against costly mistakes. Ignoring these codes, particularly the more restrictive “S” or “X” designations, can lead to a host of problems including discoloration, fabric shrinkage, weakening of fibers, or the setting of stains that might otherwise have been removable.

Understanding and respecting these codes directly influences the choice of cleaning method and often determines whether a DIY approach is feasible or if professional intervention is necessary. A few moments spent deciphering a small tag can translate into significant savings in terms of both money and the frustration of dealing with damaged furniture.
The common cleaning codes are as follows:
- Code W: This symbol indicates that the fabric is safe to clean using water-based cleaning solutions. Many synthetic fibers like polyester and nylon, as well as some treated natural fibers, fall into this category. This is generally the most straightforward code for DIY cleaning.
- Code S: This code signifies that only solvent-based, water-free cleaning agents should be used. Water or water-based cleaners can cause significant damage to these fabrics, such as shrinkage, water staining, or color bleeding. This code often applies to delicate natural fibers like silk or some velvets, or materials with non-colorfast dyes. When using solvents, it is imperative to work in a well-ventilated area and ensure there are no open flames nearby due to the flammability and potential fumes of these chemicals.
- Code W/S (or SW): Fabrics marked with this code offer more flexibility, as they can typically be cleaned with either water-based or solvent-based cleaners. However, this does not mean any product can be used indiscriminately. Spot testing in an inconspicuous area is highly recommended to determine which type of cleaner yields the best results without causing any adverse reactions to the specific fabric.
- Code X: This is the most restrictive code. It means the fabric should only be cleaned by vacuuming or light brushing to remove loose soil. No water-based or solvent-based cleaning agents should be applied under any circumstances. For any cleaning beyond simple vacuuming, professional expertise is essential to avoid ruining the fabric.
Fabric Upholstery Cleaning: A Deep Dive into Materials and Methods
Know Your Fabric: A Guide to Common Upholstery Materials
 The tactile and visual appeal of upholstered furniture largely depends on its fabric. The world of upholstery materials is diverse, encompassing natural fibers cherished for their unique textures and breathability, and synthetic fibers engineered for enhanced durability and ease of maintenance. Understanding the characteristics of your specific upholstery fabric is fundamental to selecting the correct cleaning methods and preserving its beauty.
Natural Fabrics:
- Cotton: A popular choice due to its softness, breathability, and relative affordability. Cotton resists pilling and wear well, but it is susceptible to staining, wrinkling, and fading from direct sunlight unless it has been treated with a protective finish. It’s often best suited for furniture in low-traffic areas or when blended with other fibers to enhance its performance.
- Linen: Known for its exceptional durability, natural luster, and cool, breathable feel. Linen possesses a distinctive, elegant texture. However, it wrinkles very easily and can shrink if not cleaned properly, often making professional cleaning the recommended route, especially for 100% linen pieces. It may not be the most practical choice for high-traffic family furniture unless blended with more resilient fibers.
- Wool: A highly durable and resilient natural fiber, wool offers excellent insulating properties and is naturally resistant to staining, wrinkling, and soiling. However, it can have a coarse feel unless blended with softer fibers and is prone to shrinkage or felting if exposed to high heat or excessive agitation and moisture during cleaning. Low-moisture or dry cleaning methods are typically advised for wool upholstery.
Synthetic Fabrics:
- Polyester: A widely used synthetic fiber that is valued for its resistance to wrinkling, fading, stretching, and abrasion. Polyester is often blended with natural fibers to add durability and is generally easy to clean, making it a practical choice for busy households.
- Microfiber: An ultra-soft fabric made from tightly woven synthetic fibers (usually polyester or nylon). Microfiber is renowned for its excellent stain resistance, durability, and ease of cleaning, often requiring just a damp cloth for spills. Its dense weave also helps repel dust and allergens, making it a good option for homes with pets, children, or allergy sufferers. However, some microfiber types can show water spots if not cleaned evenly or can attract lint.
- Acrylic: Developed as a synthetic alternative to wool, acrylic is lightweight, resists sunlight (making it good for sunny rooms or outdoor furniture), and offers good colorfastness. Lower-quality acrylics can be prone to pilling over time.
- Performance Fabrics (e.g., Crypton, Sunbrella): These are advanced synthetic fabrics specifically engineered for superior durability, stain resistance, moisture repellency, and often UV resistance. Brands like Crypton integrate their protective technology into the fibers themselves, while Sunbrella is well-known for outdoor applications due to its fade and mildew resistance. These fabrics are excellent choices for high-traffic areas, homes with children and pets, and commercial settings. Many performance fabrics are also designed to be cleanable with diluted bleach solutions, offering an added level of convenience for tough stains.
The development and popularity of performance fabrics signify a notable shift in the upholstery market. Consumers increasingly seek materials that combine the aesthetic qualities once primarily associated with natural fibers—such as soft textures or varied weaves—with the practical benefits of modern synthetics, namely enhanced durability and simplified cleaning. This trend addresses a common dilemma: the desire for stylish, comfortable furniture that can withstand the rigors of daily life, especially in households with children or pets. Technological advancements in fabric engineering are enabling manufacturers to meet these evolving lifestyle demands, leading to a wider availability of beautiful yet resilient upholstery options. This may gradually influence consumer preferences, with these advanced synthetics becoming even more mainstream, thereby reducing the perceived “preciousness” or high-maintenance burden often linked with delicate natural upholstery.
To aid in navigating these choices, the following table provides a comparative overview:
Table 1: Upholstery Fabric Comparison
| Fabric Type | Key Characteristics (Pros) | Common Issues (Cons) | Best Cleaning Approach (Code & Method) | Ideal Use Cases |
|---|---|---|---|---|
| Cotton | Soft, breathable, affordable, resists pilling | Prone to staining, fading, wrinkling unless treated | Typically ‘W’ or ‘W/S’. Water-based cleaners, steam cleaning (with care), or professional. Spot treat promptly. | Low-traffic areas, casual furniture, slipcovers |
| Linen | Durable, breathable, elegant texture, naturally anti-static | Wrinkles easily, can shrink, may require professional cleaning to avoid water marks | Often ‘S’ or professional dry clean. Low-moisture cleaning by pros if ‘W/S’. Test carefully. | Formal living rooms, accent pieces, slipcovers |
| Wool | Durable, resilient, naturally stain & soil resistant, insulating | Can be coarse, prone to shrinkage/felting with heat/moisture, moths | ‘S’ code usually. Dry solvent cleaning or specialized low-moisture methods by professionals. | Cooler climates, durable seating, family rooms |
| Leather | Durable, luxurious, easy to maintain, develops patina (aniline) | Can scratch, fade in sunlight, requires conditioning, price | Varies by type (Pigmented: ‘W’ or specialized leather cleaner; Aniline/Nubuck: ‘S’ or specialized gentle cleaners). See leather section. | High-end furniture, homes with pets (pigmented) |
| Polyester | Resists wrinkling, fading, stretching, durable, affordable | Can feel synthetic, may trap heat, some types can pill | Usually ‘W’ or ‘W/S’. Water-based cleaners, steam cleaning. Generally easy to clean. | Family rooms, high-traffic areas, budget-friendly |
| Microfiber | Very soft, highly stain-resistant, durable, easy to clean, repels allergens | Can attract lint/pet hair, may show water spots if not cleaned evenly | Typically ‘W’ or ‘W/S’. Distilled water for ‘W’, solvents for ‘S’. Blot spills. Vacuum regularly. Some can be steam cleaned. | Homes with kids/pets, allergy sufferers |
| Acrylic | Mimics wool, sun-resistant, lightweight, good colorfastness | Low-quality versions may pill, can be heat sensitive | Often ‘W’ or ‘W/S’. Water-based cleaners. Avoid high heat. | Outdoor furniture, sun-exposed areas |
| Performance Fabrics (e.g., Crypton, Sunbrella) | Extremely durable, stain/fade/moisture resistant, easy to clean | Can be pricier, some may have a less natural feel than true natural fibers | Often ‘W’ and may be bleach-cleanable. Water-based cleaners, steam cleaning. | High-traffic areas, homes with kids/pets, outdoor |
Arming Yourself: Essential Tools and Supplies for Fabric Care
Successful DIY fabric upholstery cleaning hinges on having the appropriate tools and cleaning agents at your disposal. Equipping yourself properly not only makes the task more manageable but also significantly reduces the risk of damaging your furniture.
Basic Toolkit:
- Vacuum Cleaner: An indispensable tool. Ensure it has a dedicated upholstery attachment for broad surfaces and a crevice tool for reaching into seams, folds, and tight corners where dirt and crumbs accumulate.
- Microfiber Cloths: Invest in several high-quality microfiber cloths. Opt for white or light-colored ones to prevent any risk of dye transfer onto your upholstery, especially when dealing with lighter fabrics.
- Soft-Bristle Brushes: A soft brush (like a dedicated upholstery brush or even a soft-bristled clothes brush) is useful for gently loosening dried-on dirt or agitating cleaning solutions without abrading the fabric.
- Spray Bottles: Essential for applying cleaning solutions evenly and in a controlled manner, preventing over-saturation. Clearly label each bottle with its contents.
- Buckets: Needed for mixing larger quantities of cleaning solutions or for rinse water.
Cleaning Agents (Selection depends on fabric type and cleaning code):
- Mild Dish Soap: A gentle, pH-neutral liquid dish soap (like Dawn or Ivory) can be mixed with water for many ‘W’ coded fabrics.
- Distilled White Vinegar: A versatile natural cleaner and deodorizer. It can be diluted with water for cleaning ‘W’ coded fabrics.
- Rubbing Alcohol (Isopropyl Alcohol): Effective for some ‘S’ coded fabrics or for treating specific types of stains (like ink) on certain ‘W/S’ fabrics. Use with caution and ensure good ventilation.
- Specialized Upholstery Shampoo/Cleaner: Commercial products formulated specifically for upholstery. Always choose one that matches your fabric’s cleaning code.
- Dry Cleaning Solvent: For ‘S’ code fabrics only. These are potent chemicals and should be used with extreme caution, ensuring excellent ventilation and strictly following product instructions. Often, this is best left to professionals.
- Enzyme Cleaners: Specifically designed to break down organic stains and odors, such as those from pets (urine, vomit) or food spills.
Optional but Highly Beneficial Tools:
- Steam Cleaner: A handheld or larger unit with an upholstery attachment can provide a deeper clean and sanitize some fabric types. Use with caution to avoid over-wetting.
- Wet/Dry Vacuum (Extraction Machine): If you plan to do more intensive water-based cleaning, a machine that can extract the dirty water is invaluable for a thorough clean and faster drying.
Fabric Cleaning Techniques Unveiled: Choosing Your Method
The approach to cleaning fabric upholstery varies significantly based on the fabric type, the level of soiling, and the specific cleaning code assigned by the manufacturer. Understanding the different professional and DIY methods available allows for an informed choice, ensuring both effectiveness and the safety of your furniture.
- Steam Cleaning (Hot Water Extraction):
- Process: This method employs a machine that sprays hot water, often mixed with a cleaning solution, deep into the upholstery fibers. Almost simultaneously, a powerful vacuum extracts the water along with the dislodged dirt, allergens, grime, and cleaning solution residue.
- Pros: It offers a very deep clean, making it highly effective for heavily soiled furniture and for removing embedded allergens like dust mites and pet dander. The high temperature of the steam also provides a sanitizing effect, killing bacteria and neutralizing many odors. When minimal or eco-friendly cleaning solutions are used, it can be a relatively green cleaning option.
- Cons: A primary drawback is the potential for long drying times due to the amount of water used. If not performed correctly, or if the equipment is not powerful enough, there’s a risk of over-wetting the fabric. This excessive moisture can lead to problems like mildew growth, browning, fabric shrinkage, or damage to the underlying padding or frame materials.
- Fabric Suitability: Steam cleaning is generally best suited for durable synthetic fibers such as polyester and nylon, and some robust natural fibers if the technician is experienced and careful. It is not recommended for delicate, water-sensitive fabrics like silk, certain types of velvet, or some wools, as these can be damaged by the heat and moisture. Always verify the fabric’s cleaning code (‘W’ or ‘W/S’ fabrics are candidates, but caution is still needed).
- Low-Moisture Cleaning:
- Process: As the name suggests, these techniques utilize significantly less water compared to traditional steam cleaning. There are several variations:
- Encapsulation: A cleaning solution is applied, which contains polymers that crystallize around dirt particles as they dry. These crystals are then vacuumed away.
- Dry Foam Cleaning: A dense foam is generated from a cleaning solution and applied to the fabric. The foam loosens soil, which is then typically vacuumed up after a short drying period.
- Specialized Low-Moisture Extraction: Some machines use specialized cleaning agents and controlled moisture application, followed by efficient extraction. This often involves pre-treating soiled areas, applying the solution, gentle agitation with a brush or bonnet pad, and then either extraction or allowing the fabric to dry for later vacuuming.
- Pros: The most significant advantage is much faster drying times, often within a few hours or less. This minimizes disruption and greatly reduces the risk of problems associated with over-wetting, such as mildew, shrinkage, or fabric browning. It can be quite effective for cleaning lightly to moderately soiled upholstery. Some low-moisture cleaning products are formulated to leave behind residues that can actually soften the fabric.
- Cons: For heavily embedded dirt and severe soiling, low-moisture methods might not achieve the same deep-cleaning penetration as hot water extraction. There’s also a possibility, particularly with some DIY or improperly applied methods, that cleaning solution residues can be left behind, which could potentially lead to a stiff feel in natural fibers or attract dirt over time (though other sources mention products designed to avoid this ).
- Fabric Suitability: Low-moisture cleaning is a versatile option suitable for many synthetic fabrics. It can also be carefully adapted for use on some natural fibers, especially those that are more sensitive to excessive water, like certain cottons or linens, provided that products specifically designed for these materials are used. Delicate fabrics such as silk, linen, and wool often benefit from professional low-moisture or dry cleaning techniques to prevent damage.
- Process: As the name suggests, these techniques utilize significantly less water compared to traditional steam cleaning. There are several variations:
- Dry Solvent Cleaning:
- Process: This method is entirely water-free. It utilizes specialized chemical solvents designed to dissolve oils, grease, and other types of soil that are not water-soluble. The solvent is carefully applied to the fabric, allowed time to work on the soil, and then typically extracted using specialized equipment, or it evaporates, carrying the dissolved dirt away with it.
- Pros: Its primary advantage is safety for water-sensitive fabrics (those with a ‘S’ cleaning code) that would otherwise shrink, bleed colors, develop water spots, or suffer other damage if cleaned with water or water-based solutions. It is particularly effective on oil-based stains. Drying time is usually minimal, often less than an hour.
- Cons: The solvents used can be harsh and may pose potential health risks from fumes if not used in an extremely well-ventilated area. There are also environmental considerations with some traditional solvents. Due to the nature of the chemicals and the specialized equipment often required for application and extraction, dry solvent cleaning is frequently best performed by trained professionals. Some solvents can also be incompatible with certain synthetic materials or fabric backings, potentially causing damage.
- Fabric Suitability: This method is specifically intended for fabrics labeled with a “Code S.” These often include delicate materials such as silk, some types of velvet, certain wools, rayon, or fabrics with dyes that are not colorfast in water.
- Shampooing:
- Process: This traditional method involves applying a specially formulated upholstery shampoo, often in the form of a foam, to the fabric surface. The shampoo is then agitated with a soft brush or sponge to work it into the fibers and loosen dirt. After a dwell time, the loosened dirt and shampoo residue are typically vacuumed away once the area has dried. Some more advanced shampooing methods may incorporate a rinse-extraction step to remove more residue.
- Pros: When done correctly, shampooing can improve the aesthetic appearance of the upholstery and contribute to better indoor air quality by removing surface dirt and some allergens. Some proponents claim faster drying times compared to methods that deeply saturate the fabric, and a reduced risk of fabric shrinkage if over-wetting is avoided. For certain durable fabrics, it can be a relatively safe and effective DIY cleaning method if manufacturer instructions are followed carefully.
- Cons: A common issue with shampooing is the difficulty in completely removing all shampoo residue from the fabric fibers. Leftover sticky residue can attract new dirt more quickly, leading to rapid re-soiling. There’s also a risk of excessive wetting if too much liquid is applied or if the equipment used malfunctions, which can prolong drying times and potentially lead to mildew. For deeply embedded dirt and heavy soiling, shampooing may not offer the same level of extraction power as methods like hot water extraction. Furthermore, some upholstery shampoos contain harsh chemicals that could cause browning on light-colored fabrics or pose health concerns if the area is not well-ventilated during and after cleaning.
- Fabric Suitability: Shampooing is generally suitable for fabrics that can tolerate water-based cleaning methods, typically those with a ‘W’ or ‘W/S’ cleaning code. It’s often used on durable cottons and many synthetic upholstery fabrics. Extreme care must be taken if considering this method for more delicate fabrics.
A common thread running through the evaluation of these diverse upholstery cleaning methods is the critical factor of drying time and the associated risks of excessive moisture. Whether it’s the prolonged drying after steam cleaning , the potential for over-wetting during shampooing , or even concerns with DIY methods if not executed properly , the “wetness” of a technique emerges as a pivotal consideration for both consumers and professionals.
Methods like low-moisture cleaning and dry solvent cleaning explicitly highlight faster drying times as a key advantage. This suggests a strong market demand for cleaning solutions that not only clean effectively but also allow for a quicker return-to-use of the furniture and minimize the chances of moisture-related problems such as mold, mildew, fabric damage, or lingering odors.
The underlying relationship is clear: increased water usage generally leads to longer drying periods, which in turn elevates the risk of undesirable outcomes. Consequently, innovations in cleaning technology and product formulation that focus on reducing moisture content and accelerating drying, while still maintaining high cleaning efficacy, are likely to continue gaining favor.
DIY Fabric Upholstery Cleaning: Your Step-by-Step Guide and Safety First!
 Embarking on a DIY fabric upholstery cleaning project can be rewarding, restoring freshness and cleanliness to your furniture. However, success hinges on careful preparation, adherence to safety precautions, and using the correct techniques for your specific fabric type.
Preparation is Key:
- Consult the Oracle (The Cleaning Code): Before you do anything else, locate and understand the cleaning code on your upholstery’s care tag. This code (W, S, W/S, or X) dictates the types of cleaning agents you can safely use.
- Thorough Vacuuming: Your first active step should always be to vacuum the upholstery meticulously. Use the upholstery attachment for large surfaces and the crevice tool for seams, folds, and around buttons to remove all loose dirt, dust, crumbs, and pet hair. Removing this dry soil prevents it from turning into mud when a cleaning solution is applied.
- Gather Your Supplies: Have all your chosen cleaners, cloths, brushes, spray bottles, and buckets ready before you begin.
Spot Test, Spot Test, Spot Test!:
This step cannot be overemphasized and is the golden rule of DIY upholstery cleaning. The vast array of fabric types, dyes, and finishes means that even a cleaner generally considered “safe” for a particular fabric category could react adversely with your specific item.
Applying an untested cleaner directly to a visible area is a gamble that can lead to permanent discoloration, fabric damage, or other undesirable outcomes, effectively turning a simple cleaning task into a costly problem or even a furniture replacement scenario. Always test your chosen cleaning solution on a small, hidden, inconspicuous area of the upholstery—such as underneath a cushion, on a back flap, or along an inner seam.
Apply the cleaner as you intend to use it, let it sit for the recommended time, then blot or rinse as per the method. Crucially, wait for the test spot to dry completely before assessing the results. Look for any signs of color bleeding, fading, water spotting, or changes in fabric texture. Only if the test area remains unchanged should you proceed with cleaning the rest of the furniture. This simple act of patience and caution is a critical risk mitigation strategy.
General Cleaning Process (for ‘W’ or ‘W/S’ fabrics using a mild detergent solution):
- Mix Solution: Create a cleaning solution by adding a small amount of mild, neutral pH liquid dish soap (a teaspoon or two) to a bucket of warm (not hot) water. Agitate gently to create suds. Avoid harsh detergents.
- Apply Gently: Dip a clean, white microfiber cloth into the suds, wring it out thoroughly so it’s just damp, not soaking wet. Over-wetting can lead to water stains, mildew, or damage to the padding.
- Wipe in Sections: Starting from the top of a section (e.g., an armrest, a cushion), gently wipe the fabric. Work systematically to ensure even coverage. For more soiled areas, you can use a soft-bristled upholstery brush to gently agitate the cleaner into the fabric, always moving with the weave if possible.
- “Rinse” the Fabric: After cleaning a section, take a separate clean microfiber cloth, dampen it with plain cool water, and wring it out well. Wipe over the cleaned area to help remove any soap residue.
- Blot Excess Moisture: Use a clean, dry towel to blot the cleaned area, pressing down firmly to absorb as much moisture as possible.
Using a Vinegar Solution (for ‘W’ or ‘W/S’ fabrics, good for light cleaning and deodorizing):
- Mix Solution: Combine equal parts distilled white vinegar and cool water in a clean spray bottle.
- Apply Lightly: Lightly mist the fabric surface; do not saturate it.
- Dab Gently: Use a clean microfiber cloth to gently dab and wipe the misted areas. The vinegar scent will dissipate as it dries.
Using Rubbing Alcohol (for ‘S’ code fabrics or specific spot treatments on ‘W/S’ fabrics, e.g., ink):
- Ventilation: Work in a very well-ventilated area, away from any open flames or sparks, as rubbing alcohol is flammable and its fumes can be strong.
- Apply to Cloth: Pour a small amount of isopropyl alcohol onto a clean, white cloth.
- Blot, Don’t Rub: Gently blot the stained area. For ‘S’ code fabrics, you may be cleaning larger sections this way, always applying the alcohol to the cloth first.
Drying:
Proper drying is crucial. Allow the upholstery to air-dry completely before use. To speed up the process and prevent mildew, open windows to create cross-ventilation, use fans directed towards the furniture, or turn on a dehumidifier if the environment is humid. Avoid direct heat sources like hairdryers on high settings unless specifically recommended for a spot-drying technique on a very small area.
Safety Precautions are Non-Negotiable:
- Heed the Code: Always, always follow the cleaning code instructions for your specific upholstery.
- Ventilation is Vital: Ensure good airflow, especially when using solvents, strong commercial cleaners, or even vinegar solutions in enclosed spaces.
- Protect Yourself: Wear rubber gloves to protect your skin from cleaning agents. If you are steam cleaning or using aerosolized products or strong chemicals, consider wearing safety glasses and a mask to protect your eyes and respiratory system.
- No Chemical Cocktails: Never mix different cleaning chemicals, especially bleach with ammonia, as this can create dangerous, toxic gases. Generally, only dilute cleaners with water as per instructions.
- Keep Vulnerable Individuals Away: Ensure children and pets are kept away from the area during the cleaning process and until the upholstery is completely dry.
- Gentle Does It: Avoid over-wetting the fabric and resist the urge to scrub harshly, as this can damage fibers, cause pilling, or spread stains.
Leather Cleaning and Conditioning: Preserving Luxury and Durability
Leather upholstery exudes a sense of luxury and, with proper care, can offer remarkable durability. However, not all leather is the same, and using incorrect cleaning or conditioning methods can lead to irreparable damage. Understanding the specific type of leather on your furniture is the first and most critical step in its preservation journey.
Decoding Leather: A Look at Common Types
The term “leather” encompasses a range of materials, each with distinct characteristics, vulnerabilities, and care requirements. Identifying your specific type is crucial for selecting appropriate cleaning products and techniques.
- Pigmented (Protected/Finished) Leather: This is the most prevalent type of leather found on furniture due to its enhanced durability and ease of maintenance. During its processing, a polymer surface coating containing opaque pigments is applied. This coating provides a protective layer that makes the leather more resistant to staining, fading, and general wear. The surface typically has a uniform color and texture, and natural markings like scars or insect bites are often buffed out or concealed by the finish. Examples from Carl Hansen & Søn include Loke and Freja leathers.
- Aniline Leather (also Pure Aniline or Full Aniline): Considered the highest quality and most natural-looking leather, aniline is dyed using soluble, transparent dyes that penetrate the hide without a heavy surface coating of pigment or polymer. This process allows the natural grain, including all its unique markings, scars, and color variations, to remain visible, contributing to its character. Aniline leather is exceptionally soft and offers superior seating comfort. However, its porous nature makes it highly absorbent and thus very susceptible to staining from liquids, oils, and even sunlight-induced fading. It requires diligent and careful maintenance. An example is Sif leather.
- Semi-Aniline Leather: This type strikes a balance between the natural appearance of aniline leather and the durability of pigmented leather. It receives a light surface coating that contains a small amount of pigment or a thin protective finish. This coating offers better protection against spills and wear than pure aniline, making it more resistant to stains and easier to clean, while still allowing much of the natural grain and character of the hide to show through. An example is Thor leather.
- Nubuck Leather: Nubuck is a top-grain leather that has been sanded or buffed on the grain (outer) side to create a soft, velvety nap of short protein fibers. It is prized for its luxurious feel. However, like aniline, nubuck is quite absorbent and prone to staining, soiling, and water spotting if not protected. It requires specialized cleaning methods to avoid damaging the nap.
- Other Types:
- Goatskin: Often an aniline leather, sometimes vegetable-tanned, known for its distinct grain and durability.
- Saddle Leather: Typically an aniline leather, very strong and durable, developing an attractive patina over time.
The diverse characteristics of these leather types reveal an inherent trade-off that both consumers and manufacturers must consider: the relationship between natural beauty and practical resilience. Generally, the more “natural” and less processed the leather appears—as with aniline or nubuck—the more vulnerable it is to everyday wear, spills, and environmental factors, thus demanding more specialized and diligent care.
Conversely, pigmented leather offers significantly greater ease of maintenance and resistance to damage, but this comes at the expense of some of the hide’s original, unaltered character. This fundamental relationship—where less processing often equates to greater vulnerability—directly dictates the appropriate cleaning approaches and product choices.
The broader implication for consumers is that lifestyle factors, such as the presence of children or pets, or the intended use and placement of the furniture, should heavily influence the selection of a suitable leather type to ensure both satisfaction and longevity.
Choosing Your Arsenal: The Best Cleaners and Conditioners for Your Leather
Selecting the correct cleaning and conditioning products is paramount for leather care; using an inappropriate product can lead to discoloration, drying, cracking, or other forms of irreversible damage.
- Pigmented Leather: Due to its protective topcoat, pigmented leather is the most resilient. It can generally be cleaned with mild, pH-neutral cleaners specifically formulated for leather, or even a very dilute solution of gentle soap (like Ivory soap flakes or Woolite, as suggested by some manufacturers ) and lukewarm water. Always ensure the cloth is only damp, not wet. Products explicitly stating they are safe for “pigmented,” “protected,” or “finished” leather are ideal. Cortina Leathers Universal Cleaner Wipes are also indicated as suitable for pigmented leather. Regular conditioning helps maintain its suppleness and prevent the finish from drying out.
- Aniline and Semi-Aniline Leather: These leathers require exceptionally gentle care. Use pH-balanced cleaners specifically designed for aniline or semi-aniline types to avoid stripping natural oils or damaging the minimal finish. Some sources strongly advise against using any oils, traditional saddle soaps, or general conditioners on pure aniline leather, recommending only dusting or cleaning with a lightly damp cloth. However, other specialized products, like the Geist Aniline Leather Care Kit which includes an Aniline Cleaner and Aniline Cream (conditioner/protector), are formulated to clean and protect these delicate leathers without clogging pores or altering their natural feel significantly. Regular application of a vegetable-based leather cream or specific aniline protector can be beneficial for maintaining moisture and offering some stain resistance for certain aniline leathers.
- Nubuck Leather: This unique leather demands specialized products to clean and maintain its characteristic velvety nap. Cleaners are typically foam or spray-based and should be specifically labeled for nubuck (or suede, which has similar cleaning needs). After cleaning, a nubuck brush or block is essential to gently lift and restore the nap. Liquid cleaners that are not designed for nubuck can flatten the nap, cause water spots, or darken the leather. Protective sprays formulated for nubuck are crucial to help repel water and stains. Furniture Clinic Suede & Nubuck Cleaner is one such specialized product.
General Recommendations for Product Selection:
- Spot Test: Regardless of the leather type or product, always test any cleaner or conditioner on a small, inconspicuous area of the furniture first. Allow it to dry completely and observe for any adverse reactions like discoloration or texture change before treating the entire piece.
- Avoid Harsh Chemicals: Steer clear of products containing solvents, abrasives, alcohol (unless a very specific spot treatment for ink on pigmented leather, used with extreme care), ammonia, furniture polish not designed for leather, or bleach, as these can severely damage most leathers.
- Reputable Brands: Many well-known brands offer comprehensive leather care kits that are often tailored to specific leather types. Examples mentioned in various sources include Lexol, Leather Honey, Weiman, Chemical Guys, Fibrenew, Mothers, and Geist. When in doubt, consult the furniture manufacturer’s care recommendations.
To simplify the selection process, the following table summarizes care approaches for common leather types:
Table 2: Leather Type Cleaning Guide
| Leather Type | Key Characteristics | Recommended Cleaner Type | Recommended Conditioner Type | Step-by-Step Cleaning Summary | Key Precautions |
|---|---|---|---|---|---|
| Pigmented (Protected) | Durable, uniform color, stain-resistant surface coating | Mild, pH-neutral leather cleaner; or very dilute mild soap (e.g., Ivory) and lukewarm water | Leather conditioner for protected leather | 1. Vacuum. 2. Apply cleaner to soft cloth. 3. Wipe surface gently. 4. Dry with clean cloth. | Avoid excessive water. Test cleaner first. Do not use harsh chemicals. |
| Aniline (Pure/Full) | Soft, natural grain visible, absorbent, prone to staining/fading | Specialized aniline cleaner (pH-balanced, very gentle). Some suggest only damp cloth. | Specialized aniline cream/protector (non-pore-clogging). Some say no conditioner. Vegetable-based cream for some types. | 1. Dust/Vacuum. 2. Apply aniline cleaner to cloth. 3. Wipe very gently, quickly, and evenly over entire panels to avoid blotches. 4. Air dry. | Extremely sensitive. Avoid all harsh chemicals, oils, saddle soap. Blot spills immediately. Protect from sunlight. |
| Semi-Aniline | Natural look with a thin protective coating, more durable than aniline | Gentle leather cleaner for semi-aniline or aniline leather ; or mild soap solution (damp cloth). | Conditioner suitable for semi-aniline or aniline leather; or specialized protector. | 1. Vacuum. 2. Apply cleaner to cloth. 3. Wipe gently and evenly. 4. Air dry. | More resistant than aniline but still requires gentle care. Test products. Avoid over-wetting. |
| Nubuck | Velvet-like nap, soft, absorbent, prone to staining | Specialized nubuck/suede foam or spray cleaner | Nubuck protector spray (not traditional conditioner) | 1. Brush with nubuck brush. 2. Apply nubuck cleaner as directed. 3. Let dry. 4. Brush again to restore nap. | Avoid liquid cleaners not for nubuck. Protect with spray. Brush regularly to maintain nap. |
The Gentle Touch: Step-by-Step Guide to Cleaning Leather Upholstery
Regular, gentle cleaning is key to maintaining the beauty and longevity of your leather furniture. The specific approach will vary slightly based on the leather type, but the general principles of gentle handling and appropriate product use remain constant.
Preparation:
- Vacuum First: Begin by thoroughly vacuuming the leather surface using a soft brush attachment. This removes loose dust, crumbs, and abrasive particles that could scratch the leather during the cleaning process. Pay close attention to seams, crevices, and around buttons.
- Identify Your Leather Type: Refer to the descriptions above or your furniture manufacturer’s information to confirm whether your leather is pigmented, aniline, semi-aniline, nubuck, etc. This is crucial for selecting the correct cleaning method and products.
- Choose the Right Cleaner: Based on the leather type, select an appropriate cleaning solution as outlined in the previous section.
- Spot Test: As always, before applying any cleaner to the entire piece, test it on a small, hidden area to ensure it doesn’t cause discoloration or damage.
Cleaning Process (General guidelines; always adapt to your specific leather type and the instructions on your chosen cleaning product):
- Apply Cleaner to Cloth: Dampen a clean, soft, lint-free microfiber cloth (preferably white or undyed to prevent dye transfer) with the selected leather cleaner. Crucially, do NOT apply the cleaner directly onto the leather surface, as this can lead to uneven application, over-saturation, or spotting.
- Wipe Gently: Working in manageable sections, gently wipe the leather surface with the dampened cloth.
- For pigmented leather, you can generally wipe the entire surface systematically.
- For more delicate aniline or semi-aniline leathers, it’s often recommended to work quickly and wipe an entire panel (e.g., a whole cushion face, an entire armrest) at a time, using light, even strokes to avoid creating blotches or water marks. The cloth should be damp, not wet.
- Avoid Scrubbing: Resist the temptation to scrub aggressively, even on stubborn spots, as this can damage the leather’s finish or surface.
- Address Residue (if applicable): If using a mild soap solution (for appropriate leather types), or if the cleaner’s instructions recommend it, follow up by wiping the area with a separate clean cloth that has been lightly dampened with plain water to remove any cleaner residue.
- Dry Thoroughly: Use a soft, dry cloth to gently buff the leather or blot away any remaining moisture.
- Air Dry: Allow the leather to air dry completely before use. Avoid placing it in direct sunlight or near artificial heat sources like radiators or blow dryers to speed up drying, as this can cause the leather to dry out and potentially crack.
Nubuck Specifics:
For nubuck leather, after cleaning with a specialized nubuck cleaner and allowing it to dry completely, use a dedicated nubuck brush or a nubuck eraser (for small marks) to gently restore the velvety nap. Brushing in different directions can help lift the fibers.
Nourish and Protect: Conditioning Leather to Keep it Supple
 Conditioning is a vital step in leather care, akin to moisturizing skin. It replenishes the natural oils within the leather, keeping it soft, flexible, and resilient, thereby preventing dryness, brittleness, and the eventual cracking that can occur as leather ages or is exposed to dry environments. This proactive “healthcare” for leather not only preserves its luxurious feel and appearance but also significantly contributes to its longevity. Viewing leather care through the lens of skin care—requiring regular “moisturizing” to fend off signs of aging—can help underscore its importance beyond mere surface cleaning.
When to Condition:
- The frequency of conditioning depends on the leather type, the climate, and the amount of use the furniture receives.
- For pigmented leather, a general guideline is to condition once or twice a year, or as needed if the leather starts to feel dry.
- For aniline and semi-aniline leathers, it’s best to follow the specific recommendations of the specialized aniline care products used. For instance, the Geist Aniline Cream is suggested for application two to three times a year. Over-conditioning can sometimes be an issue, so observe the leather’s feel.
- Nubuck leather typically does not receive traditional conditioning with creams or oils, as these can flatten its nap and alter its appearance. Instead, nubuck relies on protective sprays to maintain its condition and resist soiling.
How to Condition (General Process for Pigmented, Aniline, and Semi-Aniline Leathers, using appropriate products):
- Clean First: Always ensure the leather is thoroughly clean and completely dry before applying any conditioner. Applying conditioner to dirty leather can trap soil and grime.
- Apply Conditioner to Cloth: Dispense a small amount of the appropriate leather conditioner onto a clean, soft, lint-free cloth. Do not apply the conditioner directly to the leather.
- Rub in Gently: Gently rub the conditioner into the leather using soft, circular motions. Work in sections to ensure even coverage over the entire surface.
- Allow Absorption: Let the conditioner penetrate the leather for the time recommended by the product manufacturer. This can range from about 30 minutes to several hours, or even overnight for some products, allowing the oils to be fully absorbed.
- Buff Off Excess: After the absorption period, take another clean, dry, soft cloth and gently buff the leather surface. This removes any unabsorbed conditioner residue and can enhance the leather’s natural sheen.
Preventing Cracking:
Beyond regular cleaning and conditioning, a few environmental considerations can help prevent leather from drying out and cracking:
- Avoid placing leather furniture in prolonged direct sunlight, as UV rays can cause fading and accelerate drying.
- Keep leather furniture away from direct heat sources such as radiators, fireplaces, or heating vents, which can also strip moisture from the leather.
- Maintain a moderate level of humidity in your home if possible, especially in very dry climates or during winter months when indoor heating is in use.
Conquering Spots and Smells: Targeted Stain and Odor Removal
Even with the most diligent care, spills and unwelcome odors can occasionally mar the beauty and freshness of your upholstery. Addressing these issues promptly and correctly is key to maintaining your furniture’s pristine condition.
Know Your Enemy: Identifying Common Upholstery Stain Categories
The first crucial step in effective stain removal is to understand the nature of the stain itself, as different types of stains require different treatment approaches. Misidentifying a stain can lead to using the wrong cleaning agent, which might be ineffective or, worse, could set the stain permanently or damage the fabric.
Common stain categories include:
- Water-Based Stains: These are among the most frequent culprits and include spills like coffee, tea, fruit juice, soda, and many food-related marks. These stains are often acidic in nature.
- Oil-Based Stains: These stains are hydrophobic (repel water) and typically originate from substances like grease, cooking oil, butter, salad dressing, some types of makeup (like foundation or oily lipstick), and certain inks. They often appear darker and can feel greasy or slippery.
- Tannin Stains: These are plant-derived stains. Common examples include coffee, tea, red wine, and some fruit juices (like berry juices). They frequently leave behind characteristic brownish, yellowish, or reddish-purple rings or marks.
- Protein-Based Stains: These are organic stains originating from food products or bodily fluids. Examples include blood, egg, milk, yogurt, baby formula, and vomit. When dry, protein stains can often feel stiff or crusty.
- Dye Stains: These stains are caused by the transfer of artificial or natural dyes onto the upholstery. Sources include ink (ballpoint, marker), grass, some brightly colored foods and beverages, and dye transfer from wet clothing or newspapers onto lighter-colored upholstery. Dye stains can be particularly stubborn as they chemically bond with fabric fibers.
- Combination Stains: Some troublesome stains are a mixture of categories. For instance, lipstick often contains both oil and dye components , while a “ring around the collar” type stain on a headrest might be a complex mix of body oils (oily component) and sweat (containing water-based salts) along with particulate matter.
Identifying the stain category correctly is akin to detective work, but the type of upholstery fabric itself provides a critical clue in this investigation. The success of any stain removal attempt is intrinsically linked to the fiber type and any finishes applied to it. For example, natural fibers like cotton or linen tend to absorb water-based stains more deeply and quickly unless they have been treated with a repellent finish. Conversely, many synthetic fibers might initially repel water-based spills but can be more prone to absorbing oily stains. This interaction between the stain and the fabric means that stain identification isn’t solely about recognizing the spillage; it’s about understanding how that spillage will behave on that particular surface. A generic, all-purpose stain remover might not always be effective and could potentially worsen the situation if the fabric’s characteristics and its reaction to the stain (and cleaner) are not considered. This underscores the importance of knowing both the nature of the stain and the properties of the material you are treating.
The Stain Slayer’s Toolkit: Targeted Removal Techniques
Once a stain occurs, swift and appropriate action is paramount. The following general rules and specific techniques can guide your efforts:
General Rules for All Stains:
- Act FAST: The sooner you address a spill, the higher your chances of complete removal. Fresh stains are significantly easier to tackle than those that have set.
- Blot, Don’t Rub: This is a cardinal rule. Gently blot the stain with a clean, white cloth or paper towel, working from the outside of the stain inward. Rubbing can spread the stain further into the fabric and can also damage or distort the upholstery fibers.
- Always Spot Test: Before applying any cleaning solution to a visible part of the stain, test it on an inconspicuous area of the upholstery to check for colorfastness, fabric damage, or any adverse reactions.
- Work from the Outside In: When treating a stain, always work from the outer edges towards the center. This helps to contain the stain and prevent it from spreading further.
Fabric Upholstery Stains:
- Wine (Red): Immediately blot as much liquid as possible. Fresh red wine spills often respond well to an immediate application of salt or baking soda, which can help draw the wine out of the fibers; let it sit for a few minutes, then vacuum up. Club soda, poured lightly over the stain and blotted, can also be effective due to its carbonation. For more stubborn or dried stains, a solution of mild detergent and cool water, or a specialized commercial wine stain remover, may be necessary. Some performance fabrics are even bleach-cleanable, but always check manufacturer guidelines.
- Coffee/Tea: Blot the excess liquid immediately. For fabric upholstery, a solution of one part white vinegar to two parts cool water can be effective; apply lightly and blot. A mild detergent solution can also be used. For persistent stains on light-colored, colorfast fabrics, a diluted solution of hydrogen peroxide (3%) can be tested carefully (always spot test first, as it can have a bleaching effect).
- Ink: Ink stains can be challenging. For some inks on fabric, applying rubbing alcohol to a clean cloth and then gently blotting the stain (do not rub, as this will spread it) can help lift the ink. Some older remedies suggest hairspray (which often contains alcohol), but this should be tested very carefully as other ingredients in hairspray could damage the fabric. Specialized ink removers designed for fabric are generally a safer bet.
- Grease/Oil: For fresh grease or oil stains on fabric, immediately sprinkle the area generously with an absorbent powder like cornstarch, baking soda, or talcum powder. Let it sit for at least 15-30 minutes (or longer for larger spills) to absorb the oil, then vacuum the powder away. Follow up by treating any remaining residue with a mild detergent solution or, if the fabric code is ‘S’, a dry cleaning solvent.
Leather Upholstery Stains:
- Wine (Red): Blot the spill immediately with a clean, dry cloth. For pigmented leather, you can then gently wipe the area with a cloth dampened with a very mild soap and water solution, or a specialized leather cleaner. For delicate aniline leather, blot only and if the stain persists, consult a professional leather specialist, as improper cleaning can easily set the stain or damage the leather. Some suggest trying soda water cautiously on leather.
- Coffee/Tea: Blot up excess liquid. For pigmented leather, wipe with a cloth lightly dampened with a mild soap solution or a leather cleaner. For aniline leather, blot carefully and use a cleaner specifically formulated for aniline leather.
- Ink: Ink is notoriously difficult to remove from leather and often requires professional attention, especially on aniline or nubuck. For pigmented leather, you can cautiously try dabbing the ink mark very gently with a cotton swab dipped in isopropyl (rubbing) alcohol. Test this method extensively on a hidden spot first, as alcohol can dry out or damage the leather finish. Work quickly and do not rub. Some sources mention dabbing fresh ink with milk , but success varies.
- Grease/Oil: For fresh grease or oil stains on any type of leather, immediately apply an absorbent powder like talcum powder or cornstarch directly onto the stain. Let it sit for several hours or even overnight to draw out the oil, then gently brush it off. For any remaining stain on pigmented leather, use a mild degreasing leather cleaner. Aniline and nubuck leathers are very porous and may absorb the oil, sometimes resulting in a darkened spot that may or may not fade or blend in over time; professional advice is often needed for these types.
For quick reference, the following table provides guidance on common stains:
Table 3: Stain Removal Quick Guide
| Common Stain Type | Fabric Upholstery (Recommended Action, Products, Precautions) | Leather Upholstery (Recommended Action, Products, Precautions per leather type) |
|---|---|---|
| Red Wine | Blot immediately. Apply salt/baking soda or club soda. Mild detergent solution or wine stain remover. Check if bleach-cleanable (performance fabrics). Test first. | Pigmented: Blot, wipe with mild soap/water or leather cleaner. Aniline/Nubuck: Blot only. Consult professional if stain persists. Soda water cautiously. |
| Coffee/Tea | Blot. Vinegar/water solution or mild detergent. Diluted hydrogen peroxide (test on light fabrics). | Pigmented: Blot, wipe with mild soap/water or leather cleaner. Aniline/Nubuck: Blot, use specialized aniline/nubuck cleaner. |
| Ink | Blot. Rubbing alcohol on cloth (test first). Specialized ink remover. Avoid spreading. | Pigmented: Very carefully dab with rubbing alcohol on swab (test extensively). Aniline/Nubuck: Professional help highly recommended. Milk for fresh ink (some suggest). |
| Grease/Oil | Blot. Cornstarch/baking soda to absorb. Follow with mild detergent or dry-cleaning solvent (‘S’ code fabrics). | Blot. Talcum powder/cornstarch to absorb. Pigmented: Follow with mild degreasing leather cleaner. Aniline/Nubuck: May absorb; consult professional if problematic. |
| Mud | Let dry completely. Brush/vacuum off loose dirt. Treat remaining stain with mild detergent and water. | Let dry. Brush off loose dirt. Pigmented: Wipe with damp cloth and mild soap/leather cleaner. Aniline/Nubuck: Brush gently; use specialized cleaner if needed. |
| Blood | Blot fresh stain with COLD water. Hydrogen peroxide (3%) or enzyme cleaner for stubborn stains (test first). | Blot fresh stain with COLD water. Pigmented: Mild soap/water or leather cleaner. Aniline/Nubuck: Cold water blot; specialized cleaner. Professional help for set stains. |
Banish Bad Smells: Effective Odor Removal Strategies
 Upholstered furniture, with its porous fibers, can readily absorb and trap a variety of odors from daily life, including those from pets, cooking, smoke, mildew, or general use, leading to a less-than-fresh home environment. Simply masking these smells with air fresheners provides only temporary relief. Truly effective odor removal targets the source of the odor, either by absorbing the offending molecules, neutralizing them, or breaking down the organic matter causing the smell.
DIY Odor Removal Methods:
- Baking Soda: This common household item is a renowned natural deodorizer. Its crystalline structure effectively absorbs and neutralizes many types of odor molecules. Sprinkle a generous, even layer of baking soda over the entire surface of fabric upholstery. For deeper penetration, gently brush it into the fibers. Allow it to sit for several hours, or even overnight for more persistent odors, then vacuum it up thoroughly using an upholstery attachment. This method is excellent for general mustiness, pet odors, and light food smells.
- White Vinegar: Distilled white vinegar is another effective natural deodorizer, largely due to its acetic acid content, which can neutralize alkaline odor molecules and also has some antibacterial properties. Mix equal parts white vinegar and cool water in a spray bottle. Lightly mist the fabric upholstery (always spot test in a hidden area first to ensure colorfastness and fabric safety). Do not saturate the fabric. The vinegar smell will be noticeable initially but will dissipate as the fabric dries, often taking the unwanted odors with it. Vinegar can also be added to the rinse cycle when washing removable slipcovers.
- Activated Charcoal: Activated charcoal is extremely porous and has a vast surface area, making it highly effective at adsorbing a wide range of odor-causing molecules and moisture from the air. Place bowls of activated charcoal briquettes or commercially available charcoal odor-absorbing bags near or under the affected furniture, or tuck them into cushion crevices. It’s important to ensure the charcoal does not come into direct contact with light-colored or delicate upholstery, as it can potentially leave black marks. Activated charcoal is particularly good for ongoing odor absorption and for combating mildew smells due to its moisture-wicking properties.
- Enzyme Cleaners: These are biological cleaners containing specific enzymes that target and break down organic matter, which is often the source of stubborn odors like pet urine, vomit, blood, or spoiled food. The enzymes act as catalysts, accelerating the decomposition of the odor-causing proteins, starches, or fats into smaller, odorless components. Enzyme cleaners are crucial for effectively eliminating pet-related accidents and their lingering smells, as they address the problem at its molecular source. Always follow product instructions carefully.
- Steam Cleaning: The combination of heat and moisture in steam cleaning can help to loosen and lift odor-causing particles embedded deep within fabric fibers. The heat can also help to kill odor-causing bacteria and mildew. However, ensure the fabric is suitable for steam cleaning and that the item is dried thoroughly afterward to prevent new mildew odors.
- Sunlight and Fresh Air: If feasible, airing out cushions or smaller pieces of furniture outdoors on a dry, sunny day can work wonders. Ultraviolet rays from the sun have natural sanitizing properties that can help kill bacteria and neutralize some odors, while fresh air helps to dissipate them.
Professional Odor Removal Options:
- Ozone Treatment: For severe or pervasive odors, such as those from heavy smoke (fire or tobacco) or persistent mildew, professional ozone treatment can be highly effective. Ozone (O3) is a powerful oxidizing agent that chemically reacts with and neutralizes odor molecules by altering their structure. This treatment must be performed by trained professionals in an unoccupied and sealed environment, as ozone at high concentrations can be harmful to the respiratory system and can also degrade certain materials like rubber, some plastics, and specific textiles if exposure is prolonged or uncontrolled. After treatment, the area must be thoroughly ventilated.
The choice of odor removal method often depends on the nature and intensity of the smell. While some methods like baking soda and activated charcoal primarily work by absorbing odor molecules, and air fresheners (as implied by “masking sprays” ) merely cover them up, more advanced approaches like enzyme cleaners and ozone treatments aim to eliminate the odor at its source by breaking down or chemically altering the offending compounds. Steam cleaning assists by physically removing the source particles. This suggests a hierarchy of effectiveness: methods that neutralize or eliminate the source of the odor are generally superior and offer more permanent solutions compared to those that only provide temporary relief through absorption or masking. For truly effective and lasting odor removal, especially for persistent or organic-based smells, targeting the source is key.
Mattress Cleaning: For a Healthy Sleep Environment
While often out of sight beneath sheets and protectors, the mattress is a piece of furniture that directly impacts health and well-being. Over time, it becomes a repository for unseen elements that can affect sleep quality and contribute to allergies.
The Unseen Inhabitants: Why Clean Your Mattress?
Night after night, mattresses accumulate a surprising collection of debris: millions of dead skin cells shed by our bodies, sweat, body oils, and, consequently, thriving populations of dust mites that feed on these skin cells, along with their allergenic waste products. This microscopic environment can also harbor bacteria and mold if moisture is present. For individuals with allergies or asthma, these accumulated allergens can trigger symptoms and disrupt sleep. Regular and thorough mattress cleaning is therefore not just about hygiene; it’s about creating a healthier sleep environment, which can improve rest and overall well-being, and can also help prolong the functional life of the mattress.
The mattress can be viewed not merely as a passive bedding item but as a dynamic ecosystem. Human use—shedding skin, perspiring—provides a continuous food source for microscopic organisms like dust mites. This, in turn, leads to the production of allergens and can foster microbial growth, especially in humid conditions. Regular cleaning practices such as vacuuming, deodorizing, and prompt stain removal actively disrupt this ecosystem. By reducing the food supply for dust mites and removing their waste, and by controlling moisture, these cleaning actions inhibit allergen accumulation and microbial proliferation. This perspective highlights that mattress cleaning is less about visible aesthetics (since mattresses are usually covered) and more about proactive health management. It directly impacts the quality of the sleep environment, especially for allergy sufferers, and contributes to overall sleep hygiene.
A Fresh Start: Deep Cleaning and Sanitizing Your Mattress
A periodic deep clean can refresh your mattress and significantly reduce allergens and odors. Here’s a step-by-step approach:
- Step 1: Strip the Bed: Remove all bedding—sheets, pillowcases, mattress protector, and any mattress toppers. Launder these items according to their care labels, preferably in hot water (at least 130°F or 54°C, if the fabric allows) to effectively kill dust mites and bacteria.
- Step 2: Vacuum Thoroughly: Using a clean upholstery attachment on your vacuum cleaner, meticulously vacuum the entire top surface and sides of the mattress. Pay special attention to seams, crevices, and around any quilting or buttons, as these are prime hiding spots for dust mites and allergens. A vacuum cleaner equipped with a HEPA (High-Efficiency Particulate Air) filter is ideal, as it can trap even microscopic particles, preventing them from being redistributed into the air.
- Step 3: Spot-Treat Stains: Address any visible stains promptly. The treatment method will depend on the type of stain:
- Common Stains: Mattresses often suffer from sweat, urine, blood, or food and drink spills.
- Sweat or Urine: For these protein-based stains, a mixture of baking soda, a few drops of mild dish soap, and hydrogen peroxide (3%) can be effective. Lightly spray the solution onto the stain (do not saturate the mattress), let it sit for about 10-15 minutes, then gently blot the area with a clean cloth—avoid scrubbing, which can push the stain deeper. Enzyme cleaners are also highly effective for breaking down the organic compounds in urine stains and neutralizing their odors.
- Blood: Fresh blood stains should be treated with cold water (hot water can set protein stains). Gently dab the stain with a cloth dampened with cold water and a small amount of mild detergent or hydrogen peroxide. For dried blood stains, applying a paste of salt or baking soda with a little cold water can help loosen the stain before blotting.
- Wine or Beverages: A mixture of equal parts white vinegar and water can be lightly sprayed onto the stain and blotted. Afterward, sprinkle baking soda on the damp area to help absorb any remaining moisture and odor.
- Food or Vomit: Scrape off any solid residue. Apply a paste of baking soda and water to the stain, let it dry completely, then scrape off the dried paste and vacuum the area thoroughly. Enzyme cleaners are also very effective for these types of organic stains.
- General Stain Tip: Always blot stains from the outer edges inward to prevent spreading. Before applying any cleaning solution, test it on a small, inconspicuous area of the mattress first to ensure it doesn’t cause discoloration or damage.
- Step 4: Deodorize with Baking Soda: Once stains have been treated and blotted (and the areas are slightly damp or dry), sprinkle a generous and even layer of baking soda over the entire mattress surface. Use at least one full cup for a queen-size mattress. Let the baking soda sit for a minimum of 30 minutes, but preferably for several hours or even overnight if possible. Baking soda is excellent at absorbing moisture and neutralizing odors.
- Step 5: Vacuum Again: After the baking soda has had ample time to work, vacuum the mattress thoroughly once more, ensuring all traces of baking soda and any loosened debris are removed.
- Step 6: Air Out the Mattress: Proper ventilation is key to ensuring the mattress dries completely and to further dissipate any lingering odors. If possible, open windows in the room to create good airflow. If weather permits and it’s feasible, exposing the mattress to indirect sunlight for a few hours can also help, as UV rays have natural sanitizing properties. Ensure the mattress is absolutely dry before remaking the bed to prevent the growth of mold or mildew.
- Optional Sanitizing: For an extra level of sanitization, some people opt to use a handheld UV-C light sanitizer, which can help kill bacteria, viruses, and dust mites on the mattress surface. Steam cleaning can also be used, but with extreme caution to apply minimal moisture and ensure rapid drying, as excessive dampness is detrimental to mattresses. Low-moisture steam has been shown to be effective against dust mites.
Your Mattress Cleaning Toolkit: Essential Supplies
Having the right supplies on hand will make the mattress cleaning process more efficient and effective:
- Vacuum Cleaner: With a clean upholstery attachment and preferably a HEPA filter.
- Baking Soda: A key ingredient for deodorizing and helping with some stains.
- Mild Detergent or Dish Soap: For creating gentle cleaning solutions.
- Distilled White Vinegar: For stain treatment and deodorizing.
- Hydrogen Peroxide (3% solution): For treating certain types of stains, particularly protein-based ones.
- Enzyme Cleaner: Highly recommended for organic stains like urine, blood, or vomit.
- Clean Cloths or Sponges: For blotting stains and applying cleaning solutions.
- Spray Bottles: For applying liquid cleaning solutions in a controlled mist.
- Optional: Handheld steam cleaner (use with caution regarding moisture), UV-C sanitizer.
Timing is Everything: How Often to Deep Clean Your Mattress
Consistency is key for maintaining a hygienic sleep surface.
- A full deep clean, as described above, is generally recommended every 6 months. Some sources suggest a range of every 3 to 6 months, depending on allergies or other factors.
- Lighter cleaning, such as vacuuming the mattress surface, can be done more frequently, perhaps monthly or each time you change your bed linens.
- Spills and accidents should always be treated immediately to prevent stains from setting and odors from developing.
To help maintain a regular cleaning routine, consider the following schedule:
Table 4: Mattress Cleaning Schedule/Checklist
| Frequency | Task | Notes/Tips |
|---|---|---|
| Weekly (or when changing bed linens) | Wash all bedding (sheets, pillowcases, mattress protector) in hot water (if fabric allows). | Helps control dust mites and bacteria. |
| Briefly air out the mattress (remove covers for an hour or so with windows open if possible). | Allows moisture to dissipate. | |
| Monthly | Vacuum the mattress surface thoroughly using an upholstery attachment. | Removes surface dust, dead skin cells, and allergens. |
| Every 6 Months (or seasonally) | Perform a full deep clean: vacuum, spot-treat all stains, deodorize with baking soda, vacuum again, and air out completely. | Addresses deeper soiling, odors, and allergen buildup. |
| As Needed | Treat spills and stains immediately. | Prevents stains from setting and odors from developing. |
Don’t Forget the Guardian: Cleaning Mattress Protectors
The mattress protector serves as the first line of defense against spills, stains, dust mites, and allergens, significantly contributing to the cleanliness and longevity of your mattress itself. Therefore, cleaning the protector regularly is just as important as cleaning the mattress.
- Most mattress protectors are designed to be machine washable, which simplifies their care. However, it is crucial to always check the manufacturer’s care label for specific washing and drying instructions before proceeding.
- It’s a good practice to wash a new mattress protector before its first use. Thereafter, a general guideline is to wash it monthly, or more frequently if spills, accidents, or illness occur.
- When washing, typically use cold to warm water and select a gentle or normal wash cycle, depending on the protector’s material and construction. Regular laundry detergent is usually suitable, with the exception of down-filled protectors, which may require a specialized down cleaner.
- Avoid using bleach or fabric softeners, as these chemicals can damage the waterproof or protective layers of the mattress protector, diminishing its effectiveness.
- Drying: Air drying is often the best method for mattress protectors, as it is gentlest on the materials and helps to preserve their shape and protective qualities. If you must use a machine dryer, select a low heat setting and consider drying it with other bedding items to buffer it. Some materials, particularly those with polyurethane waterproof barriers, should typically be air-dried only to prevent heat damage.
- If the mattress protector has visible stains, it’s advisable to pre-treat these stains before washing, following similar principles to mattress stain removal (e.g., using a mild detergent solution or an appropriate stain remover for the type of stain and fabric).
Drapery and Curtain Cleaning: Brightening Your Windows
Window treatments, including drapes and curtains, play a significant role in a room’s ambiance, but they also act as magnets for dust, allergens, and odors. Regular cleaning is essential to keep them looking their best and to maintain healthy indoor air quality.
A World of Window Dressings: Identifying Materials
The first step in properly cleaning any window treatment is identifying its material, as this will dictate the safe and effective cleaning methods. Common types include:
- Blinds: Often made from wood, faux wood, aluminum, or vinyl.
- Shades: These come in various forms, including:
- Cellular (Honeycomb) Shades: Typically made from spun polyester or other synthetic fabrics.
- Roller Shades: Can be vinyl, polyester, or other treated fabrics.
- Roman Shades: Made from a wide range of fabrics, from cotton and linen to silk and synthetics.
- Solar Shades: Designed to filter light, often made from PVC-coated polyester or fiberglass.
- Woven Wood/Bamboo Shades: Made from natural materials.
- Drapery and Curtains: The fabric options are extensive:
- Cotton: Common, versatile, but can shrink if not cared for properly.
- Linen: Elegant but prone to wrinkling and shrinkage; often requires professional care.
- Silk: Luxurious and delicate; usually requires dry cleaning or very gentle hand washing.
- Wool: Durable but can shrink or felt with improper washing; typically dry clean only.
- Synthetics (Polyester, Nylon, Acrylic): Generally more durable and easier to clean than natural fibers.
- Sheer Fabrics: Delicate and prone to discoloration if not cleaned regularly.
- Blackout Fabrics: Often have a special lining; cleaning depends on the face fabric and lining material.
- Velvet: Requires careful handling; usually dry clean only or specialized steam cleaning by professionals.
- Pleated Materials: Regardless of the base fabric, pleated drapes or curtains generally require dry cleaning to maintain the integrity of the pleats.
The Right Approach: Cleaning Methods for Different Window Treatments
 The method chosen for cleaning window treatments should align with the material’s sensitivity and the level of soiling.
- On-Site Steam Cleaning for Drapes:
- Process: This technique involves using a handheld or professional-grade steam cleaner to direct high-temperature water vapor onto the drapes while they are still hanging. The hot steam penetrates the fabric fibers, loosening dirt, dust, killing germs and dust mites, and helping to neutralize odors without excessive moisture or harsh chemicals.
- Pros: Offers a deep clean, sanitizes the fabric, effectively removes many odors and some light stains, is generally chemical-free (relying on steam), and can preserve the fabric’s integrity if performed correctly. It’s often time-efficient as drapes usually don’t need to be taken down, and drying time is relatively quick due to low moisture application.
- Cons: Not all fabrics are suitable for steam cleaning; delicate materials like some silks or certain types of velvet can be damaged by the heat or moisture. DIY steamers may lack the power and temperature control of professional units, potentially leading to less effective cleaning or a higher risk of water spotting if not handled correctly.
- Fabric Suitability: Generally good for many durable cottons, linens, and polyester blends. It is crucial to always test the steamer on an inconspicuous area of the drape first. For more delicate fabrics that are steam-tolerant, lower steam settings and greater care are necessary.
- Off-Site Dry Cleaning/Laundering for Drapes:
- Process (Dry Cleaning): Drapes are removed and taken to a professional dry cleaning facility. Here, they are cleaned using chemical solvents rather than water. This method is designed to gently clean fabrics while protecting delicate fibers, colors, and structural details like pleats.
- Process (Laundering): Some more durable drapes, depending on their fabric and construction (e.g., unlined cottons or polyesters), can be machine washed or hand-washed at home or by a professional laundry service. This always requires strict adherence to the care label instructions regarding water temperature, cycle, and detergent.
- Pros (Dry Cleaning): This is often the safest and most effective method for delicate fabrics such as silk, wool, velvet, intricately embroidered materials, or lined drapes where differential shrinkage could be an issue. It’s also recommended for heavily soiled drapes or high-value, custom-made items. Professionals also handle the pressing, which can be difficult for large drapes.
- Pros (Laundering): If done DIY for suitable fabrics, this is the most cost-effective option.
- Cons (Dry Cleaning): This is generally the most expensive option. It involves the inconvenience of taking down, transporting, and then re-hanging the drapes. There is also a small risk of damage if an inexperienced dry cleaner presses them incorrectly, particularly with certain fabrics or linings.
- Cons (Laundering): There’s a significant risk of shrinkage, fading, color bleeding, or damage to the fabric or construction if the material is not truly washable or if the care instructions are not followed precisely. It can also be a time-consuming process for large or multiple pairs of drapes.
- Fabric & Cost Considerations: Dry cleaning is typically essential for silks, wools, velvets, many lined cottons, and most pleated items to preserve their appearance and structure. The cost for dry cleaning drapes can vary widely based on size, fabric type, construction complexity, and the specific services required (e.g., stain removal, pressing), with averages around $25-$75 per pair for medium-sized drapes, but potentially much more for custom or elaborate treatments. Washable fabrics generally include unlined cottons, some synthetic blends like polyester, and sheer fabrics (which often require very gentle handling, cold water, and a mild detergent).
- Cleaning Blinds and Shades (General Approaches):
- Dusting: Regular dusting is the first line of defense for all types of blinds and shades. A feather duster, a soft dusting mitt, or the soft brush attachment of a vacuum cleaner can be used effectively.
- Wiping:
- Wood Blinds: Should generally be dusted only; avoid using water or liquid cleaners as they can warp or damage the wood. A wood-safe polish can be used occasionally to maintain their finish.
- Faux Wood, Vinyl, and Aluminum Blinds: These are more resilient and can typically be wiped down with a damp cloth and a mild detergent solution if needed. Dry thoroughly to prevent water spots. Running a dryer sheet along faux wood slats can help repel future dust.
- Cellular (Honeycomb) Shades: Vacuum gently with a brush attachment. Compressed air (from a can or a hairdryer on a cool setting) can be used to blow dust out from inside the cells. Spot clean the fabric gently with a damp sponge and mild detergent if necessary, blotting carefully. For deep cleaning, professional ultrasonic cleaning is often recommended.
- Roller and Solar Shades: These can usually be vacuumed or wiped with a damp cloth and a mild detergent solution. Avoid submerging them in water.
- Roman Shades: Regular dusting or vacuuming is important. Spot clean the fabric according to its type (see fabric-specific advice below). Some Roman shades may have removable fabric that is washable (always check the label). Silk, wool, or linen Roman shades typically require dry cleaning.
The care of window treatments often involves a two-tiered strategy. Frequent, light maintenance, such as regular dusting and vacuuming , is crucial for preventing a heavy buildup of soil and allergens. This routine care significantly reduces the necessity for more aggressive or intensive deep cleaning methods, thereby prolonging the life and aesthetic appeal of the treatments. However, for delicate materials, stubborn stains, or the periodic deep cleaning that all window treatments eventually require, more specialized methods like professional steam cleaning, dry cleaning, or careful washing become unavoidable. This dual approach—combining consistent light upkeep with occasional specialized care—is the most effective way to manage window treatment cleanliness, ultimately saving time and money while ensuring they remain in excellent condition. Neglecting regular dusting, for instance, means that when a deep clean is finally undertaken, it will be a more challenging task with a potentially higher risk of damage to the fabric.
Fabric Matters: Special Considerations for Drapery and Curtain Cleaning
The specific fabric of your drapes or curtains is the ultimate determinant of the appropriate cleaning method.
- Cotton: Unlined cotton drapes can often be hand-washed or machine-washed on a gentle cycle with cold or lukewarm water and mild detergent. However, if they are lined, dry cleaning is usually recommended to prevent the face fabric and lining from shrinking or distorting at different rates.
- Synthetics (Polyester, Nylon, Acrylic): These fabrics are generally more durable and many are washable, either by hand or in a machine on a gentle cycle with cool water. It’s often advised to avoid dry cleaning solvents with some synthetics as they can degrade the fibers. Always check the care label.
- Silk: Silk is a delicate protein fiber and requires very gentle handling. Hand washing in cool water with a very mild detergent (like one for delicates or baby shampoo) and minimal agitation is sometimes possible, but dry cleaning is the safest option to prevent damage, water spots, or loss of sheen. Never wring or twist silk; roll in a towel to absorb excess water and hang to dry away from direct sunlight.
- Linen: Linen is strong but prone to wrinkling and can shrink significantly if washed improperly. Dry cleaning is often the preferred method to maintain its shape and finish. If considering steam cleaning, it should be done with care, perhaps annually if necessary.
- Wool: Wool drapes should typically be dry cleaned only. Water, heat, and agitation can cause wool to shrink, felt, and lose its shape.
- Sheer Curtains: These delicate fabrics (often polyester, voile, or lace) tend to attract dust and can discolor if not cleaned regularly. Gentle hand washing in cold water with a mild detergent, or a very gentle machine cycle in a mesh bag, is usually recommended. Avoid wringing; hang to drip dry or use a no-heat dryer setting with a towel to absorb moisture.
- Velvet: Velvet has a pile that can be easily crushed or marked by water or improper handling. Most velvets (especially silk or cotton velvet) require professional dry cleaning. Some durable synthetic velvets might tolerate careful steam cleaning by a professional, but DIY steaming is generally risky.
- Pleated Drapes: Regardless of the face fabric, drapes with stitched or heat-set pleats should almost always be professionally dry cleaned. Washing can cause the pleats to lose their crispness or shape.
- Blackout Linings: The cleaning method for drapes with blackout linings depends on both the face fabric and the lining material. Some linings can be damaged by heat or certain solvents. Always check the care label. Spot cleaning or gentle washing may be possible for some, while others will require dry cleaning.
To provide a quick overview, the following table summarizes cleaning approaches for various window treatments:
Table 5: Window Treatment Cleaning Summary
| Treatment Type | Material | Recommended Cleaning Method(s) | Key Tips & Precautions |
|---|---|---|---|
| Cotton Drapes (Unlined) | Cotton | Machine wash gentle (cold/lukewarm), hand wash, or steam clean | Test for colorfastness. Air dry to prevent shrinkage. |
| Cotton Drapes (Lined) | Cotton with lining | Dry clean | Lining may shrink/distort with washing. |
| Silk Drapes | Silk | Dry clean or very gentle hand wash (cool water, mild soap) | Extremely delicate. Avoid heat, wringing. Steam with extreme caution or professionally. |
| Linen Drapes | Linen | Dry clean recommended. Careful steam clean possible. | Prone to wrinkling and shrinkage. |
| Wool Drapes | Wool | Dry clean only | Prone to shrinkage/felting with water/heat. |
| Synthetic Drapes (Polyester, Nylon) | Polyester, Nylon, Acrylic | Machine wash gentle (cool), hand wash, steam clean | Check label. Some synthetics degrade with dry cleaning solvents. |
| Sheer Curtains | Polyester, Voile, Lace | Gentle hand wash (cold, mild detergent), gentle machine cycle (mesh bag) | Clean often. Drip dry or no-heat tumble dry. |
| Velvet Drapes | Cotton, Silk, Synthetic Velvet | Dry clean only typically. Professional steam cleaning may be an option for some synthetics. | Pile is easily damaged. |
| Pleated Drapes | Various fabrics | Dry clean only | Washing can ruin pleat structure. |
| Wood Blinds | Wood | Dust regularly. Wipe with dry or slightly damp cloth. Wood polish. | Avoid water/liquid cleaners. |
| Faux Wood/Vinyl/Aluminum Blinds | PVC, Vinyl, Aluminum | Dust regularly. Wipe with damp cloth and mild detergent. | Can tolerate more moisture than real wood. |
| Cellular (Honeycomb) Shades | Polyester, synthetic blends | Vacuum gently (brush attachment). Compressed air for cells. Spot clean. Professional ultrasonic cleaning for deep clean. | Be gentle to avoid crushing cells. |
| Roller/Solar Shades | Vinyl, polyester, treated fabrics | Vacuum or wipe with damp cloth and mild detergent. | Do not immerse in water. |
| Roman Shades (Fabric) | Cotton, Linen, Silk, Synthetics | Dust/vacuum. Cleaning method depends on fabric (wash, dry clean, spot clean). | Remove dowels if washing. Dry clean delicate fabrics. |
Furniture Polishing: Restoring Shine to Wood and Metal
Polishing wood and metal components of furniture not only enhances their aesthetic appeal by restoring shine and luster but also plays a crucial role in their protection and long-term preservation.
Bringing Out the Best in Wood: Cleaning and Polishing Techniques
Proper care for wood furniture involves regular cleaning to remove dust and grime, and occasional polishing to protect the finish and enhance its natural beauty.
- Identifying Wood Finish: Before applying any polish, it’s beneficial to understand the type of finish on your wood furniture, as this can influence product choice. Common finishes include lacquer, varnish, polyurethane, shellac, or an oil finish. A simple test can offer clues: apply a drop of linseed oil to an inconspicuous spot. If the oil is absorbed into the wood, it likely has an oil finish. If the oil beads up on the surface, it’s probably a hard film-forming finish like polyurethane, lacquer, varnish, or shellac. To differentiate further between these hard finishes, you can test with a cotton swab dipped in acetone (nail polish remover) on a hidden area: acetone will typically dissolve lacquer completely, make shellac and varnish tacky, and will bead up or have little immediate effect on polyurethane. Denatured alcohol can help distinguish between shellac (which dissolves) and varnish (which reacts slowly).
- Routine Cleaning (for hard finishes like lacquer, varnish, polyurethane):
- Dusting: Dust your wood furniture regularly, at least weekly, using a soft, dry microfiber or cotton cloth. Always wipe in the direction of the wood grain to avoid creating micro-scratches. Accumulated dust isn’t just unsightly; its particles can be abrasive and can dull or scratch the finish over time.
- More Thorough Cleaning: For a deeper clean, perhaps monthly or as needed to remove fingerprints or sticky spots, lightly dampen a clean, soft cloth with a solution of a few drops of mild dish soap mixed in water. Wring the cloth out well so it is just damp, not wet. Gently wipe the wood surface, again following the grain. Immediately after wiping, dry the surface thoroughly with a separate clean, dry cloth to prevent any water damage, spotting, or residue buildup.
- Polishing Finished Wood:
- While often seen as a way to create shine, wood polishing offers deeper benefits such as protection and minor restoration. Polishes and waxes create a thin, protective barrier on the wood’s surface, which helps to shield it from moisture, dust, and minor wear. They can also help to fill in and conceal tiny surface scratches, improving the overall appearance and smoothness of the finish. Thus, polishing is not merely a cosmetic procedure; it’s a proactive maintenance step that contributes to the wood’s health and longevity, much like how conditioner benefits leather.
- Product Selection: Choose a high-quality furniture polish. Many experts recommend non-silicone polishes, as silicone can sometimes create a hazy buildup over time that is difficult to remove, or interfere with future refinishing. Avoid oily polishes that tend to attract and hold dust. For some traditional finishes, a good quality paste wax can also be used to provide a durable protective layer and a soft sheen. Products from brands like Pledge, Old English, Guardsman, Weiman, and The Original Bee’s Wax Furniture Polish are commonly available.
- Application Technique: Always apply the polish to a clean, soft cloth first, rather than spraying or pouring it directly onto the wood surface. This allows for more even distribution and prevents over-application.
- Wipe the polish onto the wood, moving with the direction of the grain. Apply a thin, even coat.
- After applying, buff the surface to a shine using a separate clean, soft cloth.
- Frequency: Occasional polishing is usually sufficient. Over-polishing, especially with wax-based products, can lead to a sticky or cloudy buildup. Consult product instructions, but generally, polishing every few months to once or twice a year is adequate for most furniture.
- Caring for Oil-Finished Wood: Furniture with an oil finish (where the oil has penetrated the wood rather than forming a surface film) requires a different approach. Avoid using typical furniture polishes or waxes on these pieces. Instead, clean them by wiping with a soft cloth lightly dampened with a compatible wood oil, such as tung oil, linseed oil, or a specialized oil-finish maintenance product. Periodically, the finish may need to be refreshed by applying a new coat of oil, allowing it to penetrate, and then wiping off any excess.
- Caring for Painted Wood: Painted wood furniture can generally be cleaned using a mild dish detergent and water solution, applied with a damp cloth. Ensure the surface is dried thoroughly afterward to prevent water damage. If the paint is a specialty type like milk paint, it can often be sealed with a topcoat (like wax or a clear polyurethane) for added protection.
Gleam and Glow: Cleaning and Polishing Metal Furniture Components
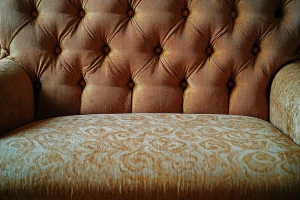 Metal components on furniture, whether structural or decorative, also require regular cleaning to maintain their appearance and prevent corrosion or tarnishing. The specific cleaning method will depend heavily on the type of metal and its finish. Using an overly aggressive cleaner or abrasive on a soft or coated metal can cause irreversible damage. Therefore, “metal” should not be treated as a single category; identifying the specific material (e.g., stainless steel, aluminum, chrome, brass) and whether it has a protective coating (like lacquer or powder coating) is crucial for choosing a safe and effective cleaning approach.
- General Metal Cleaning: For most metal surfaces, a good starting point is to wipe away dust and loose debris with a soft, damp cloth. If more thorough cleaning is needed, a solution of mild dish soap and warm water is often effective and safe. After washing, it’s important to rinse the surface with a clean, damp cloth and then dry it thoroughly with a soft, dry cloth to prevent water spots, streaks, or potential rust on susceptible metals.
- Stainless Steel:
- For routine cleaning, wipe with a soft cloth dampened with mild dish soap and water, always wiping in the direction of the metal’s grain to avoid streaking and preserve its brushed look. Rinse with a clean, damp cloth and dry thoroughly.
- To remove fingerprints, smudges, or light water spots, specialized stainless steel cleaners are widely available. Alternatively, a solution of equal parts white vinegar and water can be effective; spray lightly, wipe with the grain, and then wipe with a clean, damp cloth followed by a dry cloth.
- Avoid: Never use abrasive cleaners, steel wool, or scouring pads on stainless steel, as these will scratch the surface. Also, avoid chlorine-based cleaners unless the stainless steel has been specifically treated (like electropolished) to withstand them, as chlorine can cause corrosion.
- For polishing and restoring shine, use a dedicated stainless steel polish or a light application of lemon oil or mineral oil, buffing with a soft cloth.
- Aluminum:
- Clean aluminum surfaces with a solution of mild soap (such as Dawn) and warm water, using a soft cloth or sponge. Rinse thoroughly with clean water and dry completely with a soft cloth to prevent water spots.
- A 1:1 mixture of white distilled vinegar and water can be used to help remove stubborn water spots.
- For areas showing oxidation (a white, powdery residue), a solution of equal parts white vinegar or lemon juice and water can be used. Apply the solution, let it sit for a few minutes, then gently scrub the oxidized areas with a soft cloth or sponge. Rinse well and dry.
- After cleaning, aluminum furniture can be protected and its shine enhanced by applying a thin coat of automotive or marine wax (e.g., Meguiar’s Quik Wax).
- Avoid: Do not use harsh solvent-based cleaners, abrasive powders, or stainless steel cleaners on aluminum, as these can damage the finish or the metal itself.
- Chrome:
- For general cleaning, use a soft cloth dampened with a solution of mild dish detergent and water, or a solution of white vinegar and water. Rinse with a clean, damp cloth and buff dry with a soft, dry cloth to prevent water spots and bring out the shine.
- To remove light rust or tarnish from chrome, you can try gently rubbing the affected area with a piece of crumpled aluminum foil dipped in water, white vinegar, or even cola (the mild phosphoric acid can help dissolve rust). Very fine steel wool (grade 0000) can also be used with extreme care on heavily rusted areas, but always test in an inconspicuous spot first, as it can scratch if too much pressure is applied.
- After cleaning and removing any rust, apply a dedicated chrome polish (such as Autosol ) or a thin coat of carnauba wax to protect the chrome and enhance its luster.
- Brass:
- Solid, Unlacquered Brass: This type of brass will naturally tarnish over time, developing a patina. To clean and polish it, use a commercial brass cleaner (available as liquid, paste, or impregnated wadding, e.g., Simichrome, Wenol, Flitz ). Apply the cleaner with a soft cloth, rubbing gently along the grain of the metal if visible. Buff off the cleaner residue with a separate clean, soft cloth to achieve a shine. A homemade paste of baking soda and lemon juice or white vinegar can also be used for cleaning tarnish. Be aware that excessive or harsh cleaning can remove some of the surface metal and any desired patina. To slow down future tarnishing, unlacquered brass can be coated with a clear lacquer or a silicone-based protectant (like Slipit) after polishing.
- Lacquered Brass: If your brass item has a clear lacquer coating (intended to prevent tarnishing), it should be cleaned only with a mild detergent and water solution, applied with a soft cloth. Never use ammonia-based cleaners or abrasive brass polishes on lacquered brass, as these will damage or strip the lacquer coating, exposing the brass underneath to rapid tarnishing. Rinse gently and dry thoroughly. If the lacquer is damaged or peeling, it may need to be professionally stripped and reapplied.
- Powder-Coated Metal: Furniture with a powder-coated finish should be cleaned gently to protect the coating. Use a soft-bristled brush or cloth with a mild cleaning solution, such as gentle dish soap and warm water. Rinse thoroughly with clean water (e.g., with a garden hose for outdoor furniture) to remove all soap residue, and then dry the surface with a microfiber cloth. Avoid abrasive cleaners or tools.
Caring for Other Furniture Materials
Beyond wood and common metals, furniture often incorporates other materials that require specific care:
- MDF (Medium-Density Fiberboard): Often used in contemporary furniture, MDF is an engineered wood product. For cleaning, dust regularly with a soft, lint-free cloth or a microfiber duster. To remove stubborn stains or marks, use a cloth slightly dampened with a solution of mild detergent and water. Wipe the area gently. It is crucial to avoid excessive moisture, as MDF is susceptible to swelling and damage if it gets too wet. Always dry the surface immediately and thoroughly with a clean, dry cloth after wiping.
- Glass (Tabletops, Shelves): Dust glass surfaces regularly to prevent the buildup of particles that can scratch the surface over time. For general cleaning, use a commercial glass cleaner or a homemade solution of equal parts white vinegar and water in a spray bottle. For best results and to avoid streaks, spray the cleaner onto a lint-free microfiber cloth or paper towel, rather than directly onto the glass surface, then wipe the glass clean. Pay special attention to edges and corners where dust can accumulate.
- GRC (Glass Reinforced Concrete): This material is often used for durable tabletops or outdoor furniture. Spills should be wiped up quickly to prevent them from penetrating the surface and potentially staining. Avoid placing highly acidic foods (like citrus fruits or tomatoes) or oils directly on the GRC surface for extended periods. Use coasters under beverages and trivets under hot items. Do not drag sharp or abrasive objects across the surface. Clean with a mild soap and water solution. Ensure that moisture is not allowed to collect at the bottom of items placed on the GRC surface for long periods.
- Outdoor Woven Furniture (All-Weather Wicker): This type of furniture, often made from synthetic resins, should be cleaned regularly to remove dust, pollen, and grime. Use a solution of mild soap and water, applied with a soft brush or cloth. A garden hose can be used for rinsing. If the furniture is located in a coastal environment, it’s advisable to rinse it weekly with fresh water to prevent the accumulation of salt deposits, which can be damaging over time.
- Plastic and Rubber Components: Various plastic or rubber elements might be part of furniture construction or used as accessories (like feet or bumpers). Be cautious when using chemical cleaners near these parts, as some chemicals in cleaning products or even in items placed on them (like plastic placemats or rubber-backed items) can soften, discolor, or degrade these materials over time if left in prolonged contact. Using protective barriers like felt pads or cork under accessories placed on furniture can help prevent such issues.
The Professional Touch: When and Why to Call in the Experts
While diligent DIY cleaning and maintenance can significantly extend the life and beauty of your upholstery and furniture, there are times when the expertise, equipment, and specialized solutions of professional cleaners offer distinct advantages, and in some cases, are essential.
Beyond DIY: The Advantages of Professional Upholstery Cleaning
Professional upholstery cleaning services provide a level of thoroughness and care that is often difficult to achieve with consumer-grade products and equipment. Their involvement can be seen not just as a cleaning expense, but as a strategic investment in the longevity of your furniture and the health of your home environment. The combination of professional expertise and advanced technology typically leads to superior results and mitigates the risks associated with improper DIY cleaning, thereby preserving furniture value and contributing to a healthier living space. This is particularly true for high-value, delicate, or heavily soiled pieces.
Key advantages include:
- Deep Cleaning Power: Professionals utilize industrial-strength equipment, such as powerful hot water extraction systems (steam cleaners) and high-performance vacuums. These machines can penetrate deeper into upholstery fibers, removing a significantly greater amount of embedded dirt, dust, allergens, bacteria, and other contaminants than most DIY methods can achieve.
- Expertise and Knowledge: Trained technicians possess a comprehensive understanding of different fabric types (including delicate and exotic materials), their specific cleaning codes, and the chemical compositions of various cleaning solutions. This expertise allows them to choose the most appropriate and safest cleaning techniques for each piece, minimizing the risk of damage such as shrinkage, color bleeding, or fiber distortion. They can accurately identify stain types and understand the best approaches for their removal.
- Effective Tough Stain and Odor Removal: Professionals have access to a broader arsenal of specialized, professional-grade stain removal products and advanced deodorizing treatments (which can include techniques like ozone generation or thermal fogging for severe odors) that are generally more potent and effective on stubborn or set-in stains and persistent odors than over-the-counter consumer products.
- Specialized Equipment: Beyond powerful cleaning machines, professionals often have a range of specialized tools, such as low-moisture cleaning equipment for water-sensitive fabrics, specific attachments for delicate materials, and tools designed to accelerate drying times.
- Time-Saving and Convenience: Hiring a professional service saves you considerable time, physical effort, and the hassle of renting or purchasing equipment and cleaning solutions. They manage the entire process, from pre-inspection and preparation to the actual cleaning and providing post-cleaning advice.
- Optional Fabric Protection: Many professional cleaning services offer the application of fabric protection treatments (like Scotchgard or similar products) after cleaning. These treatments create an invisible barrier on the fabric that helps to repel future spills and stains, making subsequent cleaning easier and prolonging the cleanliness of the upholstery.
- Enhanced Longevity of Furniture: By thoroughly removing abrasive dirt particles and contaminants that can degrade fibers over time, regular professional cleaning can significantly extend the functional and aesthetic life of your upholstered furniture.
- Improved Health Benefits: The deep extraction of allergens, dust mites, pet dander, mold spores, and bacteria achieved by professional cleaning contributes directly to better indoor air quality, creating a healthier home environment, especially for individuals with allergies, asthma, or other respiratory sensitivities.
When the Pros Are a Must: Situations Demanding Expert Care
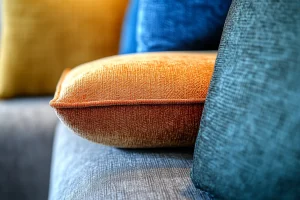 While regular DIY upkeep is beneficial, certain situations strongly warrant, or even necessitate, calling in professional upholstery cleaners:
- Delicate or Problematic Fabrics: If your upholstery is made from delicate materials such as silk, true velvet, some types of linen or wool, or any fabric bearing an ‘S’ (solvent clean only) or ‘X’ (vacuum/brush only) cleaning code, attempting to clean it yourself with water-based methods or inappropriate solvents can lead to costly and often irreversible damage like shrinkage, water spotting, pile distortion, or color loss. Professionals have the correct solvents and low-moisture techniques for these.
- Valuable or Antique Furniture: For pieces that hold significant monetary or sentimental value, or for antique upholstery where the fabric integrity might be compromised by age, the risk of DIY damage is too high. Professionals experienced in handling such items can provide the careful, specialized treatment required.
- Severe, Widespread, or Set-In Staining: If you are dealing with large or numerous stains, stains that have been present for a long time, or particularly stubborn types of stains (e.g., extensive pet accidents, large dye transfers, old ink marks), professional intervention is usually needed. They have stronger, targeted treatments and the expertise to apply them safely.
- Persistent or Strong Odors: For deeply embedded or highly offensive odors, such as those from heavy cigarette smoke, pet urine that has soaked into padding, or pervasive mildew, DIY methods may not be sufficient. Professionals can employ more powerful deodorization techniques, including enzyme treatments, ozone generators, or thermal fogging, to neutralize odors at their source.
- Lack of Time, Physical Ability, or Appropriate Equipment: Thorough upholstery cleaning can be a time-consuming and physically demanding task, especially for large pieces or multiple items. If you lack the time, are unable to perform the labor, or do not have access to (or wish to rent) suitable equipment for a deep clean, professionals offer a convenient and effective solution.
- After Water Damage Incidents: If your upholstered furniture has been affected by flooding, leaks, or firefighting efforts, it’s crucial to have it professionally cleaned, sanitized, and properly dried as soon as possible. Professionals specializing in water damage restoration can prevent mold and mildew growth and restore the furniture safely.
- Manufacturer’s Warranty Requirements: In some cases, the warranty on new furniture may stipulate that any cleaning beyond routine vacuuming must be performed by a certified professional to keep the warranty valid. Check your warranty documents.
Choosing Wisely: What to Expect from a Reputable Professional Service
Selecting a qualified and reputable professional upholstery cleaning service is key to a positive outcome. Here’s what you should generally look for and expect:
- Thorough Pre-Inspection: A professional technician should begin by carefully inspecting your upholstery. This includes identifying the fabric type, noting its condition (any pre-existing damage, wear, or fading), assessing the nature and extent of soiling and specific stains, and discussing any particular concerns you have. They should also confirm the cleaning code.
- Clear and Detailed Quoting: You should receive a clear, written quote before any work begins, detailing the services to be performed (e.g., pre-treatment, cleaning method, stain removal attempts, deodorizing, fabric protection) and the associated costs. Beware of vaguely priced services or high-pressure upselling.
- Professional-Grade Equipment: The company should use well-maintained, commercial-grade cleaning equipment appropriate for the job.
- Knowledgeable and Certified Technicians: Technicians should be trained, experienced, and ideally certified by recognized industry organizations (e.g., IICRC – Institute of Inspection Cleaning and Restoration Certification). They should be able to answer your questions confidently and explain the cleaning process.
- Use of Appropriate Methods and Solutions: The cleaning methods and chemical solutions used must be suitable for your specific upholstery fabric type and condition, adhering to manufacturer recommendations and safety standards.
- Targeted Stain Treatment: While no cleaner can guarantee 100% removal of all stains (especially old or set-in ones), a professional should make targeted efforts to treat specific spots and should set realistic expectations with you regarding the likely outcome.
- Attention to Drying: Professionals should advise on typical drying times and may use tools like air movers to help expedite the drying process, minimizing the risk of mildew or prolonged inconvenience.
- Post-Cleaning Care Advice: A good service will often provide tips on how to maintain your freshly cleaned upholstery and protect it from future soiling.
- Insurance and Guarantees: Reputable cleaning companies will carry liability insurance to cover any accidental damage. Many also offer a satisfaction guarantee for their work. Don’t hesitate to ask about these.
To help you decide between a DIY approach and hiring a professional, consider the following comparison:
Table 6: DIY vs. Professional Upholstery Cleaning Comparison
| Aspect | DIY Cleaning | Professional Cleaning |
|---|---|---|
| Cost | Lower initial outlay (cost of supplies) | Higher upfront cost, but can be cost-effective long-term by preventing damage and extending furniture life |
| Effectiveness on Tough Stains | Limited; may struggle with set-in or complex stains | Higher; access to stronger, specialized products and techniques |
| Effectiveness on Odors | Good for mild odors (baking soda, vinegar) | More effective for persistent or strong odors (enzyme treatments, ozone) |
| Risk of Damage | Higher if wrong products/methods used, or fabric misidentified | Lower; technicians are trained in fabric identification and safe cleaning practices |
| Time Commitment | Can be very time-consuming and labor-intensive | Minimal time commitment for the homeowner; professionals work efficiently |
| Equipment Needed | Basic vacuum, cloths, household cleaners; may involve renting machines | Industrial-grade, specialized machinery and tools |
| Suitable For | Routine maintenance, light soiling, minor fresh spills on durable fabrics | Deep cleaning, delicate fabrics, valuable items, heavy soiling, stubborn stains/odors, convenience |
| Knowledge Required | Understanding of fabric codes, product suitability, and techniques is crucial | Professionals possess specialized knowledge and experience |
| Health & Safety | Requires careful handling of any chemicals, good ventilation | Professionals use products safely and are aware of health protocols |
Final Thoughts: The Freshness Your Home Deserves
 Maintaining clean upholstery and furniture is a continuous effort, but one that pays dividends in the form of a more beautiful, comfortable, and healthy living environment.
Armed with the knowledge from this guide—from deciphering fabric codes and understanding material nuances to mastering appropriate cleaning techniques for various surfaces and tackling common spots and smells—you are well-equipped to handle many of the day-to-day and periodic cleaning tasks that keep your home looking its best.
However, it’s equally important to recognize the significant value and distinct advantages that professional cleaning services bring to the table. For those challenging situations involving delicate fabrics, precious antiques, stubborn stains, pervasive odors, or simply when you desire the deepest, most thorough revitalization for your furnishings, calling in the experts is often the smartest and most effective choice.
Professionals not only save you time and effort but also provide peace of mind, ensuring that your valuable furniture investments are treated with the specialized care they need to remain in prime condition for years to come. Ultimately, whether through your own diligent efforts or with the help of skilled professionals, achieving and maintaining the freshness your home truly deserves is an attainable and worthwhile pursuit.


