1. The Foundation of a Truly Clean Home: Understanding Deep Cleaning
Embarking on a deep clean is about transforming your living space into a sanctuary of true cleanliness, extending far beyond the weekly once-over. It’s an investment in your home’s health, the longevity of its components, and the overall well-being of everyone who lives there.
Defining Deep Cleaning: Beyond the Surface
Deep cleaning is an exceptionally thorough and extensive process, a far cry from the standard weekly tidying routine. It involves a comprehensive “rubdown” of your home, meticulously addressing those often-neglected and hard-to-reach spots that everyday cleaning misses. Imagine a “spring cleaning” level of intensity, where every nook, cranny, and hidden surface receives dedicated attention. This isn’t merely about achieving a visually tidy space; it’s about fundamentally enhancing the sanitation and livability of your environment. The commitment is such that any surface within your home reachable with a step stool will be hand-wiped, and even the darkest corners and the tops of cabinets are brought into the light of cleanliness.
Regular Cleaning vs. Deep Cleaning: Key Differences and When to Deep Clean
Understanding the distinction between regular upkeep and a true deep clean is crucial for setting expectations and recognizing when your home needs that extra level of care.
Key Differences:
The primary distinctions lie in the level of detail, scope of tasks, frequency, and the time and cost involved.
- Detail Level: Regular cleaning focuses on maintaining a baseline of cleanliness. For example, it might involve wiping the exterior of appliances. Deep cleaning, however, delves into the interiors, underneath, and behind these items. It’s the difference between a surface wipe and an intensive scrub.
- Scope: Standard cleaning routines cover tasks like sweeping, wiping surfaces, and basic bathroom and kitchen maintenance. A deep clean encompasses all of these but adds more intensive jobs such as scrubbing grout, washing walls and baseboards, cleaning the inside of cabinets, and sanitizing items like wastebaskets.
- Frequency: Regular cleaning is a frequent activity, often occurring weekly, biweekly, or monthly, designed to manage day-to-day tidiness. Deep cleaning is a less frequent endeavor, typically undertaken every 6 to 12 months, or on a seasonal basis.
- Time & Cost: Reflecting its thoroughness, deep cleaning is significantly more labor-intensive. It can take two to three times longer than a regular cleaning session and, as a result, is generally more expensive if hiring professional services.
The following table offers an at-a-glance comparison:
Table 1: Deep Cleaning vs. Regular Cleaning: At a Glance
| Feature | Deep Cleaning | Regular Cleaning |
|---|---|---|
| Goal | Intensive, thorough sanitation; addresses neglected areas; improves overall livability. | Maintain baseline cleanliness; upkeep of frequently used areas. |
| Detail Level | Extremely high; hand-wiping, scrubbing, cleaning inside and behind objects. | Moderate; surface wiping, general dusting, tidying. |
| Frequency | Every 6-12 months; seasonally; for specific occasions. | Weekly, bi-weekly, or monthly. |
| Time Involved | Significantly longer; can be 2-3 times the duration of a regular clean. | Shorter duration, typically a few hours depending on home size. |
| Cost | More expensive due to increased labor and time. | Less expensive. |
| Typical Tasks | Includes all regular tasks plus: cleaning inside appliances, scrubbing grout, washing walls/baseboards, cleaning light fixtures, etc.. | Sweeping/vacuuming, mopping, dusting surfaces, cleaning bathrooms (toilets, sinks), kitchen counters, trash removal. |
When to Deep Clean:
Specific situations often call for the intensity of a deep clean:
- Initial Cleaning: Many professional services recommend a deep clean for first-time customers to establish a high standard of cleanliness.
- Seasonal Overhauls: The changing seasons, particularly spring, are a traditional and practical time for a thorough deep clean.
- Pre-Event Preparation: Before hosting significant gatherings, parties, or holiday events, a deep clean ensures your home is at its best.
- Moving Transitions: Essential when moving out of a rental property (to help secure your deposit) or into a new home to ensure a fresh start.
- Home Sale Preparation: A deep-cleaned home is significantly more appealing to potential buyers during staging and showings.
- Routine Maintenance: Undertaking a deep clean every 6 to 12 months helps maintain a superior level of hygiene and home care.
The Transformative Benefits of a Deep Clean Home
The effort invested in a deep clean yields rewards that extend far beyond a merely tidy appearance. It’s a proactive approach to creating a healthier, more functional, and more enjoyable living environment.
- A Healthier Environment: One of the most significant advantages is the substantial reduction of dust, allergens (like dust mites and pet dander), bacteria, mold, and mildew. This meticulous removal of irritants and pathogens directly improves indoor air quality, which is particularly beneficial for individuals with allergies, asthma, or other respiratory conditions. The focus on sanitizing and disinfecting surfaces helps to minimize the spread of germs, contributing to a healthier household.
- Appliance Longevity and Efficiency: The detailed attention given to appliances during a deep clean, such as cleaning underneath and around them, and addressing components like refrigerator coils or dryer vents, can enhance their operational efficiency and potentially extend their lifespan. For instance, clean refrigerator coils allow the appliance to cool more effectively, using less energy.
- Enhanced Livability and Comfort: There’s an undeniable sense of comfort and tranquility that comes with inhabiting a truly clean space. A deep-cleaned home feels more organized, smells fresher, and is simply more pleasant to live in.
- Mental Well-being: The connection between a clean environment and mental clarity is well-documented. A decluttered and deeply cleaned home can reduce stress, improve focus, and foster a sense of calm and control. The process itself, while demanding, can also provide a significant sense of accomplishment.
- Pest Prevention: By eliminating food crumbs, grease buildup, and other attractants from hidden nooks and crannies, deep cleaning helps to deter common household pests.
Ultimately, deep cleaning is not just about scrubbing away dirt; it’s about cultivating a home environment that supports health, functionality, and peace of mind. It’s a comprehensive act of home care with lasting positive impacts.
2. Setting the Stage for Success: Preparing for Your Deep Clean
A successful deep clean doesn’t begin with the first swipe of a sponge; it starts with thoughtful preparation. This foundational phase is non-negotiable, as it dictates the efficiency, thoroughness, and overall success of your entire cleaning endeavor. Skipping these steps can lead to a longer, more frustrating, and less effective process.
Strategic Decluttering: The Essential First Step
Before any deep cleaning can truly commence, decluttering is paramount. This initial purge is crucial because it allows you (or professional cleaners, if you’re hiring them) to concentrate on the actual cleaning tasks rather than spending valuable time picking up and organizing misplaced items. A clutter-free space not only saves time and potentially money (if paying for a service) but also enables a more thorough and effective clean, as surfaces are accessible. Moreover, seeing tidy surfaces emerge can significantly boost motivation to continue with the more intensive deep cleaning tasks.
Actionable Steps for Decluttering:
- Systematically Clear Rooms: Go through each room and remove any items that don’t belong there, returning them to their designated storage spots. This includes getting everything off the floors – toys, stray shoes, piles of books, or any other clutter.
- Clear All Surfaces: Ensure countertops, tables, desks, and other flat surfaces are completely cleared of non-essential items. This means temporarily removing knick-knacks, decorative items, stacks of mail, unused small appliances, and even those spice jars gathering dust on the counter.
- Prioritize Visible Clutter: To avoid overwhelm, focus on clearing visible clutter first. Items stored away behind closed doors, such as inside cupboards you aren’t planning to deep clean immediately, can be addressed at a later time.
- Dispose of Waste: Collect and dispose of all trash and recyclables from every room.
- Secure Valuables: Put away any fragile or valuable items in a safe place to prevent accidental breakage or damage during the cleaning process.
- Address Preliminaries: Ensure that all laundry is washed, folded, and put away. Similarly, all dishes should be cleaned and stored in their respective places.
Planning Your Attack: Room-by-Room or Task-by-Task?
With a decluttered space, the next step is to strategize your cleaning approach.
- Room-by-Room Approach: Many find it most effective to tackle the deep clean one room at a time. This method ensures that no area is overlooked and provides a tangible sense of accomplishment as each space is completed. This guide will primarily follow a room-by-room structure for its checklists to ensure clarity and comprehensiveness.
- Task-by-Task Approach: An alternative strategy is to group similar tasks together – for example, completing all dusting throughout the house, followed by all vacuuming, then all window cleaning. While this can be efficient for some, a room-by-room plan is often easier to manage for a comprehensive deep clean.
- Prioritization: Before you begin, identify any high-traffic areas or specific “problem spots” that require special attention. These might include the kitchen and bathrooms, which tend to accumulate more grime, or areas with specific issues like moldy shower grout or heavily stained carpets. If you’re hiring a professional service, clearly communicate these priority areas. If undertaking the deep clean yourself, you might choose to tackle these challenging areas first or allocate additional time for them.
Gathering Your Arsenal: Prepping Supplies and Ensuring Safety
Having all your cleaning tools and products ready before you start is a significant time-saver and helps maintain focus.
- Assemble Supplies: Gather all necessary cleaning solutions (such as all-purpose cleaners, disinfectants, glass cleaners, degreasers, and specialized products for specific surfaces), cleaning tools (including mops, brooms, a vacuum cleaner with attachments, a variety of microfiber cloths, scrub brushes, and sponges), and personal protective equipment (like gloves and, if needed, masks).
- Read Product Labels: Carefully read the directions on all cleaning products. This ensures you’re using them safely and effectively, including correct dilution ratios and application methods, which prevents product waste and achieves the best results.
- Safety First: Always ensure good ventilation in the areas you’re cleaning, especially when using stronger chemical cleaners. Keep all cleaning products out of the reach of children and pets.
Working Smart: The Top-to-Bottom, High-to-Low Cleaning Method
One of the most effective strategies for any cleaning task, especially deep cleaning, is the “top-to-bottom” or “high-to-low” method.
- The Principle: This method dictates that you should always start cleaning from the highest surfaces in a room and work your way down to the floor. The logic is simple: as you clean higher areas, dust, dirt, and debris will inevitably fall onto lower surfaces. By cleaning in this order, you avoid having to re-clean areas you’ve already addressed.
- Order of Operations: A typical sequence would be: ceilings (for cobwebs), ceiling trim and moldings, ceiling fans and light fixtures, walls, then window treatments, furniture, and other mid-level surfaces, and finally, baseboards and floors. When cleaning floors, it’s most efficient to start in the farthest corner of the room and work your way towards the entrance.
Additional Preparation Tips (if hiring professionals)
If you’re enlisting the help of a professional cleaning service for your deep clean, a few extra preparatory steps can ensure a smoother process and better results :
- Communicate Expectations: Clearly discuss your priorities with the cleaning service. Point out specific areas you want them to focus on, any problem spots, and any areas or items you’d prefer they avoid.
- Schedule Wisely: Choose a cleaning time that allows you ample opportunity to prepare your home beforehand. Also, consider scheduling the service so you can fully enjoy the benefits of your freshly cleaned home, perhaps right before a special event or a relaxing weekend.
- Secure Pets: For the safety and comfort of your pets, and to allow the cleaners to work efficiently, it’s best to keep pets in a separate, closed-off room or, if possible, outside during the cleaning service.
- Facilitate Access: If window cleaning is part of the service, remove any window screens beforehand. If you expect walls or baseboards to be cleaned, pull furniture away from these areas to provide easy access.
The thoroughness of this preparatory phase directly impacts the quality of the deep clean. By decluttering, planning strategically, gathering the right supplies, and understanding efficient cleaning methods like the top-to-bottom approach, you create the optimal conditions for transforming your home.
3. Your Ultimate Deep Cleaning Toolkit: Pro-Recommended Supplies & Tools
Achieving a truly deep clean requires more than just elbow grease; it demands the right arsenal of cleaning supplies and tools. While a core set of versatile cleaners can tackle many tasks, a professional-level deep clean often necessitates specialized products tailored to specific materials and challenging grime. This section outlines the pro-recommended essentials, from all-purpose workhorses to targeted solutions and the indispensable tools that make the job effective and efficient.
Essential All-Purpose Cleaners and Disinfectants
These are the foundational products for your cleaning caddy.
- All-Purpose Cleaners: Designed for versatility, these cleaners are suitable for a wide range of surfaces and general cleaning tasks.
- Examples: Method Antibacterial All-Purpose Cleaner is noted for killing 99.9% of household germs and providing a streak-free shine. Mrs. Meyer’s Clean Day Multi-Surface Cleaner, often infused with essential oils like lemon verbena or lavender, is effective on grime and grease while leaving a pleasant scent. Puracy Natural Surface Cleaner offers a plant-based, non-toxic, and family-safe option. LA’s Totally Awesome is a concentrated and highly versatile cleaner. Simple solutions like diluted dish soap (a few drops in water) or Sal Suds Biodegradable Multi-Purpose Cleaner are also effective.
- Why they matter: These cleaners form the backbone of your kit, ideal for daily wipe-downs and many deep cleaning tasks across various household surfaces.
- Disinfectants: Crucial for sanitizing high-touch surfaces and areas prone to germs, such as kitchens and bathrooms. Deep cleaning aims to elevate hygiene, and disinfectants are key to eliminating harmful bacteria and viruses.
- Examples: Clorox Disinfecting Bathroom Cleaner is specifically formulated for bathroom germs. Lysol disinfectant spray is a common choice for various surfaces. Spic and Span Hospital-Grade Disinfectant Cleaner offers a robust option. For a natural alternative, hydrogen peroxide can be used as a disinfectant and is effective against mold and mildew.
Specialized Solutions: Tackling Tough Grime, Specific Surfaces, and Stains
For a truly thorough deep clean, general cleaners are often supplemented with products designed for specific challenges.
- Degreasers: Indispensable in the kitchen for cutting through accumulated cooking oils, grease, and grime on stovetops, range hoods, and backsplashes.
- Examples: Unscented laundry detergent mixed with water can act as a powerful degreaser. Dawn Platinum Advanced Power Liquid Dish Soap is also known for its degreasing properties and can be incorporated into DIY cleaning solutions.
- Glass Cleaners: Formulated to leave windows, mirrors, and other glass surfaces sparkling and streak-free.
- Examples: Windex Original Glass Cleaner is a widely available and reliable option. Sprayway Glass Cleaner, a foaming aerosol, is often recommended by professionals for its efficacy. Seventh Generation Free & Clear Glass Cleaner provides an eco-friendly choice without dyes or synthetic fragrances. A simple DIY alternative is a 1:1 mixture of water and distilled white vinegar.
- Bathroom Cleaners: Specifically designed to combat soap scum, hard water stains, mold, and mildew common in bathrooms.
- Examples: Scrubbing Bubbles Mega Shower Foamer is known for its ability to cling to surfaces and break down grime. Clorox Disinfecting Bathroom Cleaner targets bathroom-specific germs and buildup. A DIY paste of baking soda and vinegar is also effective for scrubbing.
- Kitchen-Specific Cleaners:
- Oven Cleaner: Products like Easy-Off are designed for heavy-duty oven cleaning. A DIY paste of baking soda and water is a popular alternative.
- Stainless Steel Cleaner: Weiman Stainless Steel Cleaner and Polish helps remove smudges and fingerprints. Bar Keepers Friend is another effective option for stainless steel surfaces. Some professionals even use WD40 (with caution, away from flames) or mineral oil for polishing stainless steel.
- Soft Cleansers for Sinks/Pots: Bar Keepers Friend Soft Cleanser is excellent for cleaning sinks and cookware without scratching.
- Floor Cleaners: The choice of floor cleaner should be specific to the type of flooring in your home (e.g., hardwood, tile, laminate, vinyl).
- Examples: Swiffer WetJet Multi-Surface Cleaner is suitable for various hard floors from tile to laminate. Bona Hardwood Floor Cleaner is favored for its quick-drying, residue-free formula. A DIY solution for hardwood floors can be made with warm water, a few drops of dish soap, and a teaspoon of olive oil or castile soap.
- Stain Removers: Essential for addressing spills and set-in stains on carpets, upholstery, and laundry.
- Examples: OxiClean Versatile Stain Remover is an oxygen-based cleaner effective on a wide range of stains and surfaces. Folex Instant Carpet Spot Remover is specifically for carpets. Biokleen Bac-Out Stain and Odor Remover uses enzymes to break down organic stains and odors.
- Adhesive Remover: Products like Goo Gone are indispensable for removing sticky residues from tape, stickers, and other adhesives.
- Descalers: White vinegar is a highly effective natural descaler for coffee makers, kettles, and showerheads, removing mineral buildup.
The Right Tools for the Job: From Microfiber Cloths to Specialized Brushes and Vacuums
Effective cleaning products need to be paired with the appropriate tools.
- Microfiber Cloths: A cornerstone of any cleaning kit. They are highly effective at trapping dust and dirt, are washable and reusable, and come in various textures for different tasks (e.g., smoother weaves for glass, more textured for general cleaning).
- Sponges & Scrubbers:
- Non-scratch scrub sponges: Essential for cleaning surfaces without causing damage.
- Scrub Daddy/Mommy: Popular for their texture-changing properties and scrubbing power.
- Melamine Erasers (e.g., Mr. Clean Magic Eraser): Highly effective for removing scuff marks, soap scum, and stubborn stains from various surfaces.
- Brushes:
- Toilet brush: A dedicated brush for cleaning the toilet bowl.
- Grout brush / Stiff bristle brush / Old toothbrush: Necessary for cleaning grout lines, tight corners, and detailed areas.
- Nylon scrub brushes: Good for general scrubbing tasks.
- Detail brush: Useful for getting into small crevices and around fixtures.
- Dusters:
- Extendable/telescoping duster: Allows for easy cleaning of high ceilings, ceiling fans, tops of furniture, and light fixtures without needing a ladder.
- Microfiber hand duster: Ideal for general dusting of surfaces.
- Lint roller: Effective for removing dust and pet hair from lampshades and upholstery.
- Floor Cleaning Tools:
- Vacuum cleaner with attachments: A good quality vacuum with a crevice tool (for edges and tight spaces), a brush attachment (for upholstery and delicate surfaces), and preferably a HEPA filter (to trap allergens) is indispensable.
- Mop: Various types are available, including microfiber mops, steam mops (like Bissell Powerfresh ), spray mops (like Swiffer WetJet or O-Cedar ProMist ), and spin mops (like Libman or O-Cedar EasyWring ).
- Broom and dustpan: For quick sweeping of hard floors.
- Squeegee: For achieving streak-free results on windows and glass shower doors.
- Buckets: Often, two buckets are recommended – one for the cleaning solution and one for rinsing dirty mops or cloths, to prevent spreading grime.
- Spray Bottles: Useful for mixing DIY cleaning solutions or diluting concentrated cleaners.
- Gloves (rubber/latex): Essential for protecting hands from cleaning chemicals and prolonged water exposure.
DIY Cleaning Solutions: Effective and Eco-Friendly Alternatives
Many effective cleaning solutions can be made from common, inexpensive household ingredients.
- Vinegar (Distilled White): A powerhouse cleaner. Diluted with water, it serves as an all-purpose cleaner and glass cleaner. It’s also effective for descaling coffee makers and showerheads, can be used as a fabric softener, and helps control mold and mildew. Important Note: Vinegar should not be used on all surfaces, such as unsealed grout, natural stone like marble or granite, or waxed hardwood floors, as its acidity can cause damage.
- Baking Soda: A gentle abrasive that’s excellent for scrubbing without scratching. It also acts as a deodorizer and can help lift stains. Mixed with water to form a paste, it’s great for cleaning ovens and sinks. Combined with vinegar, it can help clear drains. It can also boost the cleaning power of laundry detergent.
- Dish Soap (mild, e.g., Dawn, Castile soap): A few drops in water create an effective solution for general surface cleaning and degreasing. Castile soap is a plant-based, versatile option.
- Lemon Juice/Peels: Natural deodorizer and cleaner. The acidity of lemon juice can help cut through grease, and it can be combined with salt for scrubbing tasks. Lemon peels can freshen garbage disposals.
- Rubbing Alcohol: Acts as a disinfectant and can be effective for removing certain types of stains.
- Olive Oil: Can be a component in DIY wood polish or conditioners, and in some homemade floor cleaners, adding a slight sheen.
- Essential Oils (e.g., tea tree, lavender, lemon, eucalyptus): Can be added to DIY cleaning solutions for their pleasant fragrance and, in some cases, for their antimicrobial properties.
The art of deep cleaning lies in understanding which product and tool to deploy for each specific task. While versatile staples like vinegar, baking soda, and quality all-purpose sprays can handle a multitude of jobs, achieving professional-level results often requires a nuanced approach. This means having a selection of specialized products designed for particular materials—such as pH-neutral cleaners for granite or marble, or dedicated stainless steel polishes —and for challenging cleaning scenarios like heavy grease in ovens or discolored grout. A true “ultimate guide” recognizes that a one-size-fits-all strategy is insufficient for optimal results and the preservation of home surfaces. Professionals carry such a varied toolkit, and equipping yourself similarly empowers you to tackle every deep cleaning challenge effectively and safely.
Table 2: Pro-Recommended Deep Cleaning Supplies & Tools Summary
| Supply/Tool Category | Specific Examples/Brands (Pro-Recommended) | Primary Use(s) | Key Features/Pro-Tips | Best For |
|---|---|---|---|---|
| All-Purpose Cleaners | Method Antibacterial, Mrs. Meyer’s Multi-Surface, Puracy Natural, LA’s Totally Awesome, Diluted Dish Soap, Sal Suds, Mr. Clean Clean Freak | General surface cleaning, countertops, sinks | Versatile, some offer disinfecting, plant-based options available | Most rooms, non-specialized surfaces |
| Disinfectants | Clorox Bathroom Cleaner, Lysol Spray, Hydrogen Peroxide, Spic and Span Hospital-Grade, Rubbing Alcohol | Killing germs on high-touch surfaces, sanitizing bathrooms/kitchens | Essential for hygiene, choose based on surface compatibility | Bathrooms, kitchens, doorknobs, light switches |
| Glass Cleaners | Windex Original, Sprayway Foaming Aerosol, Seventh Generation Free & Clear, Vinegar & Water | Windows, mirrors, glass shower doors | Streak-free results, ammonia-free options available | All rooms with glass surfaces |
| Degreasers | Dawn Platinum Dish Soap, DIY: Unscented Laundry Detergent + Water | Cutting grease on stovetops, range hoods, backsplashes | Essential for kitchen grime | Kitchen |
| Bathroom Cleaners | Scrubbing Bubbles Mega Shower Foamer, Clorox Disinfecting Bathroom Cleaner, DIY: Baking Soda + Vinegar Paste | Soap scum, hard water stains, mildew | Formulated for tough bathroom buildup | Showers, tubs, tiles, sinks |
| Specialty Surface Cleaners | Weiman Stainless Steel, Bar Keepers Friend, Bona Hardwood Floor, Oven Cleaners | Cleaning specific materials without damage | Protects surfaces, effective on specific stains/buildup | Stainless steel appliances, hardwood floors, ovens, granite/marble (use appropriate type) |
| Stain Removers | OxiClean Versatile, Folex Carpet Spot Remover, Biokleen Bac-Out | Treating stains on carpets, upholstery, laundry | Oxygen-based, enzyme-based, or targeted formulas | Carpets, upholstery, laundry |
| Microfiber Cloths | Various brands (e.g., Buff Detail, Grab A Rag ) | Dusting, wiping, polishing, scrubbing | Highly absorbent, trap dust, washable, reusable, different textures available | Virtually all surfaces |
| Sponges/Scrubbers | Scotch-Brite Zero Scratch, Scrub Daddy/Mommy, Mr. Clean Magic Eraser | Scrubbing sinks, tubs, pots; removing scuffs | Non-scratch options for delicate surfaces, melamine for tough marks | Kitchens, bathrooms, walls |
| Brushes | Toilet Brush, Grout Brush, Detail Brush, Old Toothbrush | Cleaning toilet bowls, grout lines, tight crevices | Reaches areas cloths/sponges can’t | Bathrooms, kitchens, window tracks |
| Dusters | Extendable Dusters (Swiffer 360, OXO, DocaPole ), Lint Roller | High ceilings, fans, shelves, lampshades | Reaches high areas, traps dust effectively | All rooms, especially high ceilings, fabric lampshades |
| Vacuums | Various brands (Kenmore, Miele ), Handheld (Black+Decker ) | Floors, carpets, upholstery, crevices | Essential for removing dust/debris; attachments increase versatility; HEPA filter recommended | All rooms |
| Mops | Spray (Swiffer, O-Cedar ), Steam (Bissell ), Spin (Libman, O-Cedar ), Microfiber Mop | Cleaning hard floors | Choose based on floor type and preference | Hard floors (tile, vinyl, sealed wood, laminate) |
| DIY Staples | Distilled White Vinegar, Baking Soda, Dish Soap, Lemon Juice, Rubbing Alcohol | Versatile cleaning, deodorizing, descaling, gentle scrubbing | Eco-friendly, inexpensive alternatives | Multiple uses across the home (check surface compatibility) |
4. The Comprehensive Room-by-Room Deep Cleaning Blueprint
With preparations complete and your toolkit assembled, it’s time to dive into the heart of the deep clean. This section provides detailed, step-by-step checklists for every major area of your home, ensuring no corner is left untouched. Remember the golden rule: always work from top to bottom within each room to manage falling dust and debris effectively. Ensure good ventilation throughout the process.
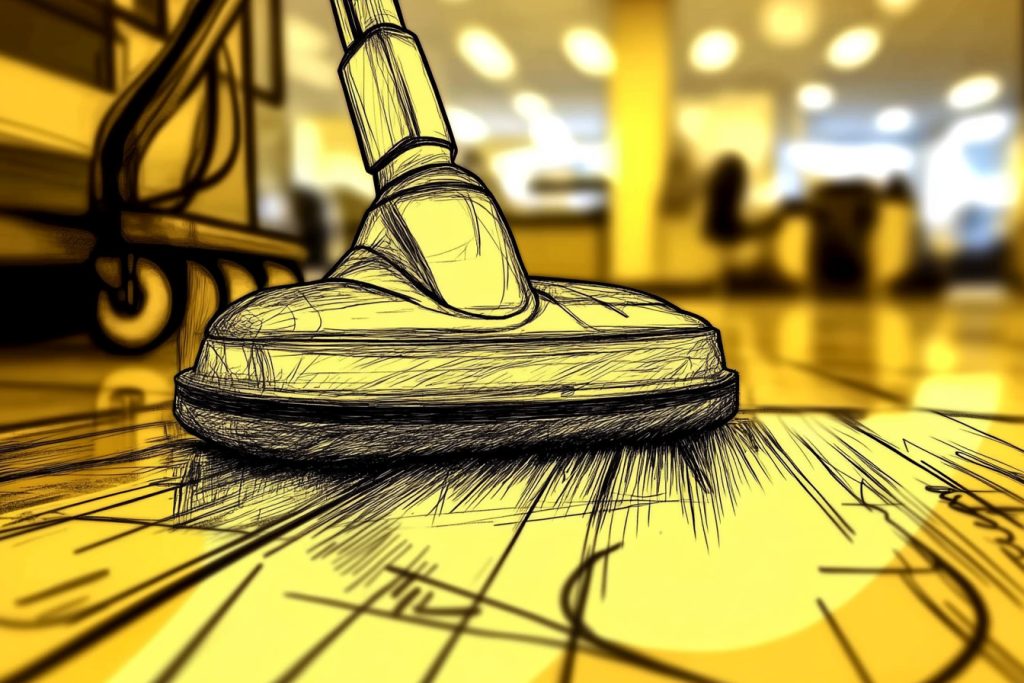
A. The Heart of the Home: Deep Cleaning Your Kitchen
The kitchen often requires the most intensive effort due to grease, food particles, and high traffic.
5
- Ceiling, Walls, Light Fixtures:
- Dust ceiling, paying attention to corners for cobwebs.
- Dust and clean light fixtures.
- Wash walls, especially near cooking areas, to remove grease and steam buildup. Supplies: Extendable duster, microfiber cloths, degreaser/mild soap solution for walls.
- Cabinets & Drawers (Inside and Out):
- Empty cabinets and drawers completely, one section at a time.
- Inspect contents, discarding expired food and unwanted utensils/cookware.
- Wipe down interior shelves and drawers thoroughly. Consider shelf liners for easier future cleaning.
- Degrease and clean exterior cabinet fronts, doors (inside and out), and handles/hardware.
- Organize remaining items neatly as you return them. Supplies: All-purpose cleaner, degreaser, microfiber cloths, organizing bins/dividers (optional).
- Countertops & Backsplash:
- Ensure surfaces are completely clear.
- Clean and sanitize countertops using a cleaner appropriate for the material (e.g., pH-neutral for granite/marble, non-abrasive for laminate/quartz).
- Clean and degrease the backsplash, scrubbing grout if tiled. Supplies: Appropriate countertop cleaner, degreaser, microfiber cloths, grout brush (if needed).
- Sink & Faucet:
- Scrub the sink basin thoroughly to remove stains and food residue.
- Clean and sanitize the faucet, handles, and the area around the sink base. Descale faucet head with vinegar if necessary.
- Clean the drain opening and run the garbage disposal (use lemon peels or ice cubes to clean and deodorize). Supplies: Sink cleaner (e.g., Bar Keepers Friend, baking soda paste), disinfectant, detail brush/old toothbrush, vinegar, lemon peels/ice.
- Appliances:
- Refrigerator/Freezer:
- Empty contents completely, discarding expired or unwanted food. Store remaining items in coolers if needed.
- Remove shelves, drawers, and bins; wash separately in warm, soapy water.
- Wipe down the entire interior, including walls and door seals/gaskets.
- Clean the exterior thoroughly, including the top, sides, and handles. Use appropriate cleaner for stainless steel if applicable.
- Carefully pull the unit away from the wall. Clean the floor underneath, the wall behind, and vacuum the refrigerator coils. Supplies: All-purpose cleaner or baking soda/water solution, microfiber cloths, vacuum with brush/crevice tool, coolers.
- Oven & Stovetop:
- Oven: Remove oven racks and soak them in hot, soapy water. Scrape out loose debris from the oven interior first. Clean the interior using a commercial oven cleaner or a paste of baking soda and water (let sit before scrubbing). Clean the inside and outside of the oven door and glass.
- Stovetop: If applicable, remove burner grates, drip pans, or electric coils and clean them separately (soaking often helps). Scrub the stovetop surface, control knobs, and panel, removing grease and burnt-on food. Clean under burners if possible.
- Range Hood/Vent: Degrease the hood surface (inside and out) and clean or replace the filter. Supplies: Oven cleaner/baking soda paste, degreaser, scrub brush/pad (nylon recommended for oven interior ), soapy water.
- Microwave:
- Loosen interior grime by heating a bowl of water with vinegar or lemon slices for a few minutes; let steam sit, then wipe clean. Remove and wash the turntable.
- Clean the exterior, including the door, handle, and keypad.
- If it’s a countertop model, move it to clean underneath. Supplies: Vinegar/lemon, water, all-purpose cleaner, microfiber cloth.
- Dishwasher:
- Remove and clean the filter, spray arms, racks, and utensil holders.
- Wipe down the interior, door edges, and rubber seals.
- Run an empty cycle with a commercial dishwasher cleaner or a cup of white vinegar placed inside to descale and deodorize.
- Clean the exterior, paying special attention to the handle. Supplies: Dishwasher cleaner/vinegar, cloth, brush for filter.
- Small Appliances (Toaster, Coffee Maker, Blender, etc.):
- Empty toaster crumb tray. Descale coffee maker using vinegar solution.
- Wipe down the exteriors of all small appliances. Follow manufacturer’s instructions for cleaning specific items like blenders. Supplies: Vinegar, all-purpose cleaner, cloths.
- Refrigerator/Freezer:
- Floors:
- Sweep or vacuum thoroughly, ensuring you reach edges, corners, and under cabinet overhangs.
- Mop the floor using a cleaning solution appropriate for your specific floor type (tile, vinyl, sealed hardwood, laminate).
- Wipe down baseboards. Supplies: Broom/vacuum, mop, appropriate floor cleaner, bucket, cloth for baseboards.
- Windows & Window Treatments:
- Clean window glass, sills, and tracks.
- Dust or wash blinds/curtains. Supplies: Glass cleaner, microfiber cloths, vacuum with brush attachment.
- Trash & Recycling Bins:
- Empty bins completely. Scrub inside and out with a disinfectant cleaner, rinse, and allow to air dry thoroughly. Supplies: Disinfectant cleaner, scrub brush, hose (optional).
- High-Touch Areas:
- Disinfect light switches, cabinet handles, appliance knobs, drawer pulls, and faucet handles. Supplies: Disinfectant spray or wipes.
B. The Sanctuary Spa: Deep Cleaning Your Bathroom(s)
Bathrooms harbor germs, soap scum, and mildew, requiring diligent deep cleaning for hygiene and appearance.
5
- Preparation:
- Remove all items from countertops, shower/tub ledges, and shelves.
- Shake out bathmats and remove them from the floor (consider washing them now). Move wastebasket and any floor items.
- Dust Top to Bottom:
- Dust the ceiling, corners for cobwebs, light fixtures, and ventilation fan covers.
- Dust walls and wipe down baseboards. Supplies: Extendable duster, microfiber cloths.
- Shower & Bathtub:
- Spray shower walls, tub surfaces, and fixtures with bathroom cleaner. Let sit briefly to loosen grime.
- Scrub walls, tub floor, and fixtures thoroughly to remove soap scum, hard water stains, and mildew. Pay extra attention to corners.
- Scrub grout lines using a grout brush or old toothbrush.
- Clean glass shower doors and tracks. Use glass cleaner or vinegar solution for doors; use a brush for tracks.
- Descale the showerhead: remove it if possible and soak in a 50/50 vinegar/hot water solution overnight, or fill a plastic bag with the solution and tie it around the showerhead. Scrub remaining deposits with a brush.
- Wash the shower curtain and liner according to care instructions, or replace if necessary. Wipe down the curtain rod.
- Rinse all surfaces thoroughly. Supplies: Tub and tile cleaner (e.g., Scrubbing Bubbles ), grout cleaner/brush, baking soda/vinegar paste (especially for acrylic tubs ), powder cleaner paste (for porcelain tubs ), glass cleaner/vinegar, squeegee, stiff bristle brush.
- Toilet:
- Apply toilet bowl cleaner inside the bowl, under the rim. Let sit.
- Scrub the inside of the bowl thoroughly with a toilet brush, including under the rim. Flush to rinse.
- Spray the exterior surfaces (tank, lid, seat top and bottom, handle, hinges, base, pedestal) with disinfectant cleaner.
- Wipe down all exterior surfaces and the floor immediately surrounding the toilet base. Supplies: Toilet bowl cleaner, toilet brush, disinfectant spray/wipes, cloths/paper towels.
- Sink & Vanity:
- Scrub the sink basin, removing toothpaste residue, soap scum, and grime.
- Clean the faucet and handles, using a detail brush for crevices. Descale faucet with vinegar if needed. Flush the drain with hot water or cleaner.
- Wipe down vanity countertops with an appropriate cleaner.
- Empty vanity cabinets and drawers. Discard expired toiletries, makeup, and medications.
- Wipe down the inside and outside of cabinets and drawers. Organize items upon return. Supplies: All-purpose cleaner/bathroom cleaner, disinfectant, glass cleaner (for mirrored cabinets), detail brush, cloths, organizers (optional).
- Mirrors & Glass Surfaces:
- Spray glass cleaner onto a cloth (not directly on the mirror to avoid frame damage) and wipe mirrors for a streak-free finish. Clean any glass shelves. Supplies: Glass cleaner, microfiber cloth or paper towels.
- Windows & Window Treatments:
- Clean window glass, sills, and tracks.
- Dust or wash blinds/curtains. Supplies: Glass cleaner, cloths, duster.
- Floors:
- Sweep or vacuum thoroughly, paying close attention to corners and around fixtures.
- Mop the floor using a disinfecting solution suitable for the flooring type (tile, vinyl, etc.).
- Scrub tile grout lines if they appear dirty.
- Wash bathmats according to care labels. Supplies: Broom/vacuum, mop, floor cleaner/disinfectant, grout brush.
- Ventilation Fan:
- Ensure power is off. Remove the fan cover. Wash the cover in warm, soapy water and let dry.
- Carefully vacuum or dust the fan blades and the interior housing. Replace cover once dry. Supplies: Screwdriver (if needed), vacuum with brush attachment/duster, cloth, soapy water.
- Trash Can:
- Empty the trash can. Clean and disinfect the inside and outside. Replace liner. Supplies: Disinfectant cleaner, cloth/sponge.
- High-Touch Areas:
- Wipe down and disinfect light switches, doorknobs, cabinet handles, and towel bars. Supplies: Disinfectant wipes or spray and cloth.
- Restock & Reorganize:
- Replenish toilet paper, hand soap, and other toiletries. Replace with fresh towels.
- Wash the toothbrush caddy (often dishwasher safe). Replace toothbrush if it’s time.
- Return organized items to their places.
C. Restful Retreats: Deep Cleaning Your Bedrooms
Bedrooms accumulate dust, allergens, and shed skin cells, making a deep clean essential for a healthy sleep environment.
5
- Declutter:
- Remove any trash, dirty dishes, or items that belong in other rooms.
- Clear surfaces like nightstands and dressers. Put dirty clothes in the hamper.
- Dust Top to Bottom:
- Start high: dust ceilings for cobwebs, ceiling fans (use pillowcase method to catch dust ), and light fixtures.
- Dust walls, trim, and baseboards.
- Dust all furniture surfaces: dressers, nightstands, headboards, bed frames, bookshelves, etc.. Use furniture polish if needed.
- Dust lamps (including bulbs) and lampshades (use a lint roller for shades).
- Dust electronics, picture frames, and decorative items. Supplies: Extendable duster, microfiber cloths, lint roller, furniture polish (optional).
- Bedding & Mattress Care:
- Strip the bed completely. Wash all bedding components according to their care labels: sheets, pillowcases, duvet covers, shams, mattress pads/protectors, and bed skirts.
- Wash pillows if washable (down pillows may need tennis balls in the dryer; synthetic pillows can air dry). Bulky comforters might require a laundromat.
- While the bed is bare, vacuum the mattress surface thoroughly using an upholstery attachment to remove dust mites, dead skin cells, and allergens.
- Freshen the mattress by sprinkling baking soda over the surface, letting it sit for about an hour, then vacuuming it up.
- Flip or rotate the mattress according to manufacturer recommendations to ensure even wear.
- Once linens are clean and dry, make the bed with fresh bedding. Supplies: Laundry detergent, baking soda, vacuum with upholstery attachment, tennis balls (for down pillows).
- Windows, Mirrors & Window Treatments:
- Clean window glass, sills, and tracks.
- Clean any mirrors in the room.
- Dust blinds thoroughly. Vacuum curtains using a brush attachment, or wash them if the fabric allows (check labels). Fluffing curtains in the dryer can be a quick refresh. Supplies: Glass cleaner, microfiber cloths, vacuum with brush attachment, laundry detergent (if washing curtains).
- Closets:
- Empty the closet completely.
- Go through clothes and other items, deciding what to keep, donate, or discard. Bag up donations/discards.
- Dust and wipe down all shelves, hanging rods, and any drawers or units inside the closet.
- Vacuum or sweep and mop the closet floor.
- Neatly organize the items you are keeping as you return them to the closet. Supplies: Bags for donation/discard, all-purpose cleaner, cloths, vacuum.
- Floors:
- Move furniture (nightstands, dressers, chairs, even the bed if possible) to access the entire floor area. Use furniture sliders for heavy items.
- Vacuum carpets and rugs thoroughly, using a crevice tool for edges and corners. Consider shampooing or deep cleaning carpets, especially if you have pets or allergies.
- Sweep and mop hard floors using an appropriate cleaner. Supplies: Vacuum with attachments, furniture sliders (optional), carpet shampooer (optional), mop, appropriate floor cleaner.
- High-Touch Areas:
- Disinfect light switches and doorknobs. Supplies: Disinfectant wipes or spray and cloth.
- Safety Check:
- Test the smoke detector, dust the unit, and replace the battery if necessary.
D. Shared Sanctuaries: Deep Cleaning Living Rooms & Common Areas (Dining Room, Hallways, Entryways)
These areas see a lot of traffic and are often the first impression guests have of your home.
7
- Declutter & Organize:
- Clear surfaces of items that don’t belong (toys, books, mail, dishes). Put items away or create “donate/discard” piles.
- Organize bookshelves, media cabinets, and any storage units. Straighten pillows and fold blankets.
- Dust Top to Bottom:
- Dust ceilings for cobwebs, ceiling fans, light fixtures, and vents.
- Dust walls, trim, and baseboards. Wash walls if needed.
- Dust all furniture: coffee tables, end tables, bookshelves, entertainment centers, dining tables, chairs, etc.. Polish wood furniture as needed.
- Dust decorative items: picture frames, artwork, knickknacks, plants, lampshades (use lint roller).
- Dust electronics: TVs, speakers, stereos, game consoles, remote controls. Supplies: Extendable duster, microfiber cloths, furniture polish, electronics-safe wipes/cloths, lint roller.
- Upholstery & Soft Furnishings:
- Vacuum all upholstered furniture (sofas, chairs, ottomans), removing cushions to clean underneath and in crevices.
- Move furniture away from walls to clean behind and underneath.
- Wash removable slipcovers, cushion covers, throw pillow covers, and blankets according to care labels. For non-washable items, spot clean or use a fabric freshener like Febreze.
- Consider professional cleaning or using DIY upholstery cleaners for tougher stains or delicate fabrics. Supplies: Vacuum with upholstery/crevice tools, laundry detergent, fabric freshener, upholstery cleaner/stain remover (commercial or DIY ).
- Windows, Mirrors & Window Treatments:
- Clean window glass (inside and out if possible), sills, and tracks.
- Clean any mirrors or glass tabletops.
- Dust blinds meticulously, cleaning between vanes. Vacuum or wash curtains/drapes (check labels). Wipe down curtain rods. Supplies: Glass cleaner, microfiber cloths, vacuum with brush attachment, laundry detergent.
- Floors, Carpets & Rugs:
- Move furniture for thorough access.
- Vacuum carpets and area rugs extensively, including edges and underneath furniture.
- Deep clean carpets/rugs by shampooing or steam cleaning, especially in high-traffic areas. Alternatively, sprinkle baking soda overnight to deodorize, then vacuum.
- Sweep and mop all hard floor surfaces. Supplies: Vacuum with attachments, carpet shampooer/steam cleaner (optional), baking soda, mop, appropriate floor cleaner.
- Entryways/Hallways/Mudrooms:
- Sweep/vacuum and mop floors thoroughly.
- Clean doormats (shake out vigorously, vacuum, or wash if possible).
- Wipe down walls, doors, doorframes, and baseboards.
- Organize shoe racks, coat hooks, benches, and any storage units.
- Dust and clean light fixtures. Supplies: Broom/vacuum, mop, appropriate cleaner, cloths, organizers.
- High-Touch Areas:
- Disinfect light switches, doorknobs, stair railings, remote controls, and cabinet/drawer handles. Supplies: Disinfectant wipes or spray and cloth.
- Safety Check:
- Test smoke and carbon monoxide detectors; replace batteries if needed.
E. The Nitty-Gritty: Conquering Often-Overlooked Areas
The true hallmark of a deep clean lies in addressing the areas typically skipped during routine tidying. These spots often harbor significant amounts of dust, allergens, and grime, and cleaning them makes a profound difference in the overall cleanliness and health of your home. Ignoring these areas means falling short of a genuine deep clean.
3
- Baseboards: These run along the bottom of walls throughout the house and are notorious dust collectors.
- Procedure: Dust first using a microfiber cloth, duster attachment on a vacuum, or a specialized tool (like a Baseboard Buddy or a cloth attached to a Swiffer-type handle to avoid bending). Then, wipe down with a damp microfiber cloth and a mild solution of water and dish soap or an all-purpose cleaner. Use a melamine eraser for stubborn scuff marks.
- Supplies: Microfiber cloths, vacuum with brush attachment, specialized baseboard tool (optional), mild soap solution/all-purpose cleaner, melamine eraser.
- Walls (Painted and Wallpapered): Walls trap dust, odors, and fingerprints.
- Procedure: Dust walls from top to bottom using an extendable microfiber mop or duster. For washing painted walls, use a soft cloth or sponge dampened with a mild solution of water and dish soap; always test in an inconspicuous area first to ensure paint stability. Avoid overwetting. Be extremely gentle with wallpaper, using only methods recommended by the manufacturer (often just light dusting or a slightly damp cloth).
- Supplies: Extendable duster/microfiber mop, microfiber cloths, mild dish soap solution (for painted walls, test first).
- Doors & Doorframes: These collect fingerprints, smudges, and dust, especially around handles and edges.
- Procedure: Wipe down the entire door surface (front, back, edges) and the surrounding frame with a damp microfiber cloth and all-purpose cleaner. Pay extra attention to the areas around doorknobs.
- Supplies: Microfiber cloth, all-purpose cleaner or mild soap solution.
- Window Sills & Tracks: These areas trap dust, dirt, dead insects, and outdoor debris.
- Procedure: Open windows fully and remove screens (clean screens separately). Vacuum the sills and tracks thoroughly using a crevice tool or brush attachment. For deep cleaning tracks, sprinkle baking soda, spray with a 1:1 vinegar-water solution, let it fizz for 5-10 minutes. Scrub the tracks (horizontal and vertical) with an old toothbrush or detail brush. Wipe out the loosened grime with paper towels or cloths. Use a butter knife wrapped in a rag to get into tight corners. Wipe down the window sills.
- Supplies: Vacuum with crevice/brush tool, baking soda, white vinegar, spray bottle, old toothbrush/detail brush, paper towels/cloths, butter knife.
- Light Switches & Outlet Covers: Frequently touched and often grimy.
- Procedure: Safety First: Never spray liquid directly onto electrical components. Lightly spray a disinfectant cleaner onto a microfiber cloth (do not saturate) and wipe the switch plate and outlet cover clean. Use a cotton swab for tight crevices if needed.
- Supplies: Microfiber cloth, disinfectant cleaner, cotton swabs (optional).
- Vents & Air Returns (HVAC): Dust buildup here impacts air quality.
- Procedure: Vacuum the exterior of the vent cover using a brush attachment. If possible and safe, turn off the HVAC system, remove the vent cover (may require a screwdriver), and wash it in warm, soapy water. Let it dry completely before replacing. While the cover is off, vacuum inside the duct opening as far as reachable. This is also an ideal time to replace your HVAC filter.
- Supplies: Vacuum with brush attachment, screwdriver (if needed), bucket, warm soapy water, cloths, new HVAC filter.
- Laundry Room: Lint, detergent spills, and moisture can create messes.
- Procedure: Wipe down the exterior surfaces of the washing machine and dryer. Clean inside the dryer drum. Run a cleaning cycle for the washing machine using a commercial cleaner or vinegar. Clean the lint trap screen thoroughly after every load, and deep clean the housing area and the dryer vent duct extending outside (this is crucial for fire safety). Wipe down laundry sinks, faucets, countertops, and shelves. Organize detergents and supplies. Sweep and mop the floor.
- Supplies: All-purpose cleaner, microfiber cloths, vacuum, long flexible brush for dryer vent, washing machine cleaner/vinegar, mop.
- Garage/Basement/Outdoor Spaces: These areas often require more heavy-duty cleaning.
- Procedure: Declutter and organize tools, equipment, and stored items. Sweep floors thoroughly. Consider power washing concrete floors, decks, or patios. Clean outdoor furniture and cushions. Clean the grill. Clean out gutters and downspouts. Check and clean weather stripping around doors and windows.
- Supplies: Heavy-duty broom, organizers/storage bins, power washer (optional), grill cleaner, appropriate outdoor furniture cleaner, ladder (for gutters).
Addressing these often-overlooked areas elevates your cleaning from routine maintenance to a true deep clean, significantly impacting the overall hygiene, air quality, and appearance of your home.
5. Preserving the Perfection: Maintaining Your Deep Clean Sparkle
Congratulations! You’ve completed the intensive work of a deep clean, transforming your home into a revitalized, healthier, and more pleasant space. The challenge now is to maintain that sparkle. Sustaining the benefits of your hard work isn’t a passive state; it requires adopting consistent, proactive cleaning habits. This ongoing effort prevents the rapid re-accumulation of dirt and grime, makes subsequent deep cleans significantly less daunting, and integrates cleanliness into your daily lifestyle.
The Mindset of Maintenance
Think of your deep clean as setting a new baseline standard. The goal of maintenance is to keep your home hovering around this level through regular, smaller efforts. Consistency is key.
Daily Habits for a Tidier Home
Small actions performed daily make a huge difference in preventing clutter and grime buildup.
- Make Beds: Instantly makes a bedroom look tidier.
- Kitchen Counter & Stovetop Wipe-Down: Clean surfaces after cooking or meals to prevent grease and food buildup.
- Dishes: Wash dishes promptly or load them into the dishwasher after meals. Don’t let them pile up in the sink.
- Bathroom Quick Clean: Wipe down bathroom counters and sinks daily. Give the toilet a quick wipe if needed. Use a squeegee on shower walls after use to prevent soap scum.
- Floor Sweep (High Traffic): Quickly sweep or spot vacuum floors in the kitchen and entryway to catch daily debris.
- Trash Removal: Empty kitchen trash daily, and other trash cans as needed, to prevent odors.
- Clutter Control: Spend 5-10 minutes each evening doing a quick “straighten-up.” Put away mail, shoes, toys, remote controls, and clothes left out during the day. Designate a spot for incoming mail.
- Spill Management: Wipe up spills on counters, floors, or appliances immediately before they set or attract pests.
- Shoes Off: Implement a “shoes off at the door” policy to drastically reduce tracked-in dirt. Keep indoor slippers handy.
Weekly Routines to Prevent Buildup
Dedicate time each week for more substantial cleaning tasks.
- Bathroom Deep(er) Clean: Thoroughly scrub toilets, showers, tubs, and sinks. Clean mirrors. Mop floors. Change towels.
- Kitchen Clean: Wipe down appliance exteriors (fridge, dishwasher, oven). Clean the microwave interior. Disinfect the sink.
- Dusting: Dust furniture, shelves, picture frames, electronics, and other surfaces throughout the house.
- Floors: Vacuum all carpets and rugs. Mop all hard floors.
- Bed Linens: Change and launder bed sheets.
- Laundry: Wash, dry, fold, and put away clothes and towels.
- Mirrors: Clean mirrors throughout the house.
- Pet Hair Management: Use a dust mop or vacuum frequently on floors and a lint brush or vacuum attachment on furniture if you have pets.
Monthly Touch-ups for Lasting Freshness
These less frequent tasks address areas that don’t need weekly attention but are crucial for long-term cleanliness.
- Kitchen Appliances: Clean the dishwasher filter, run an oven self-clean cycle (if applicable), wipe down the inside of the fridge, and purge old food from the pantry and freezer.
- Washables: Wash items like shower curtains, bathmats, duvet covers, blankets, and pillows (check care labels).
- Surface Wipes: Wipe down baseboards, light fixtures, ceiling fans, window treatments, and spot-clean walls in key areas.
- Organization: Dedicate time to organizing closets, drawers, and cabinets. Declutter items you no longer need.
- Vents: Clean HVAC vent covers.
- Appliance Maintenance: Inspect appliance filters (dishwasher, range hood) and vents (dryer) and clean as needed.
Proactive Strategies
Adopt these strategies to make maintenance easier and more effective.
- “Clean As You Go”: This is especially effective in the kitchen. Wipe down surfaces or wash prep tools while food is cooking.
- Establish Routines & Checklists: Create a cleaning schedule that works for your lifestyle. Use checklists to stay on track. Consider using reminder apps.
- Involve the Household: Assign age-appropriate chores to all family members. A shared responsibility makes maintenance more manageable.
- Strategic Storage: Utilize bins, baskets, drawer dividers, and hooks to ensure everything has a designated place. This makes tidying up much quicker. If items don’t have a home, they become clutter.
- Pre-Clean Prep (for Services): If you use a recurring cleaning service, try to do particularly messy activities (like extensive cooking, pet bathing, or kids’ messy crafts) before their scheduled visit, not right after, to maximize the duration of the professional clean.
Maintaining a deep-cleaned home is an ongoing commitment, but breaking it down into manageable daily, weekly, and monthly tasks transforms it from an overwhelming burden into a sustainable practice. These consistent efforts are the key to preserving that feeling of freshness and order, ensuring your home remains a healthy and inviting sanctuary long after the deep clean is done.
6. Conclusion: Reveling in Your Revitalized, Healthy Home
The journey to a deep-cleaned home is undeniably intensive, demanding time, effort, and attention to detail. It begins with understanding that deep cleaning transcends mere tidiness, delving into the very fabric of your home’s hygiene and health. Success hinges on methodical preparation—strategic decluttering and planning—and wielding the right arsenal of tools and supplies, balancing versatile staples with specialized solutions for specific challenges.
Executing the clean requires a systematic approach, moving room by room, always from top to bottom, and meticulously addressing not just the obvious surfaces but also the often-overlooked nooks, crannies, and hidden zones like baseboards, vents, and behind appliances. This commitment to detail is what truly elevates a clean from standard to deep, mirroring the thoroughness employed by professionals.
Finally, preserving that hard-won sparkle necessitates integrating consistent maintenance habits into daily, weekly, and monthly routines. This active upkeep prevents the rapid return of grime and makes future deep cleans far less formidable.
The rewards for this dedication are manifold. Tangibly, you gain sparkling surfaces, organized spaces, potentially better-functioning appliances, and significantly improved indoor air quality through the reduction of dust, allergens, and germs. Intangibly, the benefits include a profound sense of peace, comfort, reduced stress, and pride in inhabiting a truly clean, healthy, and welcoming home environment.
You have navigated the ultimate guide, equipped yourself with knowledge and checklists, and invested considerable effort. Now, take a moment to revel in your revitalized home. Enjoy the freshness, the order, and the healthier atmosphere you’ve created. Maintaining this standard is achievable through continued diligence, transforming deep cleaning from a monumental task into a periodic refresh within a consistently clean lifestyle.
Table 3: Your Deep Clean Maintenance Cadence Summary
| Frequency | Key Focus Areas/Tasks |
|---|---|
| Daily | Make beds, Wipe kitchen counters/stovetop, Wash/load dishes, Quick bathroom wipe-down, Sweep high-traffic floors, Empty kitchen trash, 5-10 min clutter pickup, Wipe spills immediately. |
| Weekly | Thorough bathroom clean (toilet, shower, sink, floor), Clean kitchen appliance exteriors & microwave, Dust all rooms, Vacuum all floors/rugs, Mop hard floors, Change bed linens, Do laundry. |
| Monthly | Clean inside some appliances (e.g., dishwasher filter, fridge purge), Wash shower curtains/bathmats/duvets/pillows, Wipe baseboards/light fixtures/window treatments, Organize a closet/drawer area, Clean vent covers. |
| Seasonally / Annually | Deep clean carpets/upholstery, Wash walls, Clean windows inside/out, Clean gutters, Deep appliance clean (e.g., oven, fridge coils), Major decluttering sessions, Check/clean dryer vents. |


