I. The Importance of a Pristine RV
A. Why Regular RV Detailing Matters: Enhancing Longevity, Health, and Resale Value
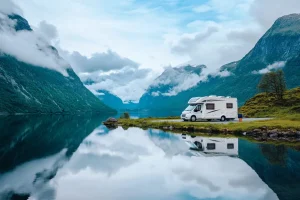
Owning a Recreational Vehicle (RV) or motorhome is an investment in freedom and adventure. However, like any significant investment, it requires diligent care to maintain its condition, functionality, and value. Regular RV detailing extends far beyond mere aesthetics; it is a fundamental aspect of responsible ownership, crucial for preserving the quality and integrity of the vehicle.
Comprehensive cleaning and detailing practices serve as a frontline defense against common threats such as corrosion, mold, mildew, and pest infestations, all of which can degrade the RV’s structure and diminish its usability over time.
The benefits of a consistent detailing regimen are multifaceted. Firstly, it significantly contributes to the longevity of the RV.
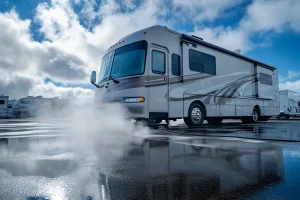
The exterior surfaces of an RV are constantly exposed to harsh environmental elements, including UV radiation, rain, road grime, and temperature fluctuations. Regular washing and the application of protective waxes or sealants create a barrier against these elements, preventing premature fading, oxidation of gel coats or paint, and the development of rust on susceptible components.
Furthermore, the detailing process allows for the early detection of minor physical damages, such as small scrapes, dents, or failing seals. Addressing these issues promptly can prevent them from escalating into more severe and costly problems, thereby extending the operational life of both the exterior shell and interior components.
This proactive approach to maintenance can be likened to preventative healthcare for the vehicle; small, consistent efforts in cleaning and protection can avert major “illnesses” down the road, such as widespread corrosion or extensive water damage from failed seals. Neglecting these routine tasks transforms them from minor chores into potentially significant and expensive repair undertakings.
Secondly, a meticulously maintained interior fosters a healthier living environment.
RVs, by their nature, are compact living spaces where occupants spend considerable time. Travel can introduce a variety of germs, allergens, and pollutants into this confined area. Deep cleaning of carpets, upholstery, mattresses, and hard surfaces, along with proper ventilation, helps to eliminate these contaminants, reducing the risk of respiratory issues, allergic reactions, and the spread of illness. Mold and mildew, in particular, thrive in damp, enclosed environments and can pose serious health risks if not proactively managed through regular cleaning and moisture control.
Finally, the effort invested in detailing directly translates into enhanced resale value.
A prospective buyer is more likely to be impressed by an RV that gleams both inside and out, as it reflects a history of careful ownership and diligent upkeep. A clean, well-maintained RV not only commands a higher price but also tends to sell more quickly than one showing signs of neglect. Professional detailing, in particular, can significantly boost this perceived and actual value when it comes time to sell or trade in the vehicle.
B. The Dual Nature of RVs: Tailoring Cleaning to Automotive and Residential Needs
RVs and motorhomes present a unique challenge in cleaning and detailing due to their inherent dual nature: they are simultaneously robust automotive vehicles and comfortable residential dwellings. This hybrid characteristic necessitates a versatile and specialized approach to cleaning, one that addresses the distinct needs of both its automotive and living-space components.
Simply applying automotive detailing techniques or, conversely, only employing household cleaning methods will prove insufficient and potentially detrimental to the vehicle’s overall condition.
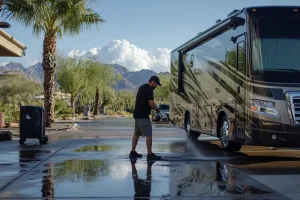
From an automotive perspective, RV detailing encompasses a range of tasks similar to those performed on standard cars and trucks, albeit on a much larger scale. These include comprehensive exterior washing of the roof and sidewalls, meticulous cleaning of awnings and slide-out toppers, removal of insects and road tar from the front cap, thorough cleaning and polishing of tires and wheels, ensuring crystal-clear glass surfaces, and applying protective waxes or sealants to the body. These procedures are vital for protecting the vehicle’s exterior from the rigors of the road and environmental exposure, maintaining its structural integrity, and preserving its visual appeal.
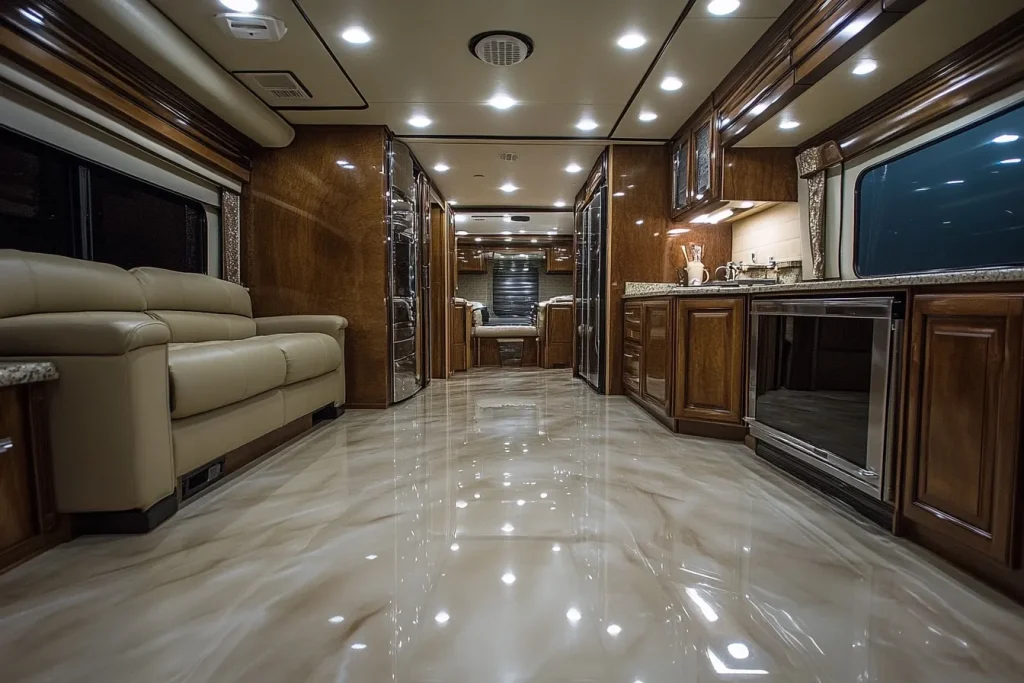
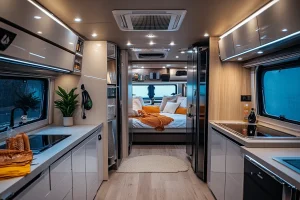
 Concurrently, the residential aspects of an RV demand cleaning protocols akin to those used in a home. The interior living space features a variety of surfaces and materials that require specific care. Hard surfaces such as countertops, dashboards, cabinetry, and flooring need regular wiping and, where appropriate, disinfection. More critically, the soft surfaces—including carpets, fabric or leather upholstery on sofas and dinettes, curtains, and mattresses—require periodic deep cleaning to remove embedded dirt, allergens, and potential contaminants.
This aspect of RV care is crucial not only for hygiene and comfort but also for preventing the degradation of these materials and the proliferation of issues like mold or pests within the living quarters.
This “hybrid” challenge means that RV owners and detailers must possess a broader scope of knowledge, a more diverse toolkit, and a wider array of cleaning products than would be necessary for detailing a car or cleaning a house alone. Using exclusively automotive products might neglect the specific hygiene and material care requirements of the interior living space.
For instance, an automotive wax is unsuitable for wooden cabinets, and a tire cleaner should never be used on upholstery. Conversely, relying solely on household cleaning products could damage automotive-grade finishes, fail to provide adequate protection against road-related wear and tear, or be incompatible with the specialized materials used in RV construction (like EPDM roofing or gel-coated fiberglass).
A truly comprehensive RV detailing regimen, often described as a “roof-to-toe” service, must harmoniously integrate techniques and products suitable for both the rugged demands of the road and the comfort expectations of a home.
C. Your RV Detailing Arsenal: Essential Tools, Supplies, and Safety Gear
Embarking on a thorough RV detailing project requires a well-stocked arsenal of tools, supplies, and safety equipment. The sheer size and complexity of an RV, with its diverse materials and systems, mean that a haphazard approach with limited tools will likely yield unsatisfactory results and can even risk damage.
A foundational toolkit includes basic items such as multiple buckets (the two-bucket wash method is highly recommended for exterior washing), a quality hose with an adjustable nozzle, various sponges suitable for different surfaces, an assortment of brushes (soft-bristled for delicate finishes, stiffer for tires and scrubbing), plenty of clean rags or microfiber towels, and a sturdy ladder to safely access the roof and upper portions of the RV.
Beyond these basics, several pieces of specialized equipment can significantly enhance the efficiency and effectiveness of the detailing process. A hose-mounted foam gun or foam cannon, when paired with a good quality vehicle shampoo, helps to pre-soak surfaces and provide excellent lubrication, lifting dirt and minimizing the risk of scratches during washing. For those looking to restore faded finishes or apply waxes and sealants with professional results, a mechanical buffer or polisher (either rotary or dual-action) is invaluable. A wet/dry vacuum cleaner with various attachments is indispensable for interior cleaning, tackling everything from carpets and upholstery to crevices in the dashboard.
The selection of cleaning products is equally critical. Generic, one-size-fits-all cleaners are rarely suitable for the varied materials found in an RV. Specialized cleaning solutions formulated for specific sections and materials are essential for achieving optimal results without causing harm.
This includes dedicated RV roof cleaners compatible with EPDM rubber, TPO, or fiberglass ; pH-neutral automotive shampoos for painted and gel-coated sidewalls ; bug and tar removers for the front cap ; non-acidic wheel cleaners and tire dressings ; streak-free glass cleaners (ammonia-free for tinted windows); and a range of interior cleaners for upholstery, carpets, vinyl, wood, and appliances.
For maintenance tasks, items like dry lubricants for slide-out mechanisms , rubber seal conditioners , holding tank treatments , headlight restoration kits , and windshield chip repair kits are also part of a comprehensive RV care toolkit.
Safety should always be a priority. Protective gear such as chemical-resistant gloves, safety glasses or goggles to shield eyes from splashes and debris, and potentially a mask when working with strong chemicals or creating dust (e.g., during sanding for oxidation removal) are important. Non-slip footwear is crucial, especially when working on a wet roof or ladder.
To provide a clearer overview of the necessary equipment, the following table outlines a master checklist of tools and supplies, categorized by detailing task. This checklist can serve as a practical guide for assembling a complete RV detailing kit, ensuring that the owner is well-prepared for any cleaning or maintenance challenge.
Table 1: Master Checklist of RV Detailing Tools & Supplies
| Category | Tools & Supplies |
|---|---|
| Exterior Wash | Buckets (at least two), hose with adjustable spray nozzle, hose-mounted foam gun/cannon, wash mitts (microfiber, lambswool), long-handled soft-bristle brushes, sturdy ladder, wheel brushes, tire brushes, RV-specific shampoo/wash |
| Drying | High-quality microfiber drying towels, synthetic chamois (e.g., The Absorber® ), squeegee for windows. |
| Bug/Tar/Streak Removal | Specialized bug and tar remover products, black streak removers, soft cloths or non-abrasive brushes. |
| Oxidation/Polishing/Waxing | Polishing machine (rotary or dual-action), wool buffing pads (for heavy cutting), foam cutting/polishing/finishing pads, oxidation removers/compounds, polishes, waxes or polymer sealants, applicator pads, microfiber towels for residue removal. |
| Roof Care | Roof material-specific cleaner (e.g., for EPDM, TPO, fiberglass), soft-bristle brush or medium-nap mop, UV protectant/treatment. |
| Awning Care | Soft-bristle brush or sponge mop, awning cleaner (commercial or mild soap solution), bucket. |
| Window Care | Ammonia-free glass cleaner (especially for tinted windows), microfiber glass towels, newspaper , water spot removers, rain repellent treatment. |
| Interior Cleaning | Vacuum cleaner (handheld or compact, with crevice tool, brush, and upholstery attachments), microfiber cloths (consider color-coding for different areas), all-purpose cleaners, disinfectant sprays/wipes, specialized cleaners for upholstery (fabric/leather), carpets, wood, vinyl, and appliances; scrub brushes (various sizes/stiffness), steam cleaner (optional), mop and bucket or spray mop. |
| Specialized Systems | Holding tank treatment chemicals (deodorizers, enzyme treatments), slide-out mechanism dry lubricant (silicone or PTFE-based), slide-out rubber seal conditioner, headlight lens restoration kit, windshield chip repair kit. |
| Safety Gear | Chemical-resistant gloves (rubber, nitrile), disposable gloves, safety glasses or goggles, respiratory mask (for certain chemicals, sanding, or heavy dust), non-slip footwear. |
Having these items readily available not only makes the detailing process smoother and more effective but also safer. It allows the RV owner to address various cleaning needs as they arise and to perform preventative maintenance that is crucial for the vehicle’s longevity and enjoyment.
II. Mastering Exterior RV Care: Achieving a Showroom Shine from Roof to Wheels
 The exterior of an RV is its first line of defense against the elements and the first impression it makes. A comprehensive exterior care regimen is vital not only for appearance but also for preserving the structural integrity and value of the vehicle. This involves a systematic approach, starting from the top and working down, using appropriate techniques and products for each specific component.
A. The Foundational Exterior Wash: Roof, Sides, and Slide-Outs
The cornerstone of any exterior detailing job is a thorough wash. For an RV, this is a significant undertaking due to its size and varied surfaces. Adhering to best practices during this foundational step will make subsequent tasks easier and more effective.
General Principles:
It is always advisable to wash an RV in a cool, shaded area if possible. Direct sunlight can cause soap and water to dry too quickly, leading to water spots and streaks that are difficult to remove. The cardinal rule of washing any large vehicle, including an RV, is to work from the top down. This ensures that dirt and grime from upper areas are not washed down onto already cleaned lower sections, saving time and effort. Before applying any soap, give the entire RV a thorough rinse with plain water. This initial rinse helps to dislodge loose dirt, dust, and debris, preventing them from being ground into the finish during the washing process and making the soap more effective.
Roof Cleaning:
The roof is often the dirtiest part of an RV and the most critical to clean correctly, as runoff from the roof affects everything below it. The first and most crucial step is to identify the roof material, as this will dictate the choice of cleaner and cleaning method. Common RV roof materials include EPDM (ethylene propylene diene monomer) rubber, TPO (thermoplastic olefin), fiberglass, and aluminum. Using a cleaner that is incompatible with the roof material can cause significant damage, such as drying out and cracking rubber membranes or dulling fiberglass finishes. For instance, products containing petroleum distillates or harsh citric ingredients should be avoided on rubber or vinyl roofs as they can cause deterioration.
Once the correct cleaner is selected (examples include Dicor RV Roof Cleaner, Thetford Premium RV Rubber Roof Cleaner, or Camco Pro-Tec Rubber Roof Cleaner ), apply it to a small, manageable section of the roof at a time.
Scrub the area gently with a soft-bristled brush, a medium-nap wash mop, or a sponge, ensuring not to be overly aggressive, especially on rubber roofs which can be susceptible to abrasion. After scrubbing, rinse the section thoroughly with clean water before the cleaner has a chance to dry, and then proceed to the next section, overlapping slightly to ensure complete coverage. This methodical approach prevents the dislodged dirt and cleaning solution from drying on the roof and makes the process more manageable. The choice of roof cleaner and the diligence in keeping the roof clean have a direct impact on the rest of the RV’s exterior.
A poorly maintained roof is the primary source of the unsightly black streaks that often plague RV sidewalls. Therefore, selecting a material-compatible cleaner and protectant not only preserves the roof itself but also simplifies the cleaning of the surfaces below it. This top-down strategy is not merely a sequence of actions but a fundamental principle for easier overall maintenance.
Washing Sides & Slide-Outs:
After the roof has been cleaned and rinsed, attention can turn to the sides and any extended slide-outs. Begin by thoroughly wetting one entire side of the RV with clean water. The use of a hose-mounted foam gun or foam cannon is highly recommended for this stage. These tools, when used with a high-quality, pH-neutral RV or automotive shampoo (such as Chemical Guys CWS_301 Citrus Wash mentioned in 2), produce a thick layer of suds. This abundance of suds is not just for show; it plays a crucial role in lubricating the surface. This lubrication is vital as it helps to encapsulate dirt particles and lift them away from the finish, significantly reducing the risk of inducing micro-scratches or swirl marks as the surface is wiped. RVs often feature large expanses of gel coat or full-body paint, which are susceptible to scratching if dirt is dragged across them without adequate lubrication.
Using a clean wash mitt (microfiber or lambswool are excellent choices) attached to an extension pole for higher areas, or a soft-bristled wash brush, gently wash the foamed section. Work in small, manageable areas, typically from the top of the sidewall downwards. This ensures that dirty runoff is always flowing over uncleaned areas. Rinse each section thoroughly with clean water before the soap has a chance to dry, especially if working in warmer conditions. Pay particular attention to slide-out sections, ensuring they are cleaned thoroughly when extended.
The same principles of pre-rinsing, foaming, gentle washing, and thorough rinsing apply to these areas as well. Proper washing technique, emphasizing lubrication and gentle agitation, not only cleans effectively but also preserves the integrity and shine of the RV’s finish, minimizing the need for more aggressive corrective procedures like polishing or compounding later on.
B. Eradicating Stubborn Grime: Effective Bug and Black Streak Removal
Even with regular washing, RVs are prone to accumulating stubborn grime such as insect remains and black streaks, which require targeted approaches for effective removal.
Bug Removal:
The front cap of an RV often bears the brunt of insect collisions during travel. These insect remains should be addressed as promptly as possible, as their acidic nature can etch into and permanently damage paint, gel coat, or clear coats if left for extended periods. For fresh bug splatters, a thorough soaking with water followed by gentle scrubbing with a soft brush or wash mitt during a regular wash may suffice. However, for more dried-on or stubborn deposits, specialized bug remover products are highly effective. Products such as Turtle Wax Bug and Tar Remover 2 or Gabe’s Pride RV Streaker Black Streak Cleaner and Bug Remover 15 are formulated to break down these organic residues.
The typical application method involves spraying the bug remover directly onto the affected areas and allowing it to soak for a short period, as per the product’s instructions (often a few minutes, as suggested by ). This dwell time allows the chemicals to loosen the bug remains. After soaking, gentle agitation with a soft bug sponge, a microfiber cloth, or a soft brush may be necessary. Finally, the area should be thoroughly rinsed with clean water. Some detailers also find that a warm, damp dryer sheet can be effective in loosening bugs, followed by a wash and rinse. Regardless of the method, avoiding harsh scrubbing that could scratch the finish is paramount.
Black Streak Removal:
Black streaks are a common nuisance for RV owners, typically appearing as dark, vertical lines running down the sides of the vehicle. These streaks are primarily caused by rainwater washing accumulated dirt, grime, roof material oxidation (chalking), and pollutants off the RV’s roof and down its sides. Therefore, the most effective long-term strategy for combating black streaks is meticulous and regular roof cleaning and the application of a quality roof protectant. Addressing the source—the dirty or degrading roof—is far more beneficial than merely treating the symptom of the streaks.
When black streaks do appear, several commercial products are available for their removal. Star Brite Black Streak Remover is often cited as a highly effective option. Other products include Camco Pro-Strength Black Streak Remover, general-purpose cleaners like Simple Green (diluted appropriately), and even WD-40, which some users report as effective for spot treatment. Gabe’s Pride RV Streaker is another product designed for this purpose.
The general method for using these removers involves wetting the surface (though some products like Star Brite may be applied to a dry surface), spraying the product directly onto the black streaks, and allowing it to dwell for a short period (typically 30-60 seconds, as per ). Gentle scrubbing with a soft cloth or brush may be required for stubborn streaks. It is crucial to rinse the area thoroughly and immediately with plenty of water after the product has worked. Always test any black streak remover in an inconspicuous area first, especially on or near decals, pinstripes, or sensitive paint finishes, as some stronger formulations can potentially cause damage if left on too long or if incompatible with the surface. Persistent black streaks, if only treated superficially without addressing the underlying roof condition, will inevitably return. This signals an ongoing issue with roof maintenance that could lead to more significant problems over time, including accelerated degradation of the roof membrane or sidewall finishes.
C. Restoring Your RV’s Glory: Oxidation Removal, Gel Coat Restoration, and Polishing
Over time, exposure to sunlight (UV radiation), weather, and environmental pollutants can cause the exterior finish of an RV, particularly those with gel coat, to degrade. This degradation often manifests as oxidation, where the surface loses its gloss, becomes dull, chalky to the touch, and can even feel porous. Restoring this faded glory requires more than just washing; it involves processes to remove the oxidized layer and then polish the underlying surface back to a shine.
Understanding Oxidation and Gel Coat:
Gel coat is the pigmented resin layer that forms the smooth, shiny, and protective outer surface on most fiberglass RVs. When new and well-maintained, it provides a durable and attractive finish. However, as it ages and is exposed to the elements, especially UV rays, the chemical structure of the gel coat can break down. This process of oxidation results in the chalky, faded appearance. The increased porosity of an oxidized gel coat also makes it more susceptible to staining and further degradation. Applying wax directly to a heavily oxidized surface is generally ineffective; the wax cannot bond properly to the compromised surface, and the result is often a smeared, uneven mess that fails to produce a shine. The oxidation must be physically removed first.
Oxidation Removal Process:
The first step in tackling an oxidized finish is a thorough wash and dry of the RV to remove all surface dirt and contaminants. For moderate to heavy oxidation, a chemical and mechanical approach is usually necessary. This typically involves using a polishing machine—a rotary buffer is often preferred for its cutting power on heavily oxidized gel coat, though a dual-action polisher can also be effective and is generally safer for beginners—equipped with a wool buffing pad or an aggressive foam cutting pad.
A specialized oxidation remover or a heavy-cut polishing compound is then applied to the pad or the surface. Examples include Meguiar’s M49 Heavy Duty Oxidation Remover or Meguiar’s M67 One-Step Compound (mentioned as effective in ), or other compounds specifically formulated for marine or RV gel coats. The product is worked into a small, manageable section at a time, typically 2 feet by 2 feet, using the polisher at a low to moderate speed with firm, even pressure and overlapping passes to ensure uniform cutting. It’s crucial to keep the polisher moving and not dwell in one spot for too long, as this can generate excessive heat and potentially burn or damage the gel coat.
The buffing pad should be cleaned frequently (spurred if wool, or rinsed/changed if foam) to remove accumulated compound and oxidized material, maintaining its cutting effectiveness. This process is continued section by section until the chalky, oxidized layer is removed, revealing a smoother, though not yet glossy, surface.
Gel Coat Restoration/Polishing:
Once the heavy oxidation has been successfully removed, or if the surface was only lightly oxidized to begin with, the next stage is polishing. This step refines the surface, removes any hazing or swirl marks left by the more aggressive compounding stage, and brings out the depth and gloss of the gel coat.
This often involves a multi-step polishing process, starting with a medium-cut polishing compound to further smooth the surface and address any remaining minor imperfections or oxidation. This is typically applied with a foam polishing pad on a dual-action or rotary polisher. Following the medium-cut polish, a fine or finishing polish is used to achieve maximum gloss, clarity, and reflectivity. Products like Polyshine® Premium Fiberglass & Composite Polish are designed for this purpose. Again, the polish is applied in modest amounts to small sections, worked thoroughly with the polisher, and the pad should be checked regularly for buildup and cleaned or changed as needed. After each polishing stage, the residue is wiped off with a clean microfiber towel to inspect the results.
It is important to recognize that gel coat is a finite layer. Each time aggressive compounding is performed to remove oxidation, a small amount of this layer is abraded away. While necessary for restoring a severely neglected finish, frequent and heavy-duty restoration can prematurely wear down the gel coat.
Therefore, a proactive approach involving regular washing and the consistent application of high-quality waxes or sealants to a healthy gel coat is far more beneficial in the long run. This “less is more, more often” principle—meaning less aggressive intervention performed more regularly in the form of protection—can prevent severe oxidation from developing in the first place, thereby minimizing the need for intensive restoration and preserving the RV’s gel coat for a longer lifespan.
D. Shielding Your Investment: Waxing vs. Sealant Application – Pros, Cons, and How-To
After the RV exterior has been thoroughly cleaned, and any oxidation or imperfections have been corrected, the final crucial step in paint and gel coat care is the application of a protective layer. This is typically achieved through waxing or the use of a paint sealant. Both serve the primary purpose of shielding the RV’s finish from damaging UV rays, moisture, road grime, bird droppings, and other environmental contaminants, thereby helping to maintain its appearance, prolong its life, and make future cleaning easier. However, traditional waxes and modern synthetic sealants differ in their composition, characteristics, and performance.
Wax (Natural):
Traditional automotive waxes, often based on natural ingredients like carnauba wax (derived from palm tree leaves), are prized for the deep, warm, and wet-look shine they impart to a finish. They work by filling in microscopic pores and imperfections in the paint or gel coat, creating a smooth, hydrophobic (water-repellent) surface. This barrier helps to repel water and dirt, making the RV easier to wash, and can also offer some protection against minor scratches and swirl marks. However, a notable drawback of natural waxes, especially on a large vehicle like an RV that endures significant exposure, is their relatively short lifespan. They may only provide effective protection for a couple to a few months before reapplication is necessary.
Sealant (Synthetic):
Paint sealants are synthetically engineered polymers designed to offer more robust and longer-lasting protection than natural waxes. Instead of merely sitting on top of the surface like a wax, sealants chemically bond with the paint or gel coat, creating a more durable and resilient barrier. They are known for providing excellent protection against a wide range of environmental assaults, including harsh UV radiation, acid rain, road salt, and extreme temperatures. The shine produced by sealants is often described as a slick, reflective, or glass-like gloss. Their durability is a key advantage, with many sealants lasting for several months, and some advanced formulations even up to a year or more, reducing the frequency of application.
Differences & Choice:
The primary difference lies in their composition and how they interact with the surface: wax provides a sacrificial layer, while sealants create a bonded shield. This generally translates to sealants offering superior durability and longevity. There are differing perspectives on which offers better overall protection; some argue that the way wax repels contaminants before they can etch the paint is superior 29, while others champion the tougher, bonded barrier of sealants.
The choice between wax and sealant often comes down to a trade-off between the desired aesthetic, the level of durability required, and the owner’s willingness to reapply the product. For an RV, which has a vast surface area, the longer protection window offered by a sealant can be a significant advantage in terms of labor and time. Many modern products also offer hybrid formulations, combining natural waxes with synthetic polymers to try and deliver the best of both worlds—the shine of carnauba with enhanced durability. It’s generally advised that once a sealant has cured, applying a traditional wax over it is not necessary and the wax may not adhere well. It’s best to choose one primary type of protection or a product specifically designed for layering.
Application:
Regardless of whether a wax or sealant is chosen, the application process shares common principles:
- Preparation is Key: The RV exterior must be impeccably clean and completely dry. If any oxidation was present, it must have been removed and the surface polished prior to protection. Applying wax or sealant over a dirty or oxidized surface will trap contaminants and yield poor results.
- Thin, Even Coats: Apply a small amount of the product to a clean, damp sponge or a dedicated foam or microfiber applicator pad. Spread it thinly and evenly over a manageable section of the RV at a time (e.g., a 3×3 foot area). Work in overlapping circular motions or follow the lines of the body panels. Fiberglass surfaces may tend to absorb slightly more product initially.
- Allow to Haze: Let the applied product dry to a haze according to the manufacturer’s instructions. The time required will vary depending on the product and ambient temperature/humidity.
- Buff to a Shine: Once hazed, use a clean, dry, high-quality microfiber towel to gently buff off the residue, revealing a slick, glossy finish. Change towels frequently as they become loaded with residue.
- Special Considerations: If the RV has custom graphics or decals, ensure the chosen wax or sealant is safe for use on them, or use a specialized product like Graphix Wax for those areas to prevent damage or discoloration.
Regularly protecting the RV’s finish with a quality wax or sealant is a critical investment in its appearance and long-term preservation, making future cleaning easier and safeguarding it against the elements.
E. Specialized Exterior Component Care
Beyond the main body of the RV, several specialized components require dedicated cleaning and maintenance to ensure their proper function and longevity. These include the roof, awnings, windows, wheels and tires, and exterior storage compartments.
1. RV Roof Deep Cleaning, UV Treatment, and Protective Coatings
The RV roof is constantly exposed to the harshest conditions—intense sun, rain, snow, and debris. Proper care is essential not only for the roof itself but for the integrity of the entire vehicle, as roof damage can lead to catastrophic water leaks and expensive interior repairs.
Deep Cleaning:
As previously discussed (Section II.A), deep cleaning the roof begins with identifying the roof material (EPDM, TPO, fiberglass, aluminum) and selecting a compatible cleaner. Brands like Dicor, Thetford, and Camco offer specialized roof cleaning solutions. The process involves applying the cleaner in sections, gently scrubbing with a soft brush or mop, and rinsing thoroughly to remove all dirt, grime, mold, mildew, and cleaner residue.
UV Treatment and Protective Coatings:
One of the primary enemies of an RV roof is ultraviolet (UV) radiation from the sun. UV rays cause materials to degrade over time, leading to fading, oxidation, drying out, and eventually cracking. Applying a UV protectant is a critical step in extending the life of the roof.
Products like Dicor Roof-Gard RV Roof Protectant are formulated for various roof types (rubber, vinyl, PVC, TPO, fiberglass) and create a barrier against UV damage. Some cleaning products, such as Star Brite RV Wash & Wax or Bio-Kleen RV Roof Cleaner & Protectant, also offer built-in UV protection. For a more permanent solution, spray-on coatings like FlexArmor can provide a seamless, durable, long-lasting protective barrier, potentially eliminating the need for frequent reapplications of temporary protectants.
The application of spray-on protectants like Roof-Gard typically involves ensuring the roof is clean and dry. The product is then sprayed onto the surface in manageable sections, out of direct sunlight, and spread evenly with a soft cloth or sponge mop. For maximum UV protection, these types of treatments often need to be reapplied every 3 to 5 weeks, or after each cleaning. The relatively small investment in time and cost for regular UV protection pales in comparison to the expense of repairing or replacing a damaged roof and addressing subsequent water intrusion. It is an ounce of prevention that is truly worth a pound of cure.
A crucial caution is to avoid any maintenance products containing petroleum distillates or citric ingredients on rubber (EPDM) or vinyl (TPO) roofs, as these chemicals can cause significant damage to the membrane and shorten its lifespan. Always check product labels for compatibility.
To simplify the selection process, the following table provides guidance on choosing cleaners and protectants based on common RV roof materials:
Table 2: RV Roof Cleaner & Protectant Selection Guide
| Roof Material Type | Key Characteristics for Cleaner | Key Characteristics for Protectant | Recommended Product Examples (from research) | Application Frequency Notes (Protectant) |
|---|---|---|---|---|
| EPDM Rubber | Non-abrasive, pH-neutral, avoid petroleum distillates/citrus | UV blocker, flexible, water-based, non-petroleum based, breathable | Dicor RP-RC-1GL Deep Cleaning RV Rubber Roof Cleaner, Thetford Premium RV Rubber Roof Cleaner | Every 3-5 weeks for spray-on types |
| TPO | Mild, non-abrasive, avoid harsh solvents/petroleum distillates | UV blocker, flexible, compatible with TPO | Cleaners/protectants specifically labeled safe for TPO (e.g., Dicor Roof-Gard ) | Every 3-5 weeks for spray-on types |
| Fiberglass | General RV wash/wax, or fiberglass-specific cleaner if oxidized | UV blocking wax or sealant, marine-grade protectants | Star Brite RV Wash & Wax , marine polishes/waxes | Seasonally, or as per product instructions |
| Aluminum | RV wash, mild detergent | Automotive wax or sealant with UV protection | Standard automotive waxes/sealants | Seasonally, or as per product instructions |
2. Awning Cleaning and Maintenance (Fabric & Vinyl)
RV awnings provide valuable shade and extend the living space, but they are also susceptible to dirt, tree sap, bird droppings, mold, and mildew. Regular cleaning not only keeps them looking fresh but also extends the lifespan of the fabric and frame, prevents stubborn stains from setting, and avoids unpleasant odors caused by trapped moisture and debris.
Supplies & Solutions:
 Essential supplies include a soft-bristle brush or sponge mop (an extendable pole is helpful), a garden hose with a spray nozzle, a ladder if needed, and a bucket. For cleaning solutions, warm water mixed with a mild dish soap is suitable for general cleaning. Commercial RV awning cleaners are also available and may be more effective for tougher stains, particularly mold and mildew.
A homemade solution of one part white vinegar to four parts water can be effective for tackling mold and mildew; apply, let soak for about 15 minutes, then gently scrub and rinse. It’s critical to avoid harsh chemicals like undiluted bleach (unless specifically approved by the awning manufacturer), abrasive pressure washers, and stiff brushes, as these can damage the fabric, fade colors, or compromise waterproof coatings.20
Cleaning Process:
- Extend & Prep: Fully extend the awning to access both top and bottom surfaces. Gently brush or shake off any loose debris like leaves or dirt. A practical tip is to consider detaching the awning support legs (if your model allows) so the awning fabric can lie flatter against the RV’s side, providing a firmer surface for scrubbing.
- Apply Cleaner: Evenly spray or wipe your chosen cleaning solution onto the fabric. If using a diluted soap mix, apply generously and allow it to sit for a few minutes to loosen dirt and grime. An alternative method described involves applying soapy water, then carefully rolling up the awning for about five minutes to allow the solution to soak both the top and underside, then unrolling it again before scrubbing and rinsing.
- Gentle Scrub: Using your soft brush or sponge mop, gently scrub the fabric in a circular or back-and-forth motion. Focus on stained or soiled areas, but avoid excessive pressure that could stretch or damage the material.
- Rinse Thoroughly: Rinse the entire awning meticulously with clean water from the garden hose, ensuring all soap or cleaner residue is removed. Leftover soap can attract more dirt or cause discoloration over time when exposed to sunlight.
- Dry Completely: This is a crucial step. Allow the awning to air dry completely before retracting it. Rolling up a damp or wet awning is a primary cause of mold, mildew, and musty odors. If you must retract it while wet due to weather, unroll it to dry fully at the earliest opportunity.
Frequency & Tips:
Clean awnings at least once per camping season, or more frequently if you are a full-time RVer or often travel in humid, dusty, or forested environments. Some recommend monthly cleaning during active camping seasons. Cleaning on a cloudy day can be beneficial, as it prevents the cleaning solution from evaporating too quickly on a hot surface, which can leave residue.21
3. Crystal Clear Views: Comprehensive Window and Glass Cleaning (Including Water Stain Removal)
Clean windows are essential for safe driving visibility and enjoying the views from inside the RV. Both exterior and interior surfaces of windshields and side windows require regular attention.
Cleaners & Tools:
A variety of cleaners can be effective. Commercial glass cleaners, such as Meguiar’s Perfect Clarity Glass Cleaner, are readily available. Homemade solutions can also work well; a common recipe is a teaspoon of dish detergent mixed with a small amount of white vinegar in a pint of warm water. Another user-suggested formula for stubborn cleaning is a mixture of 10% household ammonia, 10% rubbing alcohol, and 80% distilled water (with a strong caution against ever mixing ammonia with chlorine bleach due to toxic gas formation). For application and wiping, clean microfiber glass towels are ideal for a streak-free finish. Some still prefer traditional methods like using crumpled newspaper 2 or a quality squeegee. For tinted windows, always use an ammonia-free glass cleaner to prevent damage to the tint film.
Method:
Spray the cleaner lightly onto the glass surface or onto the cleaning cloth. Wipe in smooth, overlapping motions—either side-to-side or up-and-down—and then follow with a dry section of the cloth or a separate dry cloth to buff away any remaining streaks.
Water Stain and White Drip Mark Removal:
RVs are particularly prone to stubborn water stains or white drip marks on windows, often caused by mineral-laden runoff from the roof, especially if the roof is chalking or has residues from cleaning products. These can be challenging to remove with standard glass cleaners.
- Vinegar Solutions: The acidity of white vinegar can help dissolve mineral deposits. Apply a vinegar/water solution, let it soak for a few minutes, then scrub gently and rinse/wipe clean.
- Specialized Cleaners/Techniques: For etched-in hard water spots, a dedicated water spot remover (e.g., Meguiar’s Water Spot Remover) might be necessary, potentially applied with a buffer or by hand polishing for more severe cases.
- Unconventional User Tips: Forum discussions reveal several unconventional methods RVers use for tough window residues. These include using Bounce Dryer Sheets (wet window, rub with dryer sheet, rinse well), Brillo pads (used with extreme caution to avoid scratching glass), Coca-Cola (for greasy smears, then rinsed), or even hot water with a very small amount of Clorox (again, with extreme caution due to bleach’s reactivity and potential to damage surrounding surfaces). These methods should be approached with caution and tested in an inconspicuous area first.
Diagnosing the source of persistent window stains is key. If white streaks consistently appear after rain, it strongly indicates that the roof is the culprit, either through accumulated dirt, chalking of the roof material, or residue from incompatible roof cleaners or protectants. In such cases, addressing the roof’s condition (thorough cleaning, proper sealing, and UV protection) is essential to prevent the window staining from recurring. This links directly back to the importance of meticulous roof care.
After cleaning, applying a rain repellent treatment like TriNova Windshield Rain Repellent or Rain-X to the exterior of the windshield can improve visibility during wet weather and make future cleaning easier. Don’t forget to clean wiper blades with rubbing alcohol to prevent streaking and ensure effective operation.
4. Wheel Rejuvenation and Tire Care: Polishing and Dressing
Wheels and tires are subjected to significant abuse from road grime, brake dust, mud, and varying temperatures. Proper care is important not only for aesthetics but also for safety and longevity, as neglected wheels can corrode and tires can suffer premature degradation.
Cleaning Wheels:
The type of wheel (e.g., aluminum, steel, clear-coated alloy) will influence the choice of cleaner. It’s generally best to use a non-acidic wheel cleaner to avoid damaging the finish. Products like Sonax Wheel Cleaner 2 or 3D BDX Wheel Cleaner (which changes color as it reacts with brake dust and iron deposits 6) are examples.
- Work on one wheel at a time, ensuring it is cool to the touch.
- Spray the cleaner generously onto the wheel surface and allow it to dwell for the time specified by the manufacturer.
- Use appropriate wheel brushes (soft-bristled for delicate finishes like painted or clear-coated wheels, stiffer brushes for more robust surfaces or heavily soiled areas) to agitate the dirt and brake dust from all parts of the wheel, including spokes, barrels, and lug nut recesses.
- Rinse the wheel thoroughly with a strong stream of water.
- Dry the wheel completely with a clean microfiber towel to prevent water spots.
Polishing Aluminum Wheels:
If aluminum wheels have become dull, oxidized, or stained, they can often be restored with polishing. After thorough cleaning and drying:
- Apply a suitable metal or aluminum polish (e.g., Meguiar’s G4400 Hot Rims Wheel Polisher or 3D Metal Polish ) to an applicator pad or a foam polishing cone/pad attached to a drill.
- Work the polish into the aluminum surface in sections. As the polish works, the residue will often turn black or gray as oxidation is removed.
- Buff off the residue with a clean microfiber towel to reveal a bright shine. Repeat as necessary.
Cleaning Tires:
Tires accumulate road grime, brake dust, and old dressing.
- Use a dedicated tire cleaner (e.g., Black Magic Bleche-Wite Tire Cleaner or 3D Yellow Degreaser ) and a stiff-bristled tire brush or sponge.
- Spray the cleaner onto the tire sidewall, scrub vigorously to lift embedded dirt and old dressing, and then rinse thoroughly. Ensure the tire is completely clean before applying any new dressing.
Tire Dressing/Protectant:
Applying a quality tire dressing after cleaning does more than just enhance appearance; it provides crucial protection. RV tires often “age out” due to environmental degradation (UV exposure, ozone) before their tread wears out. Therefore, the UV blocking capabilities of a good tire dressing are paramount for extending their usable life and preventing premature sidewall cracking and drying.1
- Ensure tires are completely clean and dry.
- Apply a quality rubber dressing or protectant (e.g., Aero Cosmetics Tire Protectant and Dressing or 3D Ultra Protectant / Speed Tire Shine ).
- Use an applicator pad or sponge to apply the dressing evenly to the tire sidewall. This provides a neat finish and helps prevent “sling” (product flinging onto the RV bodywork).
- Wipe off any excess. Some dressings offer a matte finish, while others provide a high-gloss shine; choose according to preference, but prioritize UV protection.
This focus on the protective aspect of tire care, rather than just the cosmetic shine, is a critical maintenance task that contributes to both safety and cost savings by maximizing the lifespan of expensive RV tires.
5. Exterior Storage Compartment Cleaning and Organization
Exterior storage compartments, often called bays or basements, are essential for stowing gear but can easily become dirty, disorganized, and even havens for pests or mildew if neglected. Regular cleaning is important for maintaining a pleasant RV environment and protecting stored items.
Cleaning Method:
- Empty Completely: Begin by removing all items from the compartment. This provides full access for cleaning and is an excellent opportunity to sort and declutter stored gear.
- Remove Loose Debris: A highly effective way to remove loose dirt, dust, leaves, and cobwebs is by using a battery-powered leaf blower. Direct the airflow to blow debris out of the compartment, not further into corners. A vacuum cleaner with a crevice tool can also be used.
- Wipe Down Surfaces: Once loose debris is removed, wipe down all interior surfaces of the compartment—walls, floor, and ceiling—with a damp cloth and a mild detergent solution or a mixture of vinegar and water. For more stubborn grime or if sanitization is desired, a non-toxic sanitizer can be used.
- Air Dry: Allow the compartment to air dry completely with the door open before reloading items. This helps prevent moisture buildup and potential mildew growth.
Inspection Opportunity:
 Cleaning out storage compartments offers a valuable chance for inspection. With the compartment empty, take a moment to visually check for any signs of water intrusion, such as stains, dampness, or rust. Examine the compartment door seals for any cracks, tears, or areas where they might be loose or compressed, as these are common entry points for water and pests.
Look for evidence of pest activity (droppings, gnaw marks, nests). Also, quickly inspect any visible wiring or plumbing that may pass through or near the compartment for any signs of damage or wear. Addressing such issues early can prevent more significant problems, turning a simple cleaning task into a proactive maintenance check.
Organization:
When reloading items, take the opportunity to organize them logically. Use bins, containers, or dividers to keep things tidy and prevent items from shifting excessively during travel. Ensure that any items stored are clean and dry to avoid introducing moisture or odors into the compartment.
III. Revitalizing Your RV Interior: A Sanctuary on Wheels
The interior of an RV is more than just a passenger cabin; it’s a living space, kitchen, bathroom, and bedroom all rolled into one. Maintaining its cleanliness and hygiene is paramount for comfort, health, and the overall enjoyment of the RVing experience. A systematic approach to deep cleaning ensures all areas are addressed effectively.
A. Strategic Interior Deep Cleaning: The Top-Down Method and Surface Management
A successful interior deep clean starts with a strategic plan and adherence to a methodical process. This ensures efficiency and prevents re-contaminating already cleaned areas.
General Approach:
- Plan and Declutter: Before starting, make a list of all areas needing attention and perhaps prioritize them. The first practical step is to remove all trash, clutter, and loose items from the spaces to be cleaned. This creates a clear working area and makes it easier to spot dirt, stains, or any damage.
- Top-Down Method: Just as with exterior washing, the golden rule for interior cleaning is to work from the top down. Start with ceilings, light fixtures, and high vents, then move to walls, windows, and upper cabinets. Next, address furniture and countertops, and finally, clean the floors. This logical progression ensures that any dust or debris dislodged from higher surfaces falls onto areas yet to be cleaned.
- Appropriate Cleaners and Testing: RV interiors feature a wide variety of materials, from laminates and plastics to wood veneers, fabrics, and specialized appliance finishes. It’s crucial to use cleaning products appropriate for each specific surface to avoid damage such as discoloration, warping, or etching. If ever in doubt about a cleaner’s compatibility, test it first on a small, inconspicuous area.
- Ventilation: Ensure good ventilation by opening windows and roof vents while cleaning, especially when using spray cleaners or products with strong odors.
- Microfiber Management: Using a system of color-coded microfiber cloths can significantly enhance hygiene by preventing cross-contamination between different areas, such as using a bathroom cloth in the kitchen. For example, blue cloths could be designated for glass, green for general surfaces, yellow for the kitchen, and red for the bathroom. This simple practice is a low-cost, high-impact way to maintain a cleaner and healthier environment.
Ceilings & Vents:
- Begin by dusting along the seams where walls meet the ceiling, around light fixtures, window valances, and the trim of slide-outs. An extendable duster or a vacuum with a brush attachment works well.
- Vacuum dust and debris from RV air conditioning filters and vent fan screens. AC filters can often be removed and washed with warm water and mild dish soap, then thoroughly air-dried before reinstallation.
- Ceiling vent covers (like circular vents) and vent fan blades can typically be wiped down or removed for washing with warm, soapy water. Deep clean vent fans a few times a year.
- Clean light fixtures according to their material (e.g., glass covers can be washed, plastic wiped). Gently scrub any spots or stains on the ceiling itself with a damp cloth and mild soapy water, being careful not to oversaturate the ceiling material.
Walls:
- RV walls are often made of luan paneling with a vinyl or wallpaper-like coating. These should be cleaned gently. Wipe them down with a microfiber cloth lightly dampened with warm water and a mild dish soap solution. Avoid using excessive water, which could damage the paneling.
- Follow up by wiping the walls with a clean, dry microfiber cloth to remove any moisture.
- For stubborn scuffs or marks, a melamine foam eraser (like a Magic Eraser) can be effective, but always test it in an inconspicuous spot first, as it can be abrasive and may remove paint or affect the finish on some surfaces.
Windows (Interior), Screens, Blinds, Curtains:
- Clean the interior surfaces of windows using an appropriate glass cleaner (see Section II.E.3 for details).
- Vacuum window screens regularly to remove dust. For a deeper clean, screens can often be carefully removed, vacuumed, then washed gently with warm soapy water and a soft brush, rinsed, and allowed to dry completely before reinstallation.
- Wipe down window ledges, sills, and tracks with a damp cloth. A small brush or compressed air can help dislodge debris from tight tracks.
- Clean window valances according to their material (often fabric, which can be vacuumed or spot-cleaned).
- Vacuum or wipe down blinds (vinyl, metal, or wood). Fabric curtains should be laundered or dry-cleaned according to their care instructions.
General Surface Wiping:
- Wipe down all hard surfaces, including countertops, tables, shelves, and the dashboard, using an appropriate all-purpose cleaner or a solution of equal parts white vinegar and water (test vinegar solution first, as it’s not suitable for all surfaces like unsealed stone).
- Pay special attention to high-touch areas such as door handles, cabinet knobs, light switches, and control panels. These should be regularly cleaned and disinfected using sprays or wipes that are safe for the specific surfaces.
By following this systematic, top-down approach and using surface-appropriate cleaners, the RV interior can be transformed into a truly clean, healthy, and inviting space.
B. Comfort Zones: Cleaning Carpets, Upholstery (Fabric & Leather), and Mattresses
The soft furnishings in an RV—carpets, upholstery, and mattresses—contribute significantly to comfort but can also trap dirt, allergens, odors, and moisture. Proper cleaning and maintenance are essential for hygiene and longevity. Before cleaning any upholstery or carpet, it’s non-negotiable to identify the material and check for manufacturer’s cleaning instructions or codes, usually found on a tag. Using an incorrect product or method can lead to irreversible damage, such as shrinkage, discoloration, or material breakdown, which is costly to rectify and diminishes the RV’s appeal.
Carpets:
RV carpets, though often limited in area, experience concentrated foot traffic and are prone to spills.
- Vacuuming: Regular and thorough vacuuming is the first line of defense. A compact, powerful handheld vacuum or a slim canister vacuum with good attachments is ideal for RV spaces. Pay attention to edges and under furniture.
- Spot Treatment: Address spills and stains immediately to prevent them from setting. Blot the spill (don’t rub) with a clean cloth or paper towel to absorb as much as possible. Then, use a commercial carpet spot remover suitable for the carpet fiber or a homemade solution (e.g., a teaspoon of mild dish soap in two cups of water ) to gently treat the stain. Always test spot treatments in an inconspicuous area first for colorfastness.
- Protective Treatment: Consider applying a carpet protectant (like Scotchgard, if compatible) after a deep clean. This creates a barrier that helps repel spills and dirt, making future cleanups easier.
- Deep Cleaning: Periodically, carpets will benefit from a deeper cleaning to remove embedded dirt and refresh the fibers. This can be done by hiring a professional carpet cleaning service (some, like Stanley Steemer, offer RV cleaning ) or by renting a carpet cleaning machine suitable for small spaces. Aim for a deep clean at least once a year, or more frequently if the RV sees heavy use or if occupants have allergies.
Upholstery (General):
Regardless of material, begin by thoroughly vacuuming all upholstered surfaces, including sofas, dinette cushions, and captain’s chairs. Use a crevice tool to reach into seams and under cushions where crumbs and dirt accumulate.
Fabric Upholstery:
Fabric upholstery can be comfortable and stylish but may absorb odors and stains more readily than leather.33
- Routine Care: Regular vacuuming is key. For lingering odors between deep cleans, fabric freshener sprays can be used, provided they are compatible with the material.
- Cleaning: If cushion covers are removable and machine washable (check the care label!), launder them according to instructions, typically on a gentle cycle with mild detergent. For non-removable covers or spot cleaning, a mild upholstery cleaner or a DIY solution (e.g., one tablespoon of dish soap in 1.5 cups of water, sprayed lightly and blotted ) can be used. Always test first.
- Professional Cleaning: For a thorough deep clean and to address stubborn stains or widespread soiling, professional upholstery cleaning is recommended at least annually or after a long trip. Professionals have the equipment and expertise to safely and effectively clean various fabric types.
Leather Upholstery:
Leather adds a touch of luxury but requires specific care to prevent it from drying out, cracking, or fading.33
- Cleaning: After vacuuming away loose dirt, wipe down leather surfaces with a cleaner specifically designed for leather (e.g., Leather Honey Leather Cleaner ). These cleaners help remove dirt and grime without stripping the leather’s natural oils. Some sources suggest a very dilute water-vinegar solution for wiping, followed by drying and gentle rubbing with a cloth the next day , but vinegar can be harsh on some leathers, so extreme caution and testing are advised.
- Conditioning: Regularly apply a quality leather conditioner after cleaning. This replenishes moisture, keeps the leather supple, and protects against cracking and UV damage. This is a crucial step often best performed by professionals or with high-quality consumer products.
- Professional Care: For deep cleaning, stain removal, or restoration of worn leather, professional services are often the best choice to avoid damage.
Mattress Cleaning:
A clean mattress is vital for a healthy sleep environment in an RV.
- Routine Care: Remove and launder all bedding—sheets, blankets, mattress pads, and pillow protectors—regularly. Mattress and pillow protectors should ideally be washed every 1-2 months.
- Vacuuming: Thoroughly vacuum the mattress surface using an upholstery attachment. A HEPA-filter vacuum is recommended to capture fine dust particles, dead skin cells, and potential mold spores.
- Sanitizing and Deodorizing:
- For general sanitizing, lightly spray the mattress with a mixture of equal parts water and white vinegar, or a fabric-safe disinfectant. Wipe with a lightly dampened cloth. It’s crucial to avoid soaking the mattress, as excess moisture can lead to mildew.
- To neutralize odors, generously sprinkle baking soda over the entire mattress surface. Let it sit for several hours (or even overnight if possible) to absorb odors, then vacuum it up thoroughly.
- Mold Treatment (especially after water exposure): If mold is present (often indicated by dark spots or a musty smell), it needs immediate attention. Scrub the affected area with a solution of hydrogen peroxide (test on a small, hidden spot first). Wipe the area clean with a damp cloth and ensure it dries completely and thoroughly. If mold is extensive or has penetrated deep into the mattress layers, replacement is often the safest option, as embedded mold can pose serious health risks.
- Drying: After any cleaning or sanitizing that involves moisture, ensure the mattress dries completely. If possible, place it in direct sunlight for a few hours, as UV rays have natural sanitizing properties. Alternatively, use fans and a dehumidifier indoors to expedite drying.
- Protection: Using a quality waterproof and breathable mattress cover is an excellent preventative measure against spills, moisture, and allergens, and can make future cleaning much easier.
Understanding the specific materials of your RV’s soft furnishings and applying the correct cleaning and conditioning methods will keep these comfort zones fresh, hygienic, and looking their best for years to come.
C. Living Spaces: Floors, Walls, and Wood Cabinetry Care (Cleaning & Conditioning)
 The main living areas of an RV, including floors, walls, and wooden cabinetry, form the backdrop of daily life on the road and require consistent care to maintain their appearance and integrity.
Floors (Vinyl/Linoleum/Hardwood/Laminate):
Most RVs feature durable and relatively easy-to-clean hard flooring options in high-traffic areas.
- Routine Cleaning: Regular vacuuming or sweeping is essential to remove grit, dust, and debris that can scratch or dull the floor finish.
- Spill Management: Wipe up spills immediately, before they have a chance to set or soak in. Blotting with a paper towel is often sufficient for fresh liquid spills.
- Deeper Cleaning: For a more thorough clean, use a damp mop (not wet) with plain water or water mixed with a mild cleaner specifically formulated for the type of flooring in your RV (e.g., vinyl floor cleaner, laminate floor cleaner). It’s important not to oversaturate the flooring with water, especially near edges where it meets carpet or along seams, as excess moisture can seep underneath and cause damage or mildew. Microfiber flat mops or spray mops are often good choices as they allow for controlled moisture application.
- Floor Vents: Don’t forget to clean floor vents. Carefully remove the vent covers (often with a screwdriver), vacuum out any accumulated dust and debris from the duct opening, wipe the vent covers clean with a damp cloth, and then replace them.
- Professional services like Stanley Steemer can also clean various hard flooring types including hardwood, stone, and tile and grout if present in an RV.
Walls:
Wall cleaning has been generally covered in Section III.A. The key is to use gentle methods, such as wiping with a lightly dampened microfiber cloth and mild soapy water, and to test any cleaners in an inconspicuous area first, especially on wallpapered or vinyl-coated paneling common in RVs.
Wood Cabinetry & Tables:
RV cabinetry and tables, while designed to be lightweight, often feature wood or wood-veneer finishes that require careful cleaning and conditioning to maintain their appearance. A “gentle but consistent” approach is best for these surfaces. RV wood components are often more sensitive to harsh chemicals than solid hardwood furniture in a traditional home due to their construction with veneers or lightweight woods and specialized finishes designed for weight savings.
- Dusting and Wiping: Regularly dust hardwood doors, cabinet fronts, and tables with a soft, clean cloth. For cleaning, the cloth can be lightly dampened with a dedicated wood cleaning polish or a very mild detergent solution. Wipe in the direction of the wood grain.
- Spill Management: Promptly wipe up any spills with a soft, absorbent cloth to prevent staining or water damage. Moisture is a key enemy of wood finishes and veneers.
- Products to Avoid: It is crucial to avoid using ammonia-based cleaners (often found in all-purpose sprays or glass cleaners) or products containing silicone oils on wood cabinetry and tables. Over time, ammonia can dull or damage the finish, while silicone can create a buildup that is difficult to remove and may interfere with future refinishing or repairs. Frequent dusting and wiping with very mild, approved cleaners are preferable to infrequent heavy cleaning with stronger, potentially damaging chemicals.
- Interior of Cabinets: While cleaning the exterior, also wipe down the inside surfaces of cabinets and drawers with a damp cloth to remove dust and any residue. This is also a good time to check for any signs of pests or moisture.
Consistent care of these living space elements contributes significantly to the overall cleanliness, comfort, and preservation of the RV’s interior.
D. Functional Hubs:
The kitchen and bathroom are high-use areas in an RV that demand meticulous cleaning and sanitization for both hygiene and the proper functioning of appliances and fixtures.
1. Kitchen Deep Clean: Countertops, Sinks, and Appliance Detailing (Refrigerator, Microwave, Stove, Oven Interior, Vent Hoods)
The RV kitchen, though compact, is a workhorse. Keeping it clean is essential for food safety and a pleasant cooking environment. When cleaning RV appliances, it is paramount to consult the manufacturer’s manuals for specific cleaning instructions and recommended products, as these units are often specialized and may have materials or components sensitive to certain chemicals. Using an incorrect cleaner or method could lead to damage or even void a warranty.
Countertops & Sinks:
- Countertops: Wipe down all countertop surfaces regularly. Use disinfectant sprays or wipes suitable for the material. For laminate countertops, a general-purpose spray cleaner can be used for stubborn stains; however, avoid harsh chemicals like drain cleaners, oven cleaners, or allowing undiluted bleach to sit on the surface, as these can cause damage. For solid surface countertops, soapy water, ammonia-based cleaners (if compatible with the specific solid surface material – test first), or commercially available solid surface cleaners will typically remove most dirt and residue. Watermarks can often be removed by wiping with a damp cloth followed by a dry towel.
- Sinks: Clean RV sinks with antibacterial solutions to prevent odors and bacteria buildup. For routine cleaning, dish soap and a sponge are usually sufficient. For a more thorough, antibacterial scrub, create a paste of baking soda and water, scrub the sink, and then rinse well. An old toothbrush can be useful for cleaning around faucets and drains. For tough spots or hard water stains, laying a cloth or paper towel soaked in white vinegar over the area for a short time can help dissolve deposits (rinse thoroughly afterward).
Refrigerator/Freezer:
- Regularly empty the refrigerator and freezer, discarding any expired food items.
- Wipe down all interior shelves, drawers, and walls with a food-safe cleaner or a solution of baking soda and water. Sanitize as needed.
- If your RV has an absorption refrigerator or a model prone to frost buildup, defrost the freezer compartment as needed (Outdoorish.com provides a guide on this, as referenced in ). Most residential-style refrigerators in newer RVs are frost-free.
- An important maintenance check is the refrigerator door seals. Use the “dollar bill test”: close the door on a dollar bill. If you can easily pull the bill out with little to no resistance, the seal may be compromised, leading to inefficient cooling and energy waste. Adjust or replace seals as needed.
Microwave/Convection Oven:
- Wipe the interior of the microwave regularly. To loosen dried-on food splatters, place a microwave-safe bowl of water inside and microwave for about 5-10 minutes; the steam will help soften the grime, making it easier to wipe away with a cloth.
- For RV microwave convection ovens, which can accumulate more grease and baked-on food, a bit more effort may be required. A handheld steamer or a mild degreaser (ensure it’s safe for the oven’s interior finish by checking the manual) can be helpful.
- Don’t forget to clean the underside of a built-in microwave and, if equipped, the grease filter(s). These filters should be cleaned regularly (e.g., monthly) by washing them in warm, soapy water (similar to range hood filters).
Stove/Oven:
- Wipe down the exterior of the stove. Clean the stovetop surface and burner grates with warm, soapy water or a cleaner appropriate for the material (e.g., glass cooktop cleaner, stainless steel cleaner).
- To clean under the stovetop (where crumbs and spills often accumulate), carefully remove the burner grates. Some RV stovetops allow the top surface to be lifted or removed for access underneath. Vacuum out loose debris, then gently wash the area with warm, soapy water and a soft brush or cloth.
- For the oven interior, wipe up spills as soon as possible. For general cleaning, use warm, soapy water and avoid abrasive scouring pads or cleaners that could damage the oven lining. For heavily baked-on food or grease, an oven cleaner may be necessary. Carefully follow the oven cleaner’s instructions and ensure it is safe for your specific RV oven type by consulting the appliance manual. Ensure good ventilation when using oven cleaners.
Vent Hoods (Range Hoods/Fans):
- The grease filter in the range hood is crucial for trapping airborne grease. This filter should be removed and cleaned regularly (e.g., monthly or as needed depending on cooking frequency). Most metal mesh filters can be washed in hot, soapy water (dish soap is effective at cutting grease) or run through a dishwasher if manufacturer instructions permit.
- Wipe down the exterior and accessible interior surfaces of the vent hood with a degreasing cleaner or warm, soapy water.
General Kitchen Cleaning:
- Wipe down cabinet faces, drawers, walls, and any backsplash surfaces.
- A helpful tip for repelling ants in the kitchen area is to wipe surfaces with a vinegar solution (ensure compatibility with surfaces first).
2. Bathroom Sanitization: Toilets, Showers, Sinks, and Preventing Mold, Mildew, & Odors
The RV bathroom, though compact, requires diligent cleaning and sanitization to maintain hygiene, prevent odors, and combat mold and mildew growth, which can thrive in these often-humid environments.
General Preparations:
Before starting to clean, remove all personal items (toiletries, towels, rugs) to provide clear access. Ensure good ventilation by opening any windows and turning on the exhaust fan or roof vent. Dust surfaces and sweep or vacuum the floor to remove loose dirt and hair. Given the limited space, using compact cleaning tools like small scrub brushes, microfiber cloths, and tools with extendable handles can make reaching all areas easier. Always opt for non-abrasive cleaners to protect the often delicate plastic, fiberglass, or acrylic surfaces found in RV bathrooms.
Toilets:
RV toilets require specific care to ensure proper operation of the waste system and to prevent damage.
- Toilet Paper: Exclusively use RV-specific, rapid-dissolving toilet paper. Regular household toilet paper does not break down sufficiently in holding tanks and can lead to severe clogs and sensor malfunctions.
- Cleaners & Chemicals: Use toilet bowl cleaners specifically designed for RV or marine toilets (e.g., Thetford Aqua-Cleanse, Unique Scrub-It RV Toilet Cleaner, Star Brite Toilet Bowl Cleaner). Crucially, avoid using chlorine bleach or harsh household chemical toilet bowl cleaners. These can damage the rubber seals in the toilet mechanism and the holding tank, and can react dangerously with holding tank chemicals.
- Brushes: Use a soft-bristle brush or a silicone toilet brush to clean the bowl. Stiff plastic bristle brushes can scratch plastic toilet bowls.
- Cleaning Process: Apply the RV-safe cleaner to the bowl, scrub thoroughly (including under the rim), and then flush. Wipe down the exterior of the toilet, seat, and lid with a disinfecting spray or wipe.
Showers & Sinks:
- Scrub shower walls, pans, and sinks using non-abrasive, RV-safe cleaners. Products like Better Life Natural Tub and Tile Cleaner are eco-friendly and safe for plastic/fiberglass. A paste of baking soda and water can be effective for tougher stains or soap scum.
- Clean shower door tracks by spraying with cleaner, allowing it to soak, then scrubbing with an old toothbrush or a specialized groove cleaning tool. Rinse well.
- To remove mineral deposits (hard water stains) from faucets and showerheads, fill a plastic bag with white vinegar, tie it around the fixture so the affected parts are submerged, and let it soak for several hours or overnight. Remove the bag and gently scrub away loosened deposits with an old toothbrush, then rinse.
Preventing Mold, Mildew & Odors:
This is a critical aspect of RV bathroom maintenance.
- Ventilation: Always run the exhaust fan or open a vent during and after showers to remove excess moisture.
- Squeegee Use: After each shower, use a small squeegee to wipe down shower walls and doors. This simple step dramatically reduces the amount of moisture left behind, which is a primary contributor to mold and mildew growth and water spots.
- Humidity Control: Monitor humidity levels. In persistently damp conditions, consider using a small dehumidifier or moisture-absorbing products (e.g., DampRid) in the bathroom.
- Holding Tank Maintenance: Empty and clean black and gray water holding tanks regularly as per manufacturer recommendations and usage. Properly treated tanks are less likely to cause odors. Use RV-specific holding tank chemicals for odor control and waste breakdown.
- Daily Wipes & Leak Checks: Quickly wipe down surfaces daily to prevent buildup. Regularly inspect plumbing fixtures, seals, and around the base of the toilet and shower for any signs of leaks, and address them promptly.
- Eco-Friendly Deodorizers: Besides commercial products, natural solutions like a small dish of baking soda or using essential oils (e.g., tea tree, lavender, known for their antimicrobial properties) in cleaning solutions can help manage odors.
E. The Command Center: Cockpit and Driver’s Area Detailing (Dashboard, Controls, Screens, Seats)
The cockpit or driver’s area is the command center of the motorhome and, like any vehicle’s front cabin, it accumulates dust, fingerprints, and grime from regular use. Keeping this area clean is important for driver comfort, safety (clear views, non-sticky controls), and preserving the condition of various materials.
General Wipe-Down & Dusting:
 Begin with a thorough dusting of all surfaces, including the dashboard, instrument panel, steering column, and door panels. A complete wipe-down of these areas, along with interior windows, is a standard part of professional interior detailing. Use a multi-surface cleaner appropriate for automotive interiors or a dedicated dashboard cleaner.39
Dashboard, Controls, Vents & Crevices:
- Dashboard: After dusting, wipe the dashboard with a microfiber cloth lightly sprayed with an interior cleaner or protectant. Avoid products that leave a greasy or overly shiny residue, as this can cause glare on the windshield.
- Controls (Buttons, Knobs, Switches): These can be tricky due to their small size and intricate shapes. A soft detailing brush (like a toothbrush or a specialized vent brush) can be used to dislodge dust from around buttons and knobs. Lightly dampen a cotton swab or microfiber cloth corner with interior cleaner to wipe individual controls.
- Vents & Seams: Detailing putty (a pliable, sticky gel-like substance) can be pressed into vents, seams, and crevices to lift out dust and debris effectively. Alternatively, use a soft brush or compressed air.
- Cup Holders: These often collect sticky residues. A clever tip involves placing an old sock over the base of a cup, spraying the sock with a cleaner like Windex, then inserting the cup into the holder and rotating it to scrub the sides and bottom clean.
Electronic Screens (Navigation, Infotainment, Backup Monitors):
Modern RVs are equipped with various electronic screens, which are highly sensitive and require careful cleaning to avoid damage. This is an area where incorrect cleaning can have very costly consequences.
- Materials: Always use a clean, high-quality, lint-free microfiber cloth specifically designed for electronics or optical lenses. Paper towels or regular cloths can scratch screen surfaces.
- Cleaners: For most screens, a dry microfiber cloth is sufficient for removing dust and fingerprints. If a cleaner is needed, lightly dampen the cloth with distilled water or a cleaner specifically formulated for electronic screens. Never spray liquid directly onto the screen, as it can seep behind the bezel and damage internal components.
- Technique: Wipe the screen gently with minimal pressure. Avoid harsh chemicals, ammonia-based glass cleaners, abrasive cleaners, or solvents, as these can damage anti-glare coatings or the screen itself.
Seats:
Driver and passenger seats in the cockpit are typically upholstered in fabric, vinyl, or leather. Refer to Section III.B for detailed cleaning instructions appropriate to the specific material. Thorough vacuuming, including crevices, is always the first step.
Windshield (Interior):
The interior of the windshield can accumulate a film of haze from off-gassing plastics and dust. Clean it using methods described in Section II.E.3, ensuring a streak-free finish for optimal visibility. A solution of dish detergent, vinegar, and water, or a quality automotive glass cleaner, works well.
Floors & Mats:
Vacuum the carpet or hard flooring in the cockpit area thoroughly. If there are removable carpeted floor mats, take them out and shampoo them if necessary. Rubber or vinyl mats can be washed with soap and water.
By paying attention to these details, the RV cockpit can be maintained as a clean, comfortable, and functional space for the driver and passengers.
IV. Specialized RV Systems and Component Maintenance: Beyond the Surface
Beyond the visible surfaces, RVs incorporate several specialized systems and components that require regular maintenance, not just for cleanliness, but for proper function, safety, and longevity. These include holding tanks, slide-out mechanisms and seals, headlights, and windshields.
A. Holding Tank Management: Effective Treatment, Cleaning, and Sanitization (Fresh, Gray, Black)
Proper management of an RV’s holding tanks—fresh, gray, and black—is crucial for hygiene, odor prevention, and the smooth operation of the plumbing system.
Understanding Tank Types and Functions:
- Fresh Water Tank: Stores potable (drinkable) water for sinks, shower, and toilet flushing (if not a direct city water connection).
- Gray Water Tank: Collects wastewater from sinks (kitchen and bathroom) and the shower. It does not receive toilet waste.
- Black Water Tank: Holds waste flushed from the RV toilet, including human waste and RV-specific toilet paper. All three types of tanks are typically equipped with sensors to indicate fill levels (though these can be notoriously inaccurate if not maintained) and vents to allow air to escape as they fill and to prevent pressure buildup. The termination valves for draining gray and black tanks are usually located on the driver’s side of the RV.
General Usage and Maintenance Tips:
- Tank Treatments: Regularly add appropriate tank chemicals (deodorizers, waste digesters, sensor cleaners) to both gray and black tanks. These should be added before first use after emptying and as recommended by the product manufacturer. Enzyme-based treatments are often recommended as they help break down waste and toilet paper naturally, reducing odors and making tanks easier to clean. While commercial treatments are widely available, some experienced RVers explore DIY solutions like the “Geo Method,” which typically involves a mixture of water softener (like Calgon), laundry detergent, and sometimes a small amount of bleach (used with extreme caution and never mixed with ammonia-based products). This method aims to make tank walls slicker, preventing waste from sticking. However, due to the lack of direct research support for this method here, manufacturer-approved or specifically designed RV products remain the primary recommendation.
- Water Usage: Always use ample water when flushing the RV toilet. Sufficient water helps ensure that solid waste is properly liquefied and flows out easily when the black tank is dumped, preventing the dreaded “pyramid plug” (a buildup of solids directly under the toilet).
- RV Toilet Paper: Exclusively use toilet paper specifically designed for RV or marine use. These papers are formulated to dissolve quickly and completely in holding tanks, unlike household toilet paper, which can lead to clogs and system malfunctions.
- Valve Management: Keep the black tank termination valve closed until the tank is at least 1/2 to 2/3 full. Dumping too early doesn’t provide enough liquid volume to carry away solids effectively. If at a full hookup site, resist the temptation to leave the black tank valve open continuously, as this allows liquids to drain off, leaving solids behind to dry and harden. The gray tank valve can often be left open at full hookups until a day or so before dumping the black tank, then closed to accumulate water for flushing the sewer hose.
Draining and Cleaning the Black Tank:
A thorough cleaning process is detailed in 25:
- Timing: Drain the black tank when it’s 1/2 to 2/3 full at an approved RV dump station or full hookup site.
- Connection & Draining: Securely connect the sewer hose to the RV’s outlet and the dump station inlet. Open the black tank valve. Using a clear sewer hose elbow or connector is highly recommended as it allows visual monitoring of when the tank is empty and the clarity of rinse water.
- Flushing: This is a critical step. Most RVs have a built-in black tank flush inlet (connect a dedicated water hose – never your fresh water hose – and run water through the system while the black tank valve is open) or allow for the use of a tank wand (inserted down through the toilet) or an attachable flush valve. Continue flushing until the water draining from the tank runs clear. This may take several cycles of filling and emptying or continuous flushing.
- Gray Tank Flush: After the black tank is drained and flushed, close its valve and then drain the gray tank(s). The soapy water from the gray tank helps to rinse any remaining black tank residue from the sewer hose.
- Cleanup: Disconnect, rinse, and store the sewer hose and any attachments. Dispose of gloves and wash hands thoroughly.
Priming/Pretreating the Tank:
After the black tank is completely empty and clean, it’s essential to “prime” it before its next use. Add at least one gallon of fresh water (some recommend up to 10% of the tank’s capacity, e.g., 5 gallons for a 50-gallon tank) back into the empty black tank. This initial water charge helps prevent solids from sticking to the bottom of the tank and aids in odor control. This is also the time to add your chosen holding tank treatment chemical.
Fresh Water Tank Sanitization:
The fresh water tank and system should be sanitized regularly to prevent the growth of bacteria, algae, or viruses, ensuring the water remains safe for use. This is especially important before the first use of a new or new-to-you RV, after the RV has been in storage for an extended period, or if contamination is suspected.
The sanitization process typically involves introducing a diluted bleach solution (e.g., 1/4 cup of household bleach per 15 gallons of tank capacity) into the fresh water tank, filling the tank with water, running the solution through all pipes and faucets, letting it sit for several hours (e.g., 4-12 hours), and then thoroughly draining and flushing the entire system with fresh water multiple times until no bleach odor remains. Always refer to your RV owner’s manual for specific sanitization instructions and recommended bleach concentrations.
B. Smooth Operations: Slide-Out Seal Conditioning and Mechanism Lubrication
Slide-outs dramatically increase the livable space in an RV but require diligent maintenance of their seals and mechanisms to ensure smooth, trouble-free operation and to prevent costly damage from water intrusion or mechanical failure. This maintenance is a two-pronged approach: caring for the rubber seals that provide weatherproofing, and lubricating the mechanical components that move the slide.
Slide-Out Seal Conditioning:
The rubber seals around the perimeter of a slide-out are its primary defense against rain, wind, dust, and pests when the slide is extended or retracted. Over time, these seals can dry out, become brittle, crack, or tear due to exposure to UV radiation, ozone, and general wear. Damaged seals compromise the weather integrity of the RV, leading to water leaks, which can cause extensive and expensive damage to walls, floors, and furnishings, as well as promote mold growth.
- Inspection and Cleaning: At least twice a year, or more frequently if the RV is used heavily or in harsh climates, inspect all slide-out seals thoroughly. Wipe them clean with a mild soap and water solution or a dedicated rubber cleaner to remove dirt and grime.
- Conditioning: After cleaning and drying, apply an RV-specific rubber seal conditioner. Products like 3-in-One RVcare Rubber Seal Conditioner, STAR BRITE Premium RV Rubber Seal Conditioner, or similar protectants are formulated to rejuvenate the rubber, restore flexibility, and provide UV protection. Apply the conditioner to all accessible surfaces of the seal—top, bottom, and sides, both the inner and outer seals if applicable. This helps keep the seals pliable, prevents them from sticking, and enhances their sealing capability. Some conditioners also contain lubricants that help the slide move smoothly over the seals, reducing friction and wear.
Slide-Out Mechanism Lubrication:
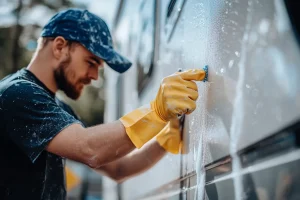 The mechanical system that extends and retracts the slide-out (which can be rack-and-pinion, cable-driven, Schwintek, or hydraulic) also requires regular cleaning and lubrication to operate smoothly and prevent premature wear.8
- Identify System Type: The first step is to determine the type of slide-out system your RV uses, as the lubrication points and procedures vary. Consult your RV owner’s manual for this information.
- Clean Before Lubricating: Before applying any lubricant, thoroughly clean all accessible parts of the mechanism, including tracks, gears, and rollers. Use a rag, compressed air, and/or isopropyl alcohol to remove dirt, old lubricant, and debris. Isopropyl alcohol is effective for cutting through grease and evaporates quickly, leaving a dry surface.
- Use Correct Lubricant: This is critical. For most RV slide-out mechanisms, a dry lubricant is recommended. Dry lubes, such as those containing silicone (e.g., 3-in-One RVcare Slide-Out Silicone Lube) or PTFE (e.g., CRC Power Lube with PTFE), create a slick surface without leaving a sticky residue that attracts and holds dirt and grit. Avoid using oil-based or wet lubricants, as these can collect dust and debris, forming an abrasive paste that actually accelerates wear on the moving parts.
- Application: Apply the dry lubricant sparingly to the specific points recommended by the slide-out system manufacturer or as detailed in reliable guides (like , which provides specific instructions for different system types). This may include rails, tracks, gears, cables, or rollers. Avoid over-applying, as excess lubricant can also attract dirt or drip onto other components.
- Frequency: Lubricate slide-out mechanisms at least three times a year, or more often based on usage and environmental conditions. After lubrication, cycle the slide-out in and out a few times to distribute the lubricant evenly.
- Debris Check: Before retracting a slide-out, always visually inspect the roof of the slide (the “slide topper” if equipped, or the slide roof itself) and sweep off any leaves, twigs, pine needles, or other debris. Retracting the slide with debris on top can damage the seals or pull the debris into the RV.
Neglecting either seal conditioning or mechanism lubrication can lead to significant problems. Leaky seals cause water damage, while poorly lubricated mechanisms can result in binding, jerky operation, excessive strain on motors and gears, and eventual mechanical failure—both of which are often expensive to repair.
C. Enhancing Safety and Aesthetics:
Certain components, while seemingly minor, play a significant role in both the safety and overall aesthetic appeal of an RV. Headlights and windshields are prime examples.
1. DIY Headlight Lens Restoration
Over time, the plastic lenses on RV headlights are prone to damage from UV radiation, road debris, and environmental contaminants. This often results in the lenses becoming cloudy, yellowed, hazy, or even minutely pitted, which significantly reduces their light output and can impair nighttime visibility, posing a safety hazard. Fortunately, in many cases, these lenses can be restored to near-new clarity using DIY headlight restoration kits.
The Problem and Solution:
The cloudiness is typically caused by the degradation of the original factory UV-protective coating and the underlying plastic itself. DIY restoration kits (from brands like 3M, Meguiar’s, Sylvania, or Cerakote) work by sanding away the damaged outer layer of plastic and then polishing the lens back to a smooth, clear finish.10
Tools and General Process (using the 3M kit as an example from ):
- Tools Needed: The restoration kit itself (which usually includes various grits of sandpaper or sanding discs, polishing compound, and sometimes a protective sealant), a drill (if the kit requires it, typically operating between 1,200-2,000 rpm for the 3M kit), masking tape to protect the paint around the headlight, a spray bottle with water (for wet sanding steps), microfiber cloths or a tack cloth for wiping, and soap and water for initial cleaning.
- Step 1: Preparation: Thoroughly clean the headlight lens with soap and water to remove all surface dirt and grime. Carefully apply masking tape around the perimeter of the lens to protect the adjacent painted surfaces from accidental sanding.
- Step 2: Sanding: This is a multi-stage process, starting with a coarser grit sandpaper and progressing to finer grits.
- Attach the coarsest sanding disc (e.g., P500 grit for the 3M kit) to the drill-mounted backing pad. Using light to medium pressure, sand the entire lens surface, keeping the drill moving to avoid heat buildup that could melt the plastic. The lens will become uniformly frosted or white.
- Progress to the next finer grit (e.g., P800 grit), sanding again to remove the coarser scratches from the previous step.
- The final sanding stage often involves wet sanding with a very fine grit abrasive (e.g., P3000 foam disc). Wet both the lens and the sanding disc with water from the spray bottle. This step further refines the surface and begins to restore clarity. A white slurry will typically form.
- Step 3: Polishing: After the final sanding stage, wipe the lens clean and dry. Attach a foam polishing pad to the drill and apply a small amount of the polishing compound provided in the kit. Polish the lens thoroughly until it becomes significantly clearer and achieves a high gloss.
- Step 4: Crucial Final Step – Protection: This is arguably the most critical step for long-lasting results and is sometimes overlooked in basic DIY instructions. The sanding process removes the original factory UV coating. If a new UV protective layer is not applied, the freshly exposed plastic will re-oxidize very quickly, often within a few months. Most comprehensive kits (like those from 3M, Cerakote, or Sylvania) include a UV-blocking sealant or wipe to be applied as the final step. This sealant cures to form a new protective barrier. Alternatively, some detailers apply a clear automotive paint protection film (PPF) over the restored lens for even more durable protection. Omitting this protective step will render the restoration temporary at best.
Alternative Methods:
Other popular kits, like those from Cerakote, often involve a series of cleaning and surface preparation wipes followed by a ceramic-based clear coat wipe that provides UV protection. Some users also report success with hand sanding followed by a quality coating. More advanced, and potentially riskier, methods like acetone vapor polishing also exist but are generally not recommended for inexperienced DIYers.
While DIY headlight restoration can dramatically improve appearance and light output, it’s important to note that the repair is generally not as permanent as the original factory coating if a high-quality UV sealant isn’t meticulously applied and allowed to cure properly. Depending on sun exposure and the quality of the sealant, the process may need to be repeated every couple of years.
2. Windshield Chip Repair: DIY Process and Professional Criteria
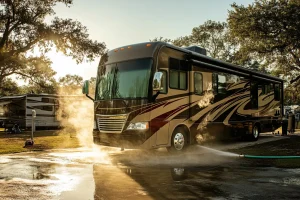 A stone chip or small crack in an RV’s large windshield can be a frustrating and potentially dangerous occurrence. If addressed promptly, many minor chips can be repaired, preventing them from spreading into larger cracks that necessitate a costly windshield replacement.
Time is of the essence when it comes to windshield chip repair; fresh chips are significantly easier to repair successfully than older ones that have become contaminated with dirt, moisture, and cleaning residues, as these contaminants can interfere with the resin’s ability to bond and achieve a clear repair. Acting quickly, even if it’s just to cover the chip with clear tape (after ensuring the area is dry) to keep it clean until a proper repair can be made, can greatly improve the outcome.
DIY Windshield Chip Repair (for Small, Simple Chips):
For small, relatively simple chips—typically those smaller than the size of a quarter and not directly in the driver’s primary line of sight—a DIY windshield repair kit can be an effective solution.11
- Kit and Preparation: Purchase a quality windshield repair kit from an auto parts store, ensuring the resin is not expired. The repair should ideally be done on a warm, sunny day, as many resins require UV light from the sun to cure properly. If the chip is damp, use a hairdryer on a low setting to gently dry it out before starting. Clean the glass area around the chip thoroughly with rubbing alcohol on a microfiber cloth (avoid spraying cleaner directly into the chip). Use a pin or thumbtack to carefully remove any loose shards of glass from the impact point.
- General DIY Process (as outlined in ):
- Apply Adhesive Patch and Pedestal: Center the adhesive patch (from the kit) over the chip on the exterior of the windshield. Attach the plastic pedestal (the resin injector guide) to this patch.
- Inject Resin: Fill the pedestal with the epoxy resin provided in the kit.
- Create Vacuum & Inject: Insert the syringe (plunger fully compressed) firmly into the pedestal. Slowly pull up on the plunger to create a vacuum, which helps draw air bubbles out of the chip and pulls resin in. Hold this vacuum for the time specified in the kit’s instructions (typically 1-10 minutes, until bubbles stop emerging). Then, remove and reinsert the syringe (or adjust it as per kit instructions) to slowly push the plunger down, forcing the resin under pressure into the chip.
- Cure Resin: Allow the resin to cure. This may involve leaving the syringe in place for a specified time or exposing the area to direct sunlight if it’s a UV-curing resin.
- Apply Curing Strip: Once the initial cure is complete, remove the pedestal and adhesive patch. Apply a drop or two of resin directly onto the repaired chip, then place a clear curing strip (from the kit) over it. Gently squeegee out any air bubbles from under the strip using a razor blade.
- Final Cure and Cleanup: Allow the resin under the curing strip to fully cure (again, often with UV light). Once cured, carefully scrape off the curing strip and any excess hardened resin from the glass surface using a sharp razor blade held at a low angle.
When DIY is NOT Advised – Professional Criteria:
DIY kits are not suitable for all types of windshield damage. Professional attention is required when:
- Size and Length: The chip is larger than a U.S. quarter, or if there are cracks longer than about three inches. Some sources suggest cracks over six inches may require replacement.
- Location: The damage is directly in the driver’s critical line of sight, as even a successful repair can leave a slight visual distortion. Damage near the edge of the windshield can compromise its structural integrity. Also, if the damage interferes with any windshield-mounted cameras or sensors (common in newer vehicles with advanced driver-assistance systems), professional assessment is crucial.
- Type and Complexity: While small, simple bullseye, star breaks, or partial cracks can often be repaired , very complex breaks with multiple intersecting cracks, or damage that has penetrated both layers of the laminated glass, usually require professional expertise or full replacement.
- Age and Contamination: As mentioned, older chips that are heavily contaminated with dirt and moisture are less likely to be successfully repaired by DIY methods.
- Risks of Improper DIY: An incorrectly performed DIY repair can actually make the damage worse, trap air or moisture in the chip, obscure visibility further, or fail prematurely, leading to the crack spreading. It could also potentially affect vehicle warranty or insurance claims if the repair does not meet safety standards.
If there’s any doubt about the suitability of a DIY repair, or if the damage meets any of the criteria for professional attention, it’s always best to consult a qualified auto glass repair technician. They have the specialized tools, resins, and expertise to perform more durable and often less visible repairs, or to advise if a full windshield replacement is the safest option.
V. The Professional Advantage: When to Entrust Your RV to the Experts
While DIY cleaning and detailing can be a rewarding and cost-effective way to maintain an RV for many owners, there are situations where the expertise, specialized equipment, and efficiency of professional detailing services offer a distinct advantage. Understanding when to tackle tasks oneself versus when to call in professionals is key to optimal RV care.
A. Recognizing Limitations: When DIY May Not Be the Best Route
Even the most enthusiastic RV owner may encounter limitations that make professional services a more practical or effective choice.
- Significant Time Commitment: Properly detailing a large RV is an extensive undertaking that can consume many hours, or even an entire weekend. Owners with limited free time may find it challenging to dedicate the necessary hours to do a thorough job.
- Limited Expertise and Experience: RVs are complex vehicles with a wide array of materials, from specialized roof membranes and gel-coated fiberglass to diverse interior fabrics, woods, and sensitive electronics. Without specific training or experience, a DIYer might inadvertently use incorrect products or techniques, potentially causing damage that could be costly to repair. For example, using the wrong chemical on a rubber roof can lead to its premature degradation, or improper use of a rotary buffer on gel coat can burn through the finish.
- Lack of Professional Tools and Products: Professional detailers invest in high-grade equipment such as commercial-strength pressure washers (used judiciously), hot water extractors for deep cleaning carpets and upholstery, steamers for sanitizing and lifting grime, powerful orbital and rotary polishers, and ozone generators for odor elimination. They also have access to professional-grade cleaning solutions, compounds, polishes, and protectants that are often more concentrated, effective, and durable than consumer-grade products available over the counter. These tools and products contribute to a higher quality and longer-lasting result.
- Specific Complex or Demanding Tasks: Certain detailing tasks are inherently more complex or require a higher level of skill:
- Heavy Oxidation Removal: Restoring a severely oxidized, chalky gel coat often requires significant skill with a rotary buffer and aggressive compounds to effectively remove the damaged layer without harming the underlying gel coat.
- Significant Interior Stains or Odors: Deep-set stains in carpets or upholstery, or persistent odors from pets, smoke, or mildew, may require the powerful extraction equipment and specialized chemical treatments that professionals possess.
- Extensive Mold Remediation: If mold growth is widespread or deeply embedded, professional remediation is often necessary to ensure complete removal and prevent health risks.
- Windshield Repair/Replacement: As discussed, chips that are too large, complex, or located in critical viewing areas, or cracks that compromise structural integrity, should always be handled by professional glass technicians.
- Application of Long-Term Protectants: The application of advanced, long-duration protectants like ceramic coatings typically requires meticulous surface preparation and application techniques best performed by certified professionals to ensure proper bonding and performance.
If an owner lacks the time, physical ability, specific expertise, or necessary tools for a particular task, or if the condition of the RV requires intensive restoration, opting for professional services is often the wiser and ultimately more beneficial decision.
B. The Tangible Benefits of Professional RV Detailing Services
Choosing to use professional RV detailing services can offer a range of tangible benefits that often justify the cost, contributing to the RV’s condition, longevity, and the owner’s enjoyment. These services can be viewed as a periodic “spa day” or a major servicing for the RV, providing a level of restorative and protective care that goes far beyond a simple wash.
- Expertise and Experience: Professional detailers who specialize in RVs possess a deep understanding of the unique materials and construction methods used in these vehicles. They are trained to identify different types of surfaces (e.g., EPDM vs. TPO roofs, gel coat vs. full-body paint, various upholstery fabrics) and know which specific products and techniques are safe and effective for each. This expertise allows them to tackle challenging issues like severe oxidation, stubborn stains, or persistent odors more effectively and with less risk of damage than an average owner might.
- Access to High-Quality Products and Specialized Tools: Professionals utilize commercial-grade cleaning agents, polishes, waxes, sealants, and protective coatings that are often more potent and durable than retail consumer products. They also employ specialized equipment, such as hot water extractors for deep cleaning carpets and upholstery, steam cleaners for sanitizing and lifting grime from hard-to-reach areas, high-speed buffers for paint correction, and potentially ozone generators for comprehensive odor elimination (as implied by services like “Aqua Fog Treatment” ). This combination leads to superior, longer-lasting results.
- Comprehensive Services and Enhanced Protection: Professional detailing often encompasses a wider range of services than a typical DIY session. This can include multi-stage paint correction to remove scratches and swirl marks, application of durable ceramic coatings for long-term protection , meticulous deep cleaning and sanitization of the entire interior , specialized roof treatments, and conditioning of seals and awnings. These comprehensive services not only clean but also preserve and protect the RV.
- Time Efficiency: What might take an RV owner an entire weekend or longer to accomplish, a team of professional detailers can often complete in a fraction of the time due to their experience, efficient processes, and specialized equipment. This frees up the owner’s valuable time.
- Enhanced Results and Resale Value: The level of cleanliness, shine, and restoration achieved by skilled professionals is often difficult to replicate with DIY efforts. A professionally detailed RV not only looks and feels significantly better but can also command a higher resale value, as it signals to potential buyers that the vehicle has been exceptionally well-cared for.
- Effective Odor Elimination: Professionals often have access to techniques and products (like ozone treatments or thermal fogging) that are more effective at neutralizing and eliminating stubborn, deeply embedded odors from smoke, pets, mildew, or cooking than over-the-counter sprays.
- Damage Prevention and Problem Identification: By using the correct products and techniques for each surface, professionals minimize the risk of inadvertently damaging sensitive RV components. Moreover, during the course of their work, experienced detailers may also spot early signs of potential problems—such as failing seals, early corrosion, or water intrusion—that an owner might overlook, allowing for proactive repairs.
Investing in periodic professional detailing can thus be seen not just as an expense for cleaning, but as a valuable service that restores, protects, and helps maintain the significant investment that an RV represents.
C. Selecting a Qualified and Reputable RV Detailing Professional
Choosing the right professional to care for an RV is crucial, given the vehicle’s complexity, size, and the variety of materials involved. Not all auto detailers are equipped or experienced enough to handle the unique demands of recreational vehicles. To ensure a positive outcome and protect the investment, RV owners should carefully vet potential service providers. Asking targeted questions can help distinguish a truly qualified RV specialist from a general detailer.
- Specific RV Experience: The most important factor is the detailer’s specific experience with RVs and motorhomes. Inquire directly: “What is your experience specifically with?” and “How many RVs do you typically detail in a month or year?” A portfolio of previous RV work, including before-and-after photos, can be very telling.
- Range of Services Offered: RVs require a broad spectrum of care. Confirm that the detailer offers the specific services your RV needs. For example: “Do you perform multi-stage gel coat restoration for oxidation?” “What type of products and methods do you use for EPDM or TPO roof cleaning and UV protection?” “Do you offer slide-out rubber seal conditioning and mechanism lubrication?” “Are interior deep cleaning services, including carpet and upholstery shampooing, part of your packages?”.
- Products and Techniques Used: Ask about the types of cleaning agents, polishes, waxes, or sealants they use. Are they high-quality, reputable brands suitable for RV materials? For instance, for roof care: “What specific cleaners and UV protectants do you use on rubber roofs, and do they contain any petroleum distillates?” Understanding their methodology for tasks like oxidation removal (e.g., types of buffers and compounds used) can also provide insight into their expertise.
- Insurance and Licensing: This is non-negotiable. Verify that the detailing business carries adequate liability insurance specifically covering work on customer vehicles, especially large and valuable ones like RVs. Ask for proof of insurance. Depending on local regulations, they may also require specific business licenses.
- Reviews, Testimonials, and References: Seek out reviews and testimonials from other RV owners. Online review platforms, RV forums, or local RV clubs can be good sources of unbiased feedback. Don’t hesitate to ask the detailer for references from previous RV clients.
- Pricing Structure and Detailed Quotes: Understand how the detailer structures their pricing—is it per linear foot of the RV, per hour, or based on pre-defined packages? Ensure you receive a detailed written quote that clearly outlines all the services to be performed and the total cost before any work begins. Clarify what is included in standard packages versus what might be considered an add-on service with an extra charge.
- Mobile vs. Shop-Based Service: Many RV detailers offer mobile services, coming to your location, which can be very convenient. Others operate from a fixed shop. Consider which option best suits your needs and whether a mobile detailer has access to necessary resources like water and power if required at your site.
- Professionalism and Communication: Pay attention to the detailer’s responsiveness, willingness to answer questions thoroughly, and overall professionalism. A good detailer will take the time to understand your RV’s specific needs and your expectations.
By taking the time to ask these pertinent questions and thoroughly research potential providers, RV owners can make an informed decision and entrust their vehicle to a professional who will deliver high-quality care, enhancing its condition, value, and readiness for future adventures.
VI. Conclusion: The Enduring Value of Meticulous RV Care
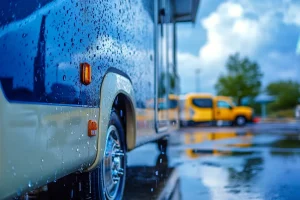 The journey of owning an RV or motorhome is one of exploration and creating lasting memories. Central to this experience is the vehicle itself—a home on wheels that requires dedicated attention to maintain its functionality, comfort, and appeal.
This comprehensive guide has traversed the multifaceted landscape of RV cleaning and detailing, from foundational exterior washes and intricate gel coat restoration to deep interior sanitization and specialized system maintenance. The core takeaway is that meticulous and regular care is not merely a cosmetic endeavor but a crucial investment in the RV’s longevity, the health of its occupants, and its retained value.
Throughout this exploration, it has become evident that RVs, with their unique amalgamation of automotive and residential features, demand a specialized approach. Whether tackling bug removal, restoring headlight clarity, conditioning slide-out seals, or deep cleaning upholstery and appliances, the right techniques and products are paramount to achieving desired results without causing inadvertent damage.
The emphasis on understanding materials—be it the type of roof membrane, the nature of the upholstery, or the finish on cabinetry—underscores the need for informed decision-making at every step.
While many detailing tasks can be successfully undertaken by a diligent owner equipped with the right knowledge and tools, the guide also illuminates the significant advantages that professional detailing services can offer.
Professionals bring a level of expertise, access to commercial-grade products and equipment, and an efficiency that can be particularly beneficial for complex restoration projects, extensive deep cleaning, or the application of advanced protective coatings like ceramics. For an RV owner, the decision between DIY and professional services often hinges on factors such as available time, personal skill level, the specific condition of the RV, and the desired outcome.
Ultimately, professional cleaning and detailing are often a superior choice, or at least a highly valuable supplement to an owner’s efforts, for several compelling reasons:
- Expertise for Specialized Needs: Professionals are better equipped to handle the diverse and sometimes delicate materials found in RVs, minimizing the risk of costly mistakes that a less experienced owner might make.
- Superior Tools and Products: Access to industrial-strength equipment (e.g., hot water extractors, ozone machines) and professional-grade chemicals often leads to a deeper, more thorough, and longer-lasting clean than typically achievable with consumer products.
- Time and Labor Savings: Detailing a large RV is a physically demanding and time-intensive process. Professionals can accomplish in hours what might take an owner days.
- Complex Restorations: Tasks like severe oxidation removal, significant stain remediation, or comprehensive odor elimination often require a level of skill and specialized solutions that go beyond typical DIY capabilities.
- Enhanced Protection and Value: Professionals can apply more durable protective treatments (e.g., ceramic coatings) that offer extended defense against the elements, and a professionally detailed RV invariably presents better to potential buyers, maximizing its resale value.
Whether an owner chooses the path of dedicated DIY care, opts for periodic professional detailing, or employs a hybrid approach, the principles outlined in this guide serve as a roadmap to preserving the beauty, functionality, and value of their recreational vehicle. A clean, well-maintained RV is not just a more pleasant environment; it’s a testament to pride of ownership and a key component of many years of enjoyable and trouble-free adventures on the open road.


