1. Understanding Post-Construction Cleanup: More Than Just Tidying Up
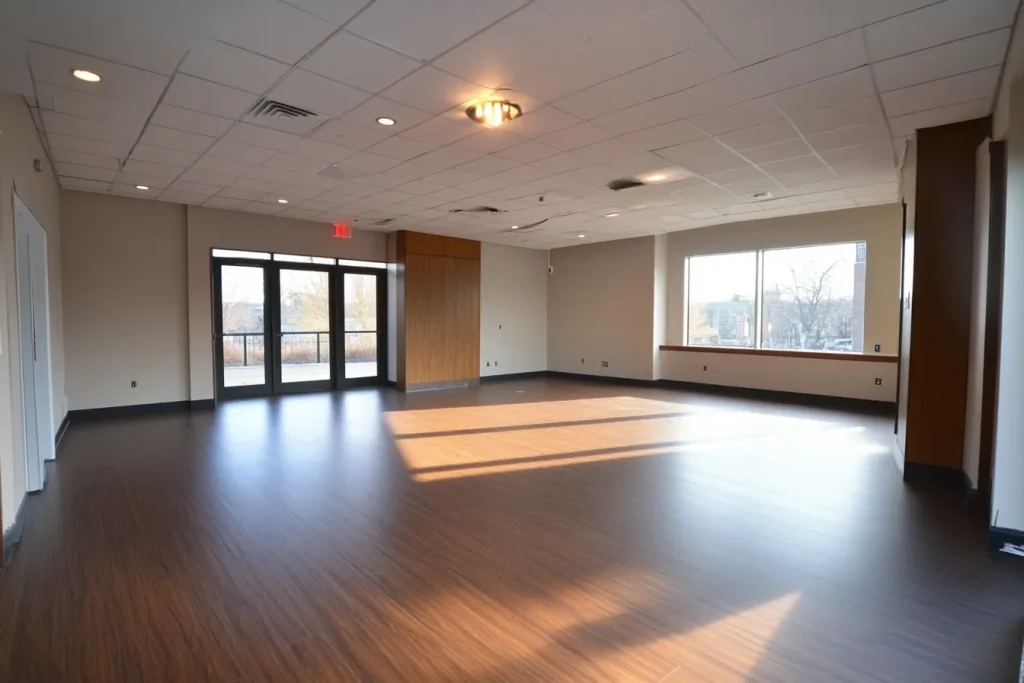
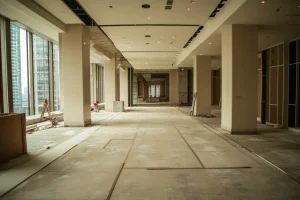
The completion of a construction or renovation project marks an exciting milestone, but the journey to a truly finished space involves one critical final stage: post-construction cleanup. This is far from a simple tidying exercise; it is an intensive and specialized process designed to transform a worksite into a safe, healthy, and aesthetically pleasing environment ready for occupancy or handover.
The importance of this phase cannot be overstated. It involves the meticulous removal of not just visible debris, but also fine dust, potential hazardous materials like stray nails or chemical residues, and stubborn marks left by construction activities.
A primary driver for thorough post-construction cleaning extends beyond mere appearances into the realm of health and safety. Construction sites inevitably generate a host of potential hazards. Fine dust, often containing silica or drywall particles, can pose significant respiratory risks if inhaled, with potential long-term health implications such as asthma, silicosis, or even lung cancer.
Volatile Organic Compounds (VOCs) released from new building materials and finishes can also linger in the air, contributing to poor indoor air quality. Thus, a comprehensive cleanup is an essential health and safety imperative, ensuring the well-being of future occupants. Skipping or inadequately performing this task can lead to lingering health concerns and a space that never feels truly clean or safe.
Why It’s Different from Regular Cleaning
Post-construction cleanup presents a unique set of challenges that distinguish it significantly from routine janitorial services or even standard deep cleaning. The nature and volume of contaminants are vastly different, demanding specialized knowledge, tools, and techniques.
Key challenges include:
- Pervasive Fine Dust: One of the most significant hurdles is the sheer volume of fine dust generated by activities like sawing, sanding, and drywall installation. This isn’t ordinary household dust; it’s often composed of materials like sawdust, drywall powder, and cement dust, which can be incredibly fine and invasive. These microscopic particles settle on every conceivable surface – walls, ceilings, floors, inside cabinets, within light fixtures, and deep into HVAC systems. Some of these dust components can be toxic. This “invisible load” of post-construction mess means that what appears clean to the naked eye might still harbor significant amounts of particulate matter. Standard vacuums often lack the filtration to capture these fine particles, potentially recirculating them into the air. This necessitates the use of High-Efficiency Particulate Air (HEPA) filter vacuums and, in some cases, air scrubbers to effectively manage and remove this airborne threat.
- Hazardous Debris: Construction sites are often littered with debris that poses physical safety risks. Stray nails, screws, shards of glass, leftover power tools, and loose or improperly secured fixtures can cause cuts, punctures, or impact injuries. Additionally, there may be leftover hazardous materials such as paints, solvents, adhesives, and treated wood, which require careful handling and specific disposal methods according to local regulations.
- Stubborn Residues: The construction process frequently leaves behind tenacious residues that standard cleaning products cannot tackle. These include paint splatters on unintended surfaces, dried adhesive from tapes or protective films, excess caulk, and grout haze on newly tiled areas. Removing these requires specialized cleaning agents and techniques to avoid damaging the brand-new surfaces.
- Scale and Complexity: The sheer scope of a post-construction clean is often underestimated. It involves cleaning every surface in the affected area, from ceilings down to floors, including easily overlooked spots. The variety of new materials installed also means cleaners must be knowledgeable about how to treat different surfaces (e.g., natural stone, engineered wood, specific types of plastics or metals) without causing damage.
The “stickiness” of construction dust, often due to its fine particulate nature or static cling, means that simple dry dusting is often insufficient. While HEPA vacuuming is a critical first step, a multi-stage approach involving damp wiping with microfiber cloths is typically necessary to capture all residual dust. However, care must be taken not to over-wet surfaces, as this can lead to damage or streaking, particularly on materials like unsealed wood or fresh paint. This delicate balance highlights the nuanced approach required.
The Three Crucial Phases: Rough, Deep, and Final Touch-Up Cleaning
 A professional and thorough post-construction cleanup is typically executed in three distinct phases. This phased approach is not merely about organizing tasks; it functions as an inherent quality assurance mechanism. Each stage prepares the site for the next, ensuring that issues like resettling dust are systematically addressed and that the final result meets the highest standards of cleanliness and safety. Skipping or inadequately performing any phase will inevitably compromise the overall outcome.
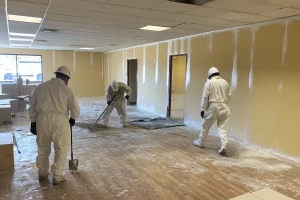
- Phase 1: Rough Cleaning
- Objective: The initial and most basic stage, focused on removing all large, visible debris, leftover construction materials, general trash, and performing an initial sweep or vacuum of the area. This phase clears the path for more detailed and intensive cleaning. While construction companies are often responsible for a “broom-swept” condition , this professional rough clean goes a step further.
- Key Tasks: Collecting and disposing of items like wood scraps, metal pieces, drywall offcuts, packaging materials, and any other substantial waste from both interior and exterior areas. This includes an initial pass at dusting down surfaces and removing stickers from new installations.
- Phase 2: Deep Cleaning (also referred to as Light Cleaning or Detailed Cleaning)
- Objective: This is the most labor-intensive and meticulous phase of the cleanup. It involves a comprehensive, top-to-bottom cleaning of all interior surfaces, fixtures, and installations to remove finer dust, dirt, and construction residues. Specialized cleaning chemicals and techniques are often employed during this stage.
- Key Tasks: Thorough cleaning of walls (including spot cleaning for marks), windows (glass, frames, sills), light fixtures, and ceilings. Cleaning and sanitizing kitchens and bathrooms, including all appliances, countertops, sinks, toilets, and showers. Detailed cleaning of cabinetry and drawers, both inside and out. Cleaning of baseboards, door frames, doorknobs, and light switches. Deep cleaning of all floor types, including specific attention to grout lines on tiled surfaces. Cleaning HVAC vents and grilles is also a critical component. This phase addresses stubborn issues like paint splatters, adhesive residues, and scuff marks.
- Phase 3: Final Touch-Up Cleaning (also known as Move-In Ready Cleaning or Sparkle Clean)
- Objective: The last stage, designed to ensure the property is absolutely pristine and ready for immediate occupancy or handover. This clean is ideally performed a few days after the deep clean to allow any fine dust particles that may have resettled to be addressed.
- Key Tasks: A final wipe-down of all horizontal surfaces to remove any settled dust and fingerprints. Polishing of fixtures (plumbing, lighting, hardware) to a high shine. Final cleaning of floors, which may include buffing or polishing depending on the material. Thorough cleaning of windows and mirrors to ensure they are streak-free. A comprehensive final inspection of all areas to catch any overlooked spots or imperfections. Running the air conditioning system can help check that vents are blowing clean and capture any final lingering particles.
The systematic progression through these phases—rough, deep, and final touch-up—is a hallmark of professional post-construction cleaning. It ensures that each level of dirt and debris is addressed in the correct order, preventing re-contamination and leading to a truly move-in ready space.
Table 1: Post-Construction Cleaning Phases & Key Tasks
| Phase | Primary Objective | Key Tasks/Activities | Typical Focus Areas |
|---|---|---|---|
| Rough Cleaning | Removal of large debris and preparation for deep cleaning. | Collecting and disposing of all visible trash, leftover construction materials (wood, metal, packaging), large dust/dirt piles. Initial sweeping/vacuuming. Removing protective coverings/stickers. | Entire construction site, both interior and exterior. Floors, open areas, easily accessible surfaces. |
| Deep Cleaning | Thorough, detailed cleaning of all surfaces and installations from top to bottom. | Dusting and washing walls, ceilings. Cleaning windows, frames, sills. Cleaning light fixtures, vents. Cleaning cabinetry/drawers (inside/out). Sanitizing kitchens/bathrooms. Detailed floor cleaning (grout, etc.). Removing paint/adhesive. | All interior rooms and spaces. All surfaces including walls, ceilings, floors, fixtures, windows, doors, cabinets. |
| Final Touch-Up | Final polish and inspection to ensure the space is immaculate and move-in ready. | Final wipe-down of all surfaces for settled dust/fingerprints. Polishing fixtures. Final floor buffing/polishing. Spot cleaning any remaining marks. Thorough inspection of all areas. Checking HVAC vent output. | All previously cleaned areas, with a focus on details, shine, and overall presentation. High-visibility areas. |
2. The Nitty-Gritty: A Comprehensive Breakdown of Post-Construction Cleaning Tasks
Successfully navigating a post-construction cleanup requires a detailed understanding of the specific tasks involved for each area and type of residue. This section delves into the practical methods and considerations for transforming a debris-filled site into a pristine, habitable space.
Conquering Construction Dust: The Invisible Menace
Construction dust is more than just an unsightly nuisance; it’s a pervasive contaminant that can infiltrate every corner of a newly built or renovated space, posing potential health risks and diminishing the quality of the finished environment. Effective dust removal is a cornerstone of post-construction cleaning.
Techniques for removing fine dust from all surfaces (walls, ceilings, floors, fixtures):
A systematic, top-down approach is paramount to prevent re-contamination of already cleaned areas. Dusting should always begin with the highest surfaces and progress downwards.
- Walls & Ceilings: The initial step involves dry dusting using microfiber cloths, long-handled dusters, or a soft brush attachment on a HEPA-filtered vacuum cleaner. This removes the bulk of loose dust. Following dry dusting, a damp wipe with a well-wrung microfiber cloth can capture finer, more adherent particles. It is crucial to test this method on an inconspicuous area first, especially on freshly painted or wallpapered surfaces, and to avoid over-wetting, which can lead to streaks or damage.
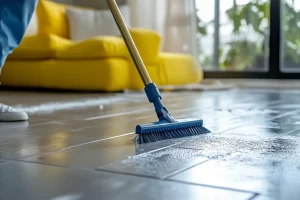
- Floors: Begin by sweeping away larger debris. Subsequently, a thorough vacuuming with a HEPA filter vacuum is essential, paying close attention to corners, edges, and along baseboards where dust accumulates. The final step for floors is typically damp mopping with a cleaning solution appropriate for the specific flooring material (detailed further in the floor cleaning section).
- Fixtures (lights, plumbing, etc.): These should be dusted meticulously with microfiber cloths or extendable dusters. If necessary, a follow-up wipe with a damp microfiber cloth and a suitable cleaner can remove any remaining film or smudges (see fixture polishing section for more details).
- Microfiber Technology: The use of microfiber cloths and mops is consistently recommended due to their superior ability to trap and hold dust particles rather than simply pushing them around. High-quality microfiber can remove up to 99% of bacteria and allergens from surfaces.
The nature of construction dust, often fine and sometimes carrying a static charge, means it can cling tenaciously to surfaces. This “stickiness” implies that dry methods alone, like using a feather duster, are often insufficient for complete removal. A multi-step process involving initial dry removal followed by damp wiping is key to achieving truly dust-free surfaces.
Ductwork Cleaning: Ensuring Clean Air Post-Renovation:
A significant portion of construction dust inevitably settles within the HVAC (Heating, Ventilation, and Air Conditioning) ductwork. If not addressed, this dust will be circulated throughout the building as soon as the system is activated, leading to poor indoor air quality, re-contamination of cleaned spaces, and potential exacerbation of allergies or respiratory conditions. This makes ductwork cleaning a critical, though often overlooked, aspect of post-construction cleanup. It’s not just a surface issue; dust becomes a multi-system contaminant.
- Methods: The primary DIY step is to thoroughly vacuum all accessible air vents, grilles, and duct openings using a HEPA filter vacuum with appropriate attachments. However, for comprehensive cleaning of the entire duct system, professional intervention is often necessary. HVAC professionals employ specialized equipment such as powerful vacuums, pneumatic brushing systems, compressed air nozzles, and air whips to dislodge and extract debris from deep within the ductwork. It’s recommended that this cleaning be performed by technicians who meet the standards of organizations like the Air Conditioning Contractors of America (ACCA Standard 6). Importantly, methods like wet solutions or UV light systems are not considered substitutes for the physical removal of particulates from ductwork.
- Filter Replacement: Regardless of whether professional duct cleaning is performed, it is absolutely essential to replace all HVAC air filters after construction work and the subsequent cleanup are complete. New filters will prevent any remaining dust in the system from being immediately dispersed.
The Role of HEPA Filters and Air Scrubbers:
The fine, often invisible, nature of construction dust necessitates specialized air filtration technology.
- HEPA Vacuums: High-Efficiency Particulate Air (HEPA) vacuums are indispensable. These are designed to capture at least 99.97% of airborne particles as small as 0.3 microns, including fine dust, allergens, and other microscopic contaminants. Standard vacuum cleaners, lacking such filtration, can simply exhaust these fine particles back into the air, exacerbating the problem.
- Air Scrubbers: These portable air filtration devices play a crucial role in improving indoor air quality during and after the cleaning process. Air scrubbers draw in ambient air, pass it through a series of filters (typically including a HEPA filter and often an activated carbon filter for VOCs and odors), and then either recirculate the cleaned air or exhaust contaminated air outdoors. They are particularly effective at capturing airborne dust that may become unsettled during cleaning activities or that lingers in the air. For optimal results, it’s often recommended to run air scrubbers for an extended period, sometimes at least 48 hours after cleaning completion, to ensure maximum particle removal.
Windows, Frames, and Sills: Achieving Crystal Clarity
Windows are often heavily affected during construction, accumulating dust, paint splatters, adhesive residues, and caulk. Cleaning them properly is essential for aesthetics and functionality. This is a multi-stage process, not a simple wipe-down, due to the risk of scratching new glass with embedded debris if not pre-cleaned correctly.
Cleaning glass, frames, and sills effectively:
- Initial Dust and Debris Removal: This is the crucial first step to prevent scratching during wet cleaning. Use a soft brush or microfiber cloth to gently dust the glass, frames, sills, and window tracks. A vacuum cleaner with a brush attachment is ideal for clearing loose dirt and debris from tracks and sills.
- Frames and Sills Cleaning: After dusting, wipe the frames and sills with a damp microfiber cloth. The cleaning solution should be appropriate for the frame material. For example, a baking soda and vinegar solution can be effective for vinyl frames , while mild soapy water is generally safe for painted wood.
- Glass Cleaning: Apply a mild window cleaning solution. Options include commercial glass cleaners (preferably ammonia-free for general use) or a DIY solution of equal parts white vinegar and water. Allow the solution to sit for a few moments to break down any film or smudges. For a streak-free finish, use a quality squeegee, pulling it from top to bottom in a controlled motion. Overlap each stroke by about an inch and wipe the squeegee blade with a clean, lint-free cloth after each pass. Dry the edges of the glass and any remaining moisture with a separate clean microfiber cloth.
Safely removing paint, caulk, and stickers:
The key to removing these stubborn residues is the “right tool for the residue” principle. There isn’t a universal solution; identifying the residue and window material is crucial to select an effective and non-damaging method.
- Paint Splatters:
- Softening: The first step is always to soften the paint. For water-based paints, apply warm, soapy water and let it sit. Warm vinegar can also be effective.
- Scraping: Once softened, use a new, sharp razor blade or a dedicated glass scraper. Hold the blade at a low, consistent angle (around 45 degrees) and use light, even strokes on a WET glass surface to lift the paint. Plastic scrapers are a safer option for window frames to avoid gouging.
- Solvents: For oil-based paints, acetone (nail polish remover) or mineral spirits can be effective. However, always test these solvents on an inconspicuous area first, especially on tinted windows or frames, as they can damage certain materials. Commercial paint removers like Goof Off or Krud Kutter are also options, but require careful adherence to instructions and safety precautions.
- Caulk Residue:
- Softening: Old caulk can be softened using a heat gun on a low to medium setting (being careful not to overheat surrounding materials) or by applying a chemical caulk remover according to product directions.
- Scraping: Gently wedge a utility knife, razor scraper, or plastic putty knife under the edge of the softened caulk and carefully lift or scrape it away.
- Residue Removal: Lingering residue can often be dissolved by wiping with a cloth dampened with rubbing alcohol or vinegar. On frames, very fine-grit sandpaper can be used with extreme caution, followed by cleaning with rubbing alcohol.
- Stickers and Adhesives:
- Heat: A hairdryer on a warm setting can often loosen the adhesive on stickers or protective films.
- Soaking/Solvents: Apply window cleaner, rubbing alcohol, or warm soapy water and allow it to soak into the sticker or adhesive to break it down. Household lubricants, cooking oils (like olive or coconut oil), or even a DIY paste of baking soda and oil can also be effective at dissolving adhesive.
- Scraping: Use a plastic scraper, an old credit card, or a dull knife to gently lift the sticker and scrape away residue once softened.
- Commercial Products: Products like Goo Gone can be used, but it’s vital to test them on an inconspicuous area first, particularly on stainless steel frames, and avoid contact with plastic parts. Specialized adhesive removers, such as Titan Oil Flo, are also available.
Tips for avoiding scratches on new windows:
- Lubrication is Key: Always ensure the glass surface is wet with water or a cleaning solution before attempting to scrape any residue.
- Use a New, Sharp Blade: A dull, chipped, or rusty razor blade is far more likely to scratch the glass than a fresh, sharp one.
- Proper Technique: Scrape in one direction only; avoid a back-and-forth sawing motion. Lift the blade after each stroke. Maintain a low, consistent angle (e.g., 45 degrees) between the blade and the glass.
- Test First: Always test your scraping technique and any chemical removers on a small, inconspicuous area of the window before proceeding.
- Consider Alternatives: For very delicate glass or if unsure, try less abrasive methods first, such as 0000 (superfine) steel wool, bronze wool, or specialized non-scratch white cleaning pads.
- Scratch Waivers: For professional construction cleanups, obtaining a scratch waiver from the client is advisable, as some new glass may have “fabrication debris” (microscopic particles fused to the glass during manufacturing) that can cause scratches when cleaned, regardless of the technique used.
Cabinetry and Drawers: Immaculate Inside and Out
Newly installed or renovated cabinetry is a significant investment and a focal point in kitchens and bathrooms. Post-construction cleaning must be meticulous to remove all dust and residues without damaging the new finishes. This is a detail-oriented task, as cleaning is required both inside and outside, including all shelves, drawers, and hardware. A top-down approach should be employed here as well.
General Approach:
- Dust Removal: The first and most critical step is to thoroughly remove all loose construction dust. Use a vacuum cleaner with a soft brush attachment or a dry microfiber cloth to dust all exterior and interior surfaces, including the tops of cabinets, sides, fronts, shelves, and the inside of drawers. Pay special attention to corners, crevices, and intricate details where dust loves to hide.
- Wiping Down: After the initial dusting, wipe all surfaces with a clean, damp (not wet) microfiber cloth. For general cleaning and disinfection, a mild disinfecting cleaner can be used, but always ensure it’s compatible with the cabinet material.
Cleaning techniques for different cabinet materials:
Cabinet cleaning is highly material-dependent. Using an inappropriate cleaner or technique can lead to discoloration, warping, or other damage.
- Wood (Custom/Solid):
- A solution of mild dish soap and hot or warm water is a commonly recommended gentle cleaner. Apply with a soft cloth or sponge, wiping in the direction of the wood grain.
- Rinse by wiping with a clean, damp cloth, and then dry the surface thoroughly with a soft, dry cloth to prevent water spots or moisture damage.
- For more stubborn grime, a paste made from baking soda and water, or a diluted solution of white vinegar and hot water, can be effective. Test in an inconspicuous area first.
- Avoid using oil-based cleaners that can leave a sticky residue attracting more dust. Products like Murphy’s Wood Cleaner are sometimes suggested.
- Laminate:
- Generally, laminate cabinets can be wiped clean with a damp, soft cloth.
- If needed, a mild liquid detergent or a non-abrasive household cleaner can be added to the water. After cleaning, rinse the surface by wiping with a clean, damp cotton cloth.
- For smears or streaks, a mild glass cleaner can be effective.
- It is crucial to avoid abrasive cleaners, scouring pads, strong chemical solvents, acids, or alkaline cleaners, as these can permanently damage or discolor the laminate surface.
- Painted:
- Always begin by dusting with a dry microfiber cloth to remove loose particles. Wiping with a wet cloth before dusting can smear the dust and make it harder to remove.
- Clean with a gentle solution of mild dish soap and warm water, using a soft microfiber rag that is damp but not dripping wet. Always test the solution on a hidden spot first.
- Rinse by wiping with a clean, slightly wet microfiber cloth to remove any soap residue, and then dry the cabinets thoroughly with a lint-free towel to prevent water marks.
- For stains, a diluted solution of white vinegar (equal parts water and vinegar) can be used. For very stubborn stains, a paste of baking soda and vinegar can be applied, allowed to sit for a few minutes, and then gently rinsed off.
- Avoid abrasive cleaners, scrubbing pads, and harsh chemical solvents, which can strip the paint or dull the finish.
- Thermofoil:
- These cabinets are best cleaned with warm water and a soft cotton or microfiber cloth.
- If water alone is insufficient, a non-detergent, non-abrasive household cleaner like Murphy® Oil Soap or a mild dish soap mixed with warm water can be used.
- For particularly tough spots, a carefully applied paste of baking soda and water can be tried, scrubbing very gently.
- It is critical to avoid products containing acetone, concentrated alcohols, acetate, ethyl alcohol, solvents, abrasives (like Comet or Ajax), acidic cleaners, furniture wax or polish, scouring pads, and ammonia-based cleaners, as these can cause delamination or discoloration.
- Metal:
- Use a gentle, pH-neutral liquid soap mixed with lukewarm water. Apply with a soft microfiber cloth.
- Wipe gently, paying particular attention to corners, grooves, and handles where dust can accumulate. Rinse by wiping with a clean, damp cloth to remove all soap residue.
- Dry thoroughly with a fresh, dry microfiber cloth to prevent water spots and streaks, ensuring the metal retains its luster.
- For stubborn stains on metal, a non-abrasive cleaner specifically designed for metal can be used, following product instructions carefully.
Removing protective films and adhesive residue:
New cabinets often come with protective plastic films that need to be removed, which can sometimes leave behind sticky adhesive residue.
- Check Manufacturer Instructions: Before attempting removal, always consult the cabinet or appliance manufacturer’s guidelines, as they may provide specific instructions or warnings.
- Gentle Peeling: Start by trying to peel the film off slowly and carefully from a corner. Sometimes, a plastic scraper or an old credit card can help to lift an edge without scratching the surface.
- Soften the Adhesive: If residue remains or the film is difficult to remove, try softening the adhesive.
- A mild solution of dish soap and warm water applied with a soft cloth can help loosen some adhesives.
- Household liquid dishwashing detergent, mineral oil, or cooking oil can be applied to a soft cloth, placed over the residue, and allowed to soak for a period to break down the adhesive.
- Gentle heat from a hairdryer on a low setting can soften some adhesives, particularly on wood surfaces, making them easier to peel.
- Rubbing alcohol (isopropyl alcohol) is often effective at breaking down adhesive residues, especially on metal surfaces. However, it should be tested in an inconspicuous area first on plastics and finished wood, as it can sometimes affect these surfaces.
- Specific Solvents (Use with Caution):
- For wood cabinets, mild solvents like orange oil, naphtha, mineral spirits, or even WD-40 can be tested carefully on a hidden spot.
- Commercial adhesive removers, such as Goo Gone® or citrus oil-based products for wood, can be effective. Always test Goo Gone® on stainless steel first, as it can sometimes discolor it, and avoid contact with plastic parts.
- Wipe Clean and Dry: After the film and residue are removed, wipe the surface clean with a soft, dry cloth. If necessary, polish the surface according to the cabinet material.
- Precautions: Never use abrasive pads or harsh scouring powders. Be extremely cautious when using any solvents on plastic parts or finished wood surfaces, as they can cause irreversible damage.
The diverse cleaning requirements for different cabinet materials, coupled with the need for meticulous inside-and-out cleaning and careful removal of protective films, underscore the complexity of this task. A generic cleaning approach is not only ineffective but risks damaging expensive new installations.
Polishing Fixtures: Bringing Back the Shine
 After the dust settles and surfaces are cleaned, the final step to making a renovated space truly sparkle is polishing the fixtures. This includes light fixtures and plumbing fixtures, which can accumulate dust, smudges, and sometimes even minor oxidation or water spots during the construction process. The approach to polishing varies significantly based on the material of the fixture and whether it has a protective lacquer.
Light Fixtures: Cleaning and polishing various materials (glass, metal)
- Safety First: Before cleaning any light fixture, always turn off the power at the circuit breaker to prevent electrical shock. Allow any incandescent or halogen bulbs to cool completely before handling.
- Dusting: Begin by removing all loose dust from the fixture using a soft microfiber cloth or an extendable duster.
- Glass Components (globes, shades, crystals):
- If glass parts are removable, carefully detach them. Wash them in a solution of mild dish soap and warm distilled water. Using distilled water helps prevent mineral spots and streaks upon drying. Rinse thoroughly with clean distilled water and dry completely with a lint-free microfiber cloth before reattaching.
- For non-removable glass, dampen a microfiber cloth with the cleaning solution and gently wipe the glass surfaces, taking care to avoid any electrical components. Use a clean, damp cloth to rinse away residue, then dry with a fresh microfiber cloth.
- A streak-free commercial glass cleaner (preferably ammonia-free for general use, like Invisible Glass) can also be used.
- For intricate chandeliers, individual crystals can be cleaned using a diluted vinegar and water solution and wiped with a microfiber cloth.
- Metal Components (brass, copper, stainless steel, polished metal, painted metal): The finish integrity is paramount here; using the wrong cleaner can cause irreversible damage.
- Polished Metal (General): Clean with a soft cloth using plain water or a mild detergent solution. A non-abrasive paste or liquid wax (such as Turtle Wax or another non-abrasive car wax) can be applied for extra protection. Avoid abrasive materials, ammonia, or alcohol-based cleaners.
- Painted Metal: Typically, these can be cleaned with a dry, soft cloth. If more intensive cleaning is needed, use plain water or a very mild detergent solution. Again, avoid abrasives, ammonia, or alcohol.
- Brass and Copper:
- Unlacquered Finishes: These metals naturally tarnish or develop a patina over time. To restore a bright shine, commercial polishes like Brasso, Noxon, Simichrome, Wenol, Flitz, or Neverdull polishing wadding can be used. These products typically contain mild abrasives that remove the tarnished layer to expose the raw metal underneath. Use them sparingly, as they do remove a small amount of metal with each application. DIY alternatives include a paste of lemon juice and baking soda, or a mixture of vinegar and salt. After polishing, rinse thoroughly and dry.
- Lacquered Finishes: Lacquered brass or copper should ONLY be cleaned with a mild detergent and water solution. Ammonia-based cleaners or abrasive polishes will damage or strip the protective lacquer coating.
- Stainless Steel: Use a microfiber cloth and a cleaner specifically formulated for stainless steel, or a solution of mild dish soap and water. Always wipe in the direction of the stainless steel’s grain to avoid micro-scratches and maintain its appearance. For oily marks or fingerprints, isopropyl alcohol, acetone, or methylated spirits can be effective (test first). A diluted vinegar and water solution can also be used.
- Bronze: Begin by rinsing with warm water and drying. For cleaning, use a mild dish soap and warm water solution, or a diluted vinegar solution for tougher grime. A soft-bristled toothbrush can be useful for cleaning crevices. After cleaning, buff the fixture with a dry microfiber cloth. To protect the finish and enhance shine, a high-quality clear paste wax (like Trewax) can be applied.
- Bulbs: If bulbs are dusty, they can be wiped gently with a damp cloth and mild soap solution, ensuring the electrical socket or base remains dry. Dry bulbs thoroughly before reinstalling and turning the power back on.
Plumbing Fixtures: Techniques for chrome, stainless steel, brass, bronze, nickel
A “gentle but persistent” approach is often best for plumbing fixtures, especially when dealing with residues like limescale, soap scum, or minor rust. This involves applying a mild cleaning agent and allowing it sufficient dwell time to break down the deposits, rather than resorting to harsh scrubbing that could damage the finish.
- General Care: Wiping down fixtures with a soft, dry cloth after each use is a good preventative measure against water spots and mineral buildup.
- Chrome:
- Clean with a solution of mild dish soap and warm water, applied with a microfiber cloth. Rinse well and dry thoroughly with a clean microfiber cloth to prevent water spots and achieve a high shine.
- For limescale and hard water spots, a solution of equal parts distilled white vinegar and water is effective. Spray it on, let it sit for a few minutes (or wrap a vinegar-soaked cloth around the faucet for about an hour for tougher deposits), then wipe clean, rinse, and dry.
- Soap scum can often be removed by gently scrubbing with a dryer sheet (new or used) or by applying a plain cooking spray and then wiping it clean.
- For light rust, a paste of baking soda and water, or lemon juice and salt, can be gently scrubbed onto the affected area. Some suggest using cola on a rag for minor rust on chrome.
- To enhance polish and repel water, buff with a dry microfiber cloth. A very small amount of baby oil or coconut oil can be applied with a cloth.
- Stainless Steel: Clean as per stainless steel light fixtures: mild soap and water, specialized stainless steel cleaners, or a vinegar/water solution, always wiping with the grain. Lemon juice mixed with baking soda can tackle tough spots.
- Brass:
- Unlacquered: Use a paste of lemon juice and baking soda, or a vinegar and salt mixture. Commercial brass cleaners (Brasso, Weiman Brass Cleaner, Wright’s Brass Polish) are also effective.
- Lacquered: Clean only with mild detergent and water to avoid damaging the lacquer.
- Bronze: Similar to bronze light fixtures. Use mild dish soap and warm water, or a diluted vinegar solution for tougher grime. Gentle scrubbing may be needed for crevices. Buff dry with a microfiber cloth. A protective furniture wax or a specialized bronze paste wax can be applied to enhance shine and protect the finish. For water spots, a paste of 1 tsp salt, 1 cup water, and 1 tbsp flour can be applied, allowed to dry, then rinsed off; follow with furniture wax.
- Nickel (Brushed/Polished):
- Brushed Nickel: This finish is more delicate. Clean with warm water and a microfiber cloth. For more stubborn grime, use a very small amount of dishwasher detergent on a damp cloth. Avoid vinegar on brushed nickel as it can damage the finish. Dry thoroughly. A suitable wax treatment can be applied if desired.
- Polished Nickel: A solution of one part white vinegar to three parts water can be used. Apply with a microfiber cloth, allow it to sit for about 5 minutes to descale and restore shine, then wipe clean and dry thoroughly.
- Polishing Tools: Microfiber cloths are indispensable for both cleaning and buffing fixtures to a high shine without causing scratches. Some microfiber cloths are specifically designed with a cleaning side and a polishing side for optimal results on materials like stainless steel.
The consistent emphasis on avoiding abrasive cleaners and harsh chemicals across various fixture materials highlights that the primary goal during polishing is not just achieving shine but also preserving the fixture’s original finish and integrity. Knowledge of material compatibility is crucial, as an incorrect product choice can lead to irreversible damage.
Floor Cleaning and Finishing: From Grime to Gleam
Floors bear the brunt of construction traffic and debris accumulation. Post-construction floor cleaning is a multi-step process that often involves not just cleaning but also specific finishing treatments to protect the new surface and enhance its appearance. The methods vary significantly based on the flooring material, underscoring that a one-size-fits-all approach can be detrimental. Using the wrong cleaner or technique can lead to permanent damage, such as etching on natural stone, warping of laminate, or stripping of factory finishes, making material-specific expertise invaluable.
General floor cleaning steps (sweeping, vacuuming, mopping):
- Debris Removal: The process always begins with removing larger pieces of debris, loose dirt, and pervasive dust. This is typically done by sweeping with a broom appropriate for the floor type (e.g., soft-bristled for delicate surfaces) or by using a dust mop.
- Vacuuming: After the initial sweep, all floor types should be thoroughly vacuumed. A vacuum cleaner equipped with a HEPA filter is highly recommended to capture fine construction dust. It’s crucial to use the correct attachments for edges and corners and to ensure the beater bar (rotating brush) is turned off when vacuuming hard floors to prevent scratching.
- Mopping:
- Use a damp mop—not soaking wet—especially for water-sensitive flooring like hardwood and laminate.
- The cleaning solution must be specifically suited to the floor material.
- Mop systematically, working from the farthest point of the room toward the exit to avoid walking on cleaned areas.
- For wood floors, always mop in the direction of the wood grain.
- Change the mop water or cleaning solution frequently if it becomes visibly dirty to prevent redepositing grime onto the floor.
Removing paint and drywall mud from various floor types:
Accidents happen, and paint drips or drywall mud splatters are common.
- General Approach: If the spill is still wet, act immediately. Blot the substance carefully rather than rubbing, which can spread it or push it deeper into porous surfaces. For dried residues, gentle scraping with an appropriate tool is often the first line of attack.
- Drywall Mud:
- Concrete: Scrape off any large, dried pieces with a putty knife. Wet the affected area thoroughly with water to soften the mud, then scrub with a firm bristle brush or sponge. Wipe up the loosened residue. A final wipe with a clean, damp rag should remove any remaining white film.
- Laminate/Hardwood: After thorough vacuuming, damp-mop with a gentle cleaning solution diluted in warm water, being careful not to soak the floor. For stubborn spots, a shop vacuum with a bristle brush attachment can be effective.
- General Note: Once drywall mud has completely dried, it can be very difficult to remove and may require careful sanding or scraping. Attempting to wipe wet drywall dust with a very wet cloth can create muddy streaks that are harder to clean ; a dry microfiber cloth should be used first for loose dust.
- Paint Splatters:
- Begin by identifying the type of paint (water-based latex/acrylic or oil-based) as this dictates the removal method.
- Hardwood Floors: For fresh water-based paint, warm soapy water and gentle scrubbing should suffice. For dried latex or oil-based paint, apply rubbing alcohol to a cloth, dab the spot, allow it to soften the paint, then gently try to peel or scrape it off with a plastic scraper. Mineral spirits can be used sparingly for stubborn oil-based paint, but test in an inconspicuous area first. A heat gun or hairdryer on a low setting can also soften dried paint, making it easier to scrape. Commercial paint removers are a last resort and must be tested carefully.
- Vinyl Plank Flooring: If paint is wet, blot immediately with a paper towel, then clean with a mild detergent and water solution, rinse, and dry. For dried paint, gently scrape with a plastic tool (never metal, which can scratch the wear layer). If a stain remains, scrub lightly with a detergent/water solution. Rubbing alcohol or a diluted white vinegar solution (1:1) can be effective for dried latex or acrylic paint; apply, let sit for a few minutes, then gently scrape or wipe.
- Tile (Ceramic/Porcelain): Small, dried paint splatters can sometimes be gently scraped off with a utility knife (test in a hidden area first to ensure no damage to the glaze). A heat gun or hairdryer can soften paint for easier removal. Soaking smaller spills or drips with white vinegar for 2-3 hours can also loosen the paint for scraping. Commercial paint removers can be used, but always test first. Crucially, avoid using vinegar or other acidic cleaners on natural stone tiles.
- Natural Stone Tile: These materials are sensitive to acids. Do not use vinegar. Gentle scraping may be possible if done with extreme care. Otherwise, specialized stone-safe paint removers are necessary. Always test any product in a hidden spot.
Specifics for different flooring:
 The “finishing” steps—such as sealing or polishing—are just as important as the initial cleaning for the long-term appearance and durability of new floors. Homeowners might focus solely on cleaning and overlook these critical protective treatments, leading to faster wear and tear.
- Tile: Grout haze removal and sealing:
- Grout Haze Removal: This chalky film is common after tiling. It’s best to address it promptly, as it becomes harder to remove over time.
- Methods: For very fresh haze, a dry cheesecloth wipe might suffice after the grout has set. If that fails, try a damp towel or sponge. For ceramic and porcelain tiles (NOT natural stone), a 50/50 solution of water and white vinegar can be effective. For more stubborn haze or for natural stone, specialized grout haze removers are available. These are typically acidic for most tiles but alkaline-based for acid-sensitive natural stone. Always dilute and use according to manufacturer directions, wearing appropriate PPE. In extreme cases of very old haze, careful scraping might be attempted.
- Grout Sealing: This crucial step protects porous grout from absorbing stains, dirt, and moisture.
- Timing: New grout must be allowed to cure fully (typically at least 48 hours, check manufacturer’s instructions) before sealing. The grout must also be clean and completely dry.
- Application: Apply a quality grout sealer uniformly along the grout lines using a foam sponge, small brush, or applicator roller. Wipe any excess sealer off the tile surfaces within 5-10 minutes with a damp cloth.
- Testing & Reapplication: After the sealer has dried (per label instructions), test its effectiveness by placing a few drops of water on a grout line. If the water beads up, the grout is properly sealed. If the water absorbs or lays flat, wipe it off, wait about 30 minutes, and apply a second coat. Grout should generally be resealed annually or as needed when water stops beading.
- Grout Haze Removal: This chalky film is common after tiling. It’s best to address it promptly, as it becomes harder to remove over time.
- Hardwood: Cleaning and polishing/buffing:
- Cleaning: After thorough vacuuming, damp mop with a pH-neutral cleaner or a product specifically recommended by the flooring manufacturer. Avoid excessive water, which can damage wood.
- Polishing/Buffing: This process restores shine, evens out the appearance, and can fill in microscopic scratches in the floor’s finish.
- Preparation: The floor must be impeccably clean and dry. Remove all furniture and rugs. It’s wise to test the polish in an inconspicuous area first.
- Application: Hardwood floor polishes (e.g., Bona Polish) are typically applied with a microfiber applicator pad or a high-density foam roller. Work in small, manageable sections, applying the polish along the grain of the wood. Use a “feathering” technique to blend sections smoothly and avoid visible start-and-stop marks.
- Buffing Machine: For a more intensive buffing, particularly to address light marks or scuffs in a polyurethane finish, a spray buffer machine can be rented. A buffing solution is applied to the floor, and the machine is then used to polish the surface. These machines require careful handling.
- Drying/Curing: Allow the polish to dry according to product instructions – typically at least an hour before light foot traffic and 24 hours before resuming heavy traffic or replacing furniture. If a full sealant coat is applied, curing can take several days.
- Sealing: New or newly sanded hardwood floors require sealing for protection. Common sealants include polyurethane (water-based or oil-based), penetrating oil sealers, and hard wax oils. This process involves thorough surface preparation (often including sanding), careful application of thin, even coats (usually 3-4), and adequate curing time.
- Laminate: Cleaning and sealing seams:
- Cleaning: After vacuuming (no beater bar) or dust mopping, damp mop using only cleaners specifically designed for laminate flooring. Products like LamanatorPlus Floor Cleaner & Revitalizer are mentioned. Critically, avoid excessive water, as it can seep into seams and cause swelling, warping, or delamination. Do not use soap, oil-soap detergents, or vinegar, as these can damage the floor or void the warranty.
- Sealing Seams: Laminate flooring itself is generally not sealed across its entire surface like hardwood. However, applying a laminate floor restorer product can help seal the seams and joints between planks, offering protection against liquid penetration and minor spills.
- Vinyl: Cleaning and sealing:
- Cleaning: Sweep or vacuum to remove loose debris. Damp mop with a cleaner specifically formulated for vinyl floors (ensure it’s bleach-free) or a diluted solution of apple cider vinegar and water. Avoid abrasive cleaners or scouring pads, which can dull or scratch the finish.
- Sealing (LVT – Luxury Vinyl Tile/Plank): LVT often comes with a factory-applied urethane wear layer. However, applying an additional sealer can enhance protection, make cleaning easier, and prolong the floor’s life. Recommended sealers include water-based polyurethane products (e.g., Covertec Vinyl Guard) or nano-coatings (e.g., Covertec Vinyl Diamond). These are applied after the new floor is thoroughly cleaned and dried. Avoid solvent-based sealers and traditional acrylic floor finishes that require stripping, as these can damage LVT.
- Natural Stone: Cleaning and polishing:
- Cleaning: Sweep or vacuum with a soft brush attachment on low suction. Damp mop with clean, warm water or a mild, pH-neutral detergent specifically designed for natural stone (often citrus-based or nonabrasive formulas). Crucially, avoid acidic cleaners like vinegar or lemon juice, as they can etch and dull the surface of many natural stones like marble, limestone, and travertine.
- Polishing: To restore shine, options include using a baking soda paste (test first), a mixture of olive oil and lemon juice (test carefully due to acidity concerns on some stones), or specialized commercial stone polishes or polishing powders applied with a soft cloth or a floor buffer. For a professional finish, experts may use diamond abrasives and polishing machines.
- Sealing: Sealing is essential for most natural stone floors to protect against stains and moisture penetration. Use a high-quality impregnating sealer formulated for the specific type of stone. The sealer should be applied evenly, allowed to penetrate the stone, and any excess wiped off according to the manufacturer’s instructions.
- Concrete: Cleaning, polishing, and sealing:
- Cleaning: For sealed concrete, after sweeping or vacuuming, mop with a mild detergent and warm water solution. For unsealed concrete, tougher stains may require a poultice made from trisodium phosphate (TSP) and an absorbent material, or specialized concrete stain removers (use TSP with caution and check local regulations; avoid vinegar on unsealed concrete as it can etch the surface). A more aggressive clean can be achieved with a diluted muriatic acid wash (typically 1 part acid to 3 parts water), but this requires extreme caution and proper PPE. Minor construction residues on sealed concrete can often be removed by buffing with a swing machine or by using chemical cleaners like Prosoco Cleaner Degreaser.
- Polishing: This is a multi-step mechanical process that involves grinding the concrete surface with progressively finer diamond abrasive grits (e.g., starting from 30/40 grit and going up to 800, 1500, or even 3000 grit for a high-gloss finish). A chemical densifier or hardener is typically applied during the grinding process to increase surface strength and improve the polish.
- Sealing: After polishing, a high-quality sealant (film-forming sealers are common for interior polished concrete) should be applied to protect the surface from stains, wear, and moisture, and to make it easier to maintain.
Appliance Cleaning: Ready for Use
Newly installed kitchen and laundry appliances require careful cleaning to remove construction dust, fingerprints, and any protective films or adhesive residues left from packaging and installation. It is paramount to consult the manufacturer’s specific cleaning recommendations for each appliance before starting, as using incorrect products or methods can damage surfaces or void warranties. A general approach involves wiping appliances thoroughly, inside and out.
Removing Protective Films and Adhesive Residue:
- Check Manufacturer Instructions: This is the crucial first step.
- Gentle Peeling: Attempt to peel the film slowly from a corner. A plastic scraper or an old credit card can be used to gently lift an edge if necessary, taking care not to scratch the appliance surface.
- Soften Adhesive: If residue remains or the film is stubborn:
- A solution of mild dish soap and warm water can help loosen many adhesives.
- Household liquid dishwashing detergent, mineral oil, or cooking oil can be effective. Apply with a soft cloth, allow it to soak on the residue for a few minutes to break it down, then wipe away.
- Rubbing alcohol (isopropyl alcohol) is good for breaking down many adhesives, especially on metal surfaces. Test in an inconspicuous area first, particularly on plastics or painted finishes.
- Commercial Removers: Products like Goo Gone® can be used, but it’s vital to test on stainless steel in a hidden spot as it can sometimes cause discoloration. Avoid contact with plastic parts.
- Wipe Clean & Dry: After successful removal, wipe the surface with a clean, soft, dry cloth. Polish if appropriate for the material.
- Precautions: Never use abrasive pads or scouring powders. Exercise caution with solvents on plastic components and delicate finishes.
Specific Appliance Types & Surfaces:
The “grain” direction on stainless steel and the need for “gentle pressure” on most appliance surfaces are recurring themes, highlighting that finishes can be more delicate than they appear. Construction dust itself can be abrasive, so aggressive scrubbing, even with a soft cloth, can cause micro-scratches if not done carefully and with the grain where applicable.
- Stainless Steel:
- Begin by removing loose dust and debris with a soft brush or a dry microfiber cloth, always wiping in the direction of the steel’s grain to prevent micro-scratches.
- Clean with a solution of warm water and mild dish soap, or use a specialized stainless steel cleaner (brands like Weiman, Therapy, and Magic are often recommended). Always wipe with the grain.
- A solution of equal parts white vinegar and water, or vinegar mixed with a little olive oil, can be used for cleaning and polishing. Lemon juice can be added to a vinegar/water mix for a fresh scent.
- For stubborn stains or stuck-on grime, a paste of baking soda and water can be gently applied.
- After cleaning, rinse the surface thoroughly (if soap or vinegar was used) and dry immediately with a clean, dry microfiber cloth to prevent water spots and streaks.
- For polishing, a small amount of olive oil or baby oil applied with a soft cloth can enhance shine.
- Enamel (e.g., Stovetops, Oven Exteriors):
- Ensure the surface is completely cool before cleaning. Remove any loose debris.
- A common cleaning method involves using mild dish soap with warm water, or creating a paste from baking soda and water, then spritzing it with white vinegar to create a fizzing action that helps lift grime. Let this sit for about 15 minutes.
- Gently scrub the surface with a soft-bristled brush (an old toothbrush works well for crevices) or a microfiber cloth. Avoid using steel wool, abrasive scouring pads, or harsh powders, as these can scratch the enamel finish.
- Wipe the surface clean with paper towels to remove the cleaning solution and loosened grime. Follow up by degreasing with a solution of hot water and dish soap applied with a microfiber cloth.
- Some users report success with ammonia (straight or diluted) for very tough baked-on grime on enamel, but this should be approached with caution due to strong fumes and the need to test in an inconspicuous area first.
- Glass Cooktops:
- Ensure the cooktop is completely cool. Wipe away loose dust and debris first.
- For daily cleaning or light dust, spray with white vinegar, wipe with a damp microfiber cloth, and then dry with a clean, dry microfiber cloth for a streak-free shine.
- For tougher stains, residues, or burnt-on food (which might be present if the kitchen was used lightly during final construction phases), sprinkle baking soda generously over the affected areas. Lay a towel soaked in hot water (and wrung out) over the baking soda and let it sit for 15-20 minutes. The steam and baking soda will help loosen the grime. Gently scrub with the cloth or a soft sponge, then wipe clean and dry.
- Specialized glass stovetop cleaners are also effective and should be used according to the manufacturer’s instructions.
- For very stubborn, stuck-on debris (like paint specks, with extreme caution), a razor blade scraper can be used. Hold it at a 45-degree angle to the cool, slightly damp surface and gently scrape in one direction. Wipe away debris as you go. Follow with a vinegar solution clean.
- Oven Interiors:
- Remove oven racks. These can typically be cleaned separately by soaking them in hot, soapy water. For heavy grime, adding baking soda to the soak can help.
- For the oven interior, a common method is to create a paste using about 1/2 cup of baking soda and a few tablespoons of water. Spread this paste over the interior surfaces of the cool oven, avoiding the heating elements. Let it sit for several hours or overnight to break down grime and dust.
- After the paste has sat, fill a spray bottle with white vinegar and spray it over the baking soda. This will cause a foaming reaction that helps lift the residue.
- Gently scrub the interior with a non-abrasive sponge or brush. Wipe everything clean with a damp microfiber cloth, rinsing the cloth frequently. Finally, dry the oven interior.
- If the oven has a self-cleaning feature, this can be utilized according to the manufacturer’s instructions. After the cycle completes and the oven cools, wipe out any ash residue.
- Professional cleaning services may use specialized degreasers for oven interiors.
- Control Panels (Knobs & Touch Screens):
- Always ensure controls are off and the surface is cool before cleaning.
- The safest method is to use a soft cloth or sponge dampened with a solution of mild dish soap and warm water.
- Alternatively, a commercial glass cleaner, a mild liquid detergent, or a non-abrasive all-purpose cleaner can be used. After cleaning, rinse the area by wiping with a clean, damp cloth, and then buff dry with a soft, lint-free cloth.
- A diluted solution of vinegar and water is also an option for control panels.
- Crucially, avoid using abrasive cleaners, scouring pads, or applying excessive pressure, as these can scratch the panel or rub off lettering and symbols.
- For models with LCD touch screens, it’s advisable to lock the control panel before cleaning, if this feature is available (consult the owner’s manual).
- Black Appliances:
- These often show streaks and fingerprints easily. Microfiber cloths are essential for a streak-free finish.
- A solution of equal parts water and white vinegar in a spray bottle can be used to clean both exterior and interior surfaces of black appliances like microwaves and refrigerators.
- After the vinegar solution, wash with a new microfiber cloth dipped in warm, soapy water (mild dish soap). Using distilled water for this step can help prevent streaks from hard tap water.
- The final step is crucial for a streak-free look: dry and buff the appliance thoroughly with a clean, dry microfiber cloth, using circular motions similar to polishing a mirror.
- Matte Finish Appliances:
- Matte finishes can be delicate and prone to showing marks or becoming shiny if cleaned improperly. General advice suggests using very gentle methods. Microfiber cloths and mild detergents are usually the safest bet [ (general post-construction context implies gentle approach)]. One source mentions a DIY cleaning formula for a fridge including lemon juice, dish soap, alcohol, baking soda, and water ; however, such a mixture should be tested with extreme caution on a very inconspicuous area of a matte finish, as some of these ingredients (like baking soda if not fully dissolved, or alcohol) could potentially alter the matte appearance. Specific guidance for post-construction cleaning of matte appliances is less detailed in the provided materials, indicating a need for careful research of manufacturer instructions or professional consultation for these surfaces.
Debris Removal and Final Site Tidying: The Last Sweep
 The final stage of post-construction cleanup involves the comprehensive removal of all remaining debris from both interior and exterior spaces, coupled with meticulous site tidying and a final inspection to ensure the property is truly ready. This phase is critical, as improper debris disposal can lead to environmental issues and legal penalties. It’s more than just “taking out the trash”; it’s a regulated process.
Interior and exterior debris removal:
- Systematic Collection: Begin by methodically collecting all remaining large debris. This includes any overlooked wood scraps, pieces of drywall, packaging materials, leftover hardware like nails and screws, and any other construction-related waste from all interior rooms and exterior areas. Use heavy-duty trash bags for smaller items and arrange for a dumpster or professional removal service for larger volumes.
- Exterior Specifics: Pay close attention to exterior areas. Clear all walkways, driveways, patios, decks, the yard, and any garage spaces of construction materials and debris. It’s particularly important to ensure no nails or screws are left on driveways or walkways, as these can cause tire damage or injury. After debris removal, these hard surfaces should be thoroughly swept or, for a deeper clean, power washed to remove ingrained dirt and fine dust. Don’t forget to clean exterior light fixtures and the mailbox.
- Tools for Debris Removal: Essential tools include protective gloves, shovels, brooms (both soft and stiff-bristled), wheelbarrows for transport, heavy-duty shop vacuums for finer debris, and potentially power washers for exterior surfaces. For larger construction sites, tilt trucks or utility carts can be invaluable for efficiently moving materials and waste.
Safe and legal disposal of construction waste:
Proper waste management is a non-negotiable aspect of post-construction cleanup.
- Importance: Adhering to correct disposal procedures is vital to protect the environment, prevent health risks associated with hazardous materials, and avoid potentially significant legal fines and penalties for non-compliance.
- Sorting & Segregation: Implement an on-site system for sorting and segregating different types of waste. Use clearly labeled, separate bins for materials like wood, metal, concrete, general waste, hazardous waste, and recyclables (e.g., glass, plastic, cardboard). This practice facilitates recycling efforts and ensures that hazardous materials are handled appropriately.
- Hazardous Materials: Items such as leftover paints, solvents, thinners, adhesives, treated wood, fluorescent bulbs, batteries, and any materials containing asbestos or lead must be considered hazardous. These require special handling and must be disposed of strictly according to local, state, and federal environmental regulations. They should never be placed in regular trash containers or poured down drains.
- Recycling: Maximize recycling efforts. Materials like concrete and asphalt can often be crushed and reused as aggregate. Metals such as steel, aluminum, and copper are highly recyclable. Untreated wood can be repurposed or mulched. Gypsum from drywall can also be processed for reuse in new drywall or as a soil amendment.
- Disposal Services: Engage licensed and reputable waste transport providers and utilize designated and approved disposal sites or recycling facilities for all construction waste.
- Waste Management Plan: For larger projects, developing a formal construction waste management plan is advisable. This plan should detail the types of waste anticipated, procedures for on-site separation, collection methods, designated recycling streams, and protocols for the safe and legal disposal of all materials.
Final walkthrough checklist points:
The final walkthrough is a critical quality control step, not merely a casual glance around. It’s a systematic inspection to confirm that all cleaning tasks have been completed to the required standard, any damages from construction have been addressed, and the property is safe, pristine, and ready for occupancy or handover.1
- Objective: To verify completeness and quality of the cleanup.
- Key Areas for Inspection:
- Entrances and Exits: Doors, frames, and doorknobs should be clean and free of dust or smudges. Entranceways should be swept and mopped.
- All Rooms (Living Areas, Kitchens, Bathrooms, Bedrooms):
- Floors: Thoroughly swept, vacuumed (including edges and corners), and mopped. No visible dust, debris, or construction marks (e.g., paint drops, scuffs).
- Walls and Ceilings: Free of dust, cobwebs, and marks.
- Windows: Glass should be streak-free; sills and tracks clean and free of debris.
- Fixtures: Light fixtures should be dusted and working; plumbing fixtures clean and polished.
- Cabinetry and Closets: Cleaned thoroughly inside and out, including shelves and drawers.
- Vents and Grates: Dusted and free of debris.
- Trash: All construction-related trash and cleaning waste removed from the premises.
- Outdoor Spaces: All signs of construction (packaging, tape, plastic, materials) removed. Walkways, driveways, and patios swept or power washed. Garage and mailbox areas clean.
- General Cleanliness: No visible dust on any surfaces (a common test is to wipe a surface with a clean, dark cloth). No debris in corners, crevices, or behind appliances. HVAC filters should be clean or newly replaced. All lights and ventilation systems should be checked for cleanliness and proper function.
- Safety Checks: A final check for any remaining hazards such as sharp objects (nails, glass shards) or overlooked tools. Ensure all floors are dry and free of slippery cleaning solution residue. Pathways should be clear and unobstructed. Ensure good ventilation to remove any lingering odors from cleaning products.
This meticulous final check ensures that the high standards expected of a professional post-construction clean are met, providing peace of mind before the space is officially handed over or occupied.
3. Essential Toolkit: Equipping Yourself for the Task
Attempting a post-construction cleanup without the right tools and supplies is not only inefficient but can also be ineffective and unsafe. The nature of construction debris—fine dust, potentially hazardous materials, stubborn residues—demands more than standard household cleaning equipment. The “right tool for the job” principle is significantly magnified in this context; using inadequate equipment can lead to damaged surfaces, incomplete cleaning, and health risks.
Must-Have Tools and Equipment (HEPA vacuums, pressure washers, microfiber cloths, scrapers, etc.)
- Vacuums:
- Heavy-Duty/Industrial Vacuum Cleaners with HEPA filters: These are non-negotiable for post-construction cleaning. HEPA (High-Efficiency Particulate Air) filters are designed to capture at least 99.97% of airborne particles as small as 0.3 microns, including the fine silica and drywall dust prevalent on construction sites. Standard vacuums often recirculate these harmful particles.
- Shop Vacs (Wet/Dry Vacuums): Useful for collecting larger debris, wet spills, and can also be fitted with HEPA filters for fine dust.
- Pressure Washers: Indispensable for cleaning exterior surfaces such as walls, driveways, walkways, patios, and decks, effectively removing caked-on mud, dust, and some construction residues.
- Microfiber Cloths and Mops: Superior to traditional cotton cloths, microfiber materials are designed to attract and trap dust, dirt, and bacteria rather than just pushing them around. They are also less likely to scratch delicate new surfaces. A good supply of various sizes is essential. Reusable microfiber mops with replaceable pads are recommended for floors.
- Scrapers:
- Plastic Scrapers: Including plastic putty knives or even old credit cards, are used for gently removing paint splatters, stickers, or adhesive residue from delicate surfaces without scratching.
- Razor Blade Scrapers: Specifically designed for glass, these are effective for removing paint, caulk, and stickers from windows, but must be used with extreme caution (new blade, wet surface, correct angle) to avoid scratching.
- Brushes: A variety of brushes are needed: soft-bristled brushes for gentle dusting of delicate items or detailed areas, and firm or stiff-bristled brushes for scrubbing more robust surfaces like grout lines or concrete floors.
- Dusters: Extendable dusters, feather dusters, and static dusters help reach high areas like ceilings, tops of cabinets, light fixtures, and ceiling fans.
- Mops and Buckets: Sturdy mops (microfiber flat mops are often preferred for even application and cleaning) and durable buckets, preferably with wringers, are necessary for floor cleaning.
- Ladders/Stepladders: Essential for safely reaching high windows, ceilings, light fixtures, and the tops of cabinetry.
- Floor Care Equipment (often rented for DIY):
- Floor Scrubbers/Buffers/Polishers: For deep cleaning and finishing large floor areas, especially hard floors like tile, concrete, or hardwood that requires polishing.
- Steam Cleaners: Can be effective for deep cleaning and sanitizing certain surfaces, particularly tile grout, without harsh chemicals.
- Air Quality Equipment:
- Air Scrubbers with HEPA filters: Used to actively remove airborne dust, VOCs, and other contaminants during and after the cleaning process, significantly improving indoor air quality.
- Air Blowers: Can be used for dislodging dust from hard-to-reach areas before vacuuming, though care must be taken not to spread dust excessively.
- Waste Disposal Equipment: Heavy-duty trash bags are a must. For larger projects, arranging for a dumpster or using tilt trucks/utility carts for transporting debris is necessary.
 Recommended Cleaning Supplies and Solutions (safe and effective options)
- All-Purpose Cleaners: Opt for mild, pH-neutral cleaners for general surface wiping, as these are less likely to damage new or delicate finishes. Some effective general cleaners mentioned include Mrs. Meyer’s Multi-Surface Cleaner and Dr. Bronner’s Sal Suds Biodegradable Cleaner.
- Degreasers: Necessary for kitchen areas to remove any greasy residues, often left from lubricants or handling.
- Disinfectants: For sanitizing bathrooms, kitchens, and high-touch surfaces like doorknobs and light switches to ensure a hygienic environment. Seventh Generation Disinfectant Spray is one example of a commercially available option.
- Glass Cleaners: Ammonia-free formulations are generally recommended to avoid streaks and potential damage to window tints or certain frame materials. Sprayway Ammonia-Free Glass Cleaner is a noted product.
- Floor Cleaners: These must be specific to the type of flooring installed (e.g., hardwood cleaner, laminate cleaner, tile and grout cleaner, neutral cleaner for stone). Using the wrong type can cause significant damage. Bona Hardwood Floor Cleaner is a recognized brand for wood floors.
- Grout Cleaners/Haze Removers: Specialized products are needed for cleaning grout and removing grout haze, with formulations varying (acidic or alkaline) depending on the tile material (ceramic/porcelain vs. natural stone).
- Paint/Adhesive Removers: Depending on the type of paint or adhesive and the surface it’s on, options range from mild solvents like mineral spirits, rubbing alcohol, or acetone (always use with caution and test in an inconspicuous area first) to commercial products such as Goo Gone, Titan Oil Flo, Home Strip, or Peel Tec.
- Polishes: Specific polishes are used for different surfaces: metal polishes for fixtures (e.g., Brasso for brass), wood floor polishes (e.g., Bona Polish), and furniture polishes.
- Natural Cleaning Options: Diluted white vinegar is a versatile cleaner for many surfaces (but should be avoided on others like natural stone or unsealed concrete). Baking soda can be used as a mild abrasive paste. Lemon juice also has cleaning properties.
- Miscellaneous: A good supply of sponges, cleaning rags, and paper towels will be needed. Magic Erasers can be useful for removing scuffs from some surfaces.
Personal Protective Equipment (PPE): Non-Negotiable for Safety
The post-construction environment is laden with potential hazards, from airborne particulates to sharp debris and chemical exposures. Therefore, the use of appropriate PPE is not merely advisable but a fundamental safety requirement. Attempting cleanup without adequate protection can lead to immediate injuries or long-term health problems.2
- Gloves: Heavy-duty, chemical-resistant rubber gloves are essential to protect hands from sharp debris (nails, glass), harsh cleaning chemicals, and general dirt and grime.
- Eye Protection: Safety glasses or goggles must be worn to shield the eyes from flying dust and debris, as well as splashes from cleaning solutions.
- Respiratory Protection: N95-rated masks or, preferably, respirators with appropriate cartridges are crucial for protecting the respiratory system from inhaling fine construction dust (which can contain silica, wood dust, drywall particles), VOCs from new materials or cleaning solvents, and other airborne contaminants.
- Foot Protection: Sturdy, closed-toe shoes, preferably steel-toed and with non-slip soles, are necessary to protect feet from falling objects, stepping on sharp debris, and preventing slips on potentially wet or dusty surfaces.
- Protective Clothing: Long-sleeved shirts and long pants, or disposable coveralls, help protect the skin from contact with dust, debris, and chemicals.
- Hard Hats: On very recent or still partially active construction sites, hard hats may be necessary to protect against falling objects or bumps in tight spaces.
The extensive list of necessary tools, specialized supplies, and comprehensive PPE underscores that post-construction cleaning is a far more demanding task than typical household chores. DIYers often underestimate these requirements, leading to inefficient cleaning, potential damage to new installations, and significant safety risks.
Table 2: Essential Post-Construction Cleaning Toolkit
| Category | Tool/Equipment/Supply | Primary Use in Post-Construction Cleaning | Why it’s essential / What it addresses |
|---|---|---|---|
| Dust & Debris Removal | HEPA Filter Vacuum (Industrial/Shop-Vac) | Capturing fine construction dust (silica, drywall), allergens, and larger debris from all surfaces. | Prevents recirculation of harmful fine particles; standard vacuums can worsen air quality and get damaged by construction debris. |
| Air Scrubber with HEPA filter | Actively filtering airborne dust, VOCs, and other contaminants during and after cleaning. | Improves indoor air quality significantly, removes lingering particles that resettle. | |
| Microfiber Cloths & Dusters (Extendable) | Trapping fine dust from surfaces, fixtures, walls, ceilings without scratching or spreading. | More effective than traditional cloths; reaches high areas. | |
| Brooms (Soft & Stiff Bristled), Dustpans | Sweeping larger debris and preparing surfaces for vacuuming/mopping. | Initial removal of bulk debris. | |
| Heavy-Duty Trash Bags, Dumpster | Collection and disposal of large volumes of construction waste. | Manages the significant amount of debris generated. | |
| Surface Cleaning & Residue Removal | Plastic & Razor Scrapers | Removing paint splatters, adhesive residue, stickers, caulk from various surfaces (glass, etc.). | Targeted removal of stubborn residues without (or minimizing) surface damage when used correctly. |
| Sponges & Non-Abrasive Scrub Brushes | Gently scrubbing surfaces to remove adhered dirt, grime, or residues. | Provides cleaning power without scratching new, delicate finishes. | |
| Material-Specific Cleaners (e.g., pH-neutral, degreasers, solvents) | Cleaning different types of surfaces (wood, stone, metal, glass, laminate) safely and effectively. | Prevents damage to new installations; addresses specific types of grime (e.g., grease, adhesive). | |
| White Vinegar, Baking Soda | Natural cleaning options for various tasks (deodorizing, mild abrasion, some stain removal). | Eco-friendly alternatives for certain cleaning needs, but compatibility must be checked. | |
| Floor Care | Mop & Bucket (with wringer, microfiber pads) | Cleaning various types of hard flooring after vacuuming. | Removes fine dust and adhered dirt from floors. |
| Floor Polisher/Buffer (optional/rental) | Restoring shine and applying protective finishes to certain floor types (hardwood, concrete). | Enhances appearance and provides a protective layer to new floors. | |
| Exterior Cleaning | Pressure Washer | Cleaning exterior walls, driveways, patios, and other hard surfaces of dirt, dust, and grime. | Efficiently cleans large outdoor areas and stubborn exterior dirt. |
| Personal Protective Equipment (PPE) | N95 Masks/Respirators | Protecting respiratory system from inhaling fine dust, VOCs, and chemical fumes. | Essential for preventing short-term irritation and long-term health problems like silicosis. |
| Safety Glasses/Goggles | Shielding eyes from dust, debris, and chemical splashes. | Prevents eye injuries and irritation. | |
| Heavy-Duty/Chemical-Resistant Gloves | Protecting hands from sharp objects, chemicals, and general grime. | Prevents cuts, abrasions, and skin irritation/burns from cleaning agents. | |
| Sturdy, Closed-Toe Shoes (Steel-toed optional) | Protecting feet from falling objects, sharp debris, and providing slip resistance. | Prevents foot injuries and ensures stability on potentially hazardous surfaces. | |
| Ladders/Stepladders | Safely accessing high areas for cleaning (ceilings, high windows, light fixtures). | Enables thorough cleaning of all areas, reducing risk of falls from overreaching. |
4. The Professional Touch: Why Calling in the Experts is Often the Best Choice
 While the allure of a DIY post-construction cleanup might seem like a cost-saving measure, the reality is often far more complex. This demanding task goes well beyond typical house cleaning, involving significant time, specialized equipment, specific expertise, and crucial safety considerations.
A careful comparison reveals that engaging professional post-construction cleaning services is frequently the most prudent, effective, and ultimately, cost-efficient decision.
The “true cost” of DIY post-construction cleaning extends significantly beyond the monetary outlay for supplies and rentals. It encompasses the substantial investment of personal time and physical labor, often spanning multiple days. For homeowners, this can be an exhausting and stressful endeavor on top of managing the renovation itself.
For businesses, diverting employees from their primary roles to perform cleanup results in lost productivity, a significant hidden expense. Furthermore, the health and safety risks associated with handling construction debris, fine dust, and potentially hazardous chemicals are considerable for untrained individuals.
An inadequate or improperly executed DIY clean can also lead to damage to new surfaces or incomplete removal of contaminants, diminishing the value and enjoyment of the renovated space.
Professionalism in post-construction cleaning is defined not just by access to better equipment, but by a confluence of specialized knowledge, appropriate tools, and methodical processes. Experts understand the unique challenges posed by different types of construction residues and the specific care requirements for a multitude of new materials and finishes.
They adhere to stringent safety protocols, including the correct use of PPE, and follow systematic cleaning plans, such as top-to-bottom methods and phased approaches, to ensure comprehensive results. Their knowledge of proper waste disposal regulations also mitigates legal and environmental risks for the property owner. This holistic approach is what delivers a truly professional outcome, which is often difficult for a DIY effort to replicate.
 Comparing DIY vs. Professional Post-Construction Cleaning
- Time, Effort, and Expertise:
- DIY: This route is exceptionally time-consuming and physically demanding. A lack of experience often translates to longer cleaning durations and a higher likelihood of overlooking crucial areas or specific types of residue. Individuals may also need to invest time learning how to operate unfamiliar rental equipment safely and effectively.
- Professional: Services operate with significantly greater speed and efficiency. This is due to their accumulated experience, dedicated and trained teams, and the implementation of systematic cleaning protocols. Professionals possess the nuanced expertise required to handle a wide array of construction residues and to clean diverse surfaces correctly, thereby avoiding accidental damage.
- Equipment and Supplies:
- DIY: Undertaking the cleanup independently often necessitates renting or purchasing specialized equipment such as HEPA-filter vacuums, pressure washers, and floor polishers, along with a broad spectrum of specific cleaning solutions. The cumulative cost of these items can, in some cases, surpass the expense of hiring a professional service. Standard household cleaning tools are generally inadequate for the demands of post-construction residue.
- Professional: Cleaning companies arrive fully equipped with industrial-grade tools, the correct cleaning agents for all types of surfaces and residues, and all necessary Personal Protective Equipment (PPE).
- Safety and Health Risks :
- DIY: Individuals face a heightened risk of injury from sharp objects like nails and glass shards, potential falls due to debris or wet surfaces, and exposure to hazardous airborne dust (such as silica or drywall dust, which can lead to serious respiratory problems). There is also the risk of chemical exposure from using strong cleaning agents without proper knowledge or protection, and injuries related to heavy lifting. Often, DIYers lack formal training in handling hazardous materials and may not use PPE correctly or consistently.
- Professional: Reputable cleaning services train their staff in comprehensive safety protocols, the correct use of PPE, and the safe handling and disposal of potentially hazardous materials. This significantly minimizes health risks for everyone involved.
- Thoroughness and Quality of Results:
- DIY: There is a considerable risk of an incomplete clean. Hidden dust in vents, overlooked corners, or areas behind appliances can lead to lingering dust issues and potential long-term health concerns. Furthermore, using incorrect cleaning products or techniques can inadvertently damage newly installed surfaces, leading to costly repairs or replacements.
- Professional: Services are committed to providing a detailed, deep clean that addresses every nook and cranny. They typically follow comprehensive checklists to ensure all areas are covered. The outcome is a truly flawless, move-in ready space.
- Cost-Effectiveness (including hidden DIY costs) :
- DIY: While there might be an apparent upfront saving on service fees, the hidden costs can be substantial. These include the monetary value of the individual’s time and lost productivity (if applicable), the expense of renting or purchasing specialized equipment, the cost of numerous specific cleaning supplies, potential fines from improper waste disposal, and the significant financial risk associated with damaging new surfaces, which might then require professional repair or replacement.
- Professional: Although there is an upfront service cost, hiring professionals can prove more cost-effective in the long term. They save valuable time, prevent costly damage to new installations, ensure proper and legal.


