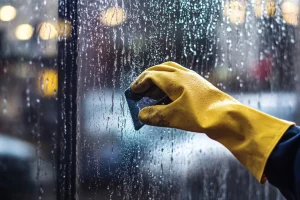
The satisfaction of gazing through truly spotless, streak-free windows is undeniable. It brightens your home, enhances your view, and brings a sense of clarity to your space. For the dedicated DIY enthusiast, achieving this level of clean is not just about saving money; it’s about the pride of a job well done. However, the path to crystal-clear windows is often paved with frustration, usually in the form of stubborn streaks and smudges.
The secret to overcoming these common hurdles and achieving professional-looking results lies not just in the cleaning solution, but heavily in understanding and utilizing the right manual window cleaning tools.
This guide will demystify the essential tools, helping you select, use, and maintain them like a seasoned pro, ensuring your efforts are rewarded with nothing but sparkling, transparent panes. While the allure of DIY is strong, this guide will also address when it might be wiser to call in professionals, ensuring your window cleaning endeavors are always safe and effective.
Assembling Your Essential Manual Window Cleaning Toolkit
A well-chosen toolkit is the foundation of any successful DIY window cleaning project. Each tool has a specific purpose, and understanding these roles will empower you to tackle your windows with confidence. The “best” tool often depends on individual needs, the types of windows being cleaned, and budget. This section will explore the core manual tools, offering insights into their variations and how to select the ones that will work best for your home.
Window Squeegees: Your Key to a Flawless Finish
The window squeegee is arguably the most critical instrument in your window cleaning arsenal, the one that ultimately delivers that coveted streak-free shine. Understanding its components – the handle, channel, and blade – and how they interact is fundamental to its effective use.
Anatomy of a Squeegee
A window squeegee consists of three main parts:
- Handle: What you grip. Handles come in various materials and designs, affecting comfort and control.
- Channel: A metal or plastic strip that holds the rubber blade. Channels vary in length and design.
- Blade: The flexible rubber or silicone strip that makes direct contact with the glass to wipe away water and dirt.
These components work in unison: the handle provides leverage, the channel holds the blade at the correct angle and pressure, and the blade’s edge removes the cleaning solution without leaving streaks.
Choosing the Perfect Squeegee Handle
The handle is your primary interface with the squeegee, so its material, type, and ergonomics are important considerations.
Handle Materials:
- Brass: A traditional choice, brass handles are known for their durability and weight. This added weight can be an advantage, as it helps apply consistent pressure to the glass with less physical exertion from the user, but it can also lead to fatigue during extended cleaning sessions. Brass can also tarnish over time, requiring occasional polishing to maintain its appearance. While some sources note brass as malleable , its general durability refers to wear resistance.
- Stainless Steel: Offering excellent durability, stainless steel handles are typically heavier than aluminum but often comparable to, or slightly lighter than, brass. A key advantage is its high resistance to rust and tarnish, making it a low-maintenance and long-lasting option. Its rigidity provides firm control. This makes it a solid all-around choice for a serious DIYer looking for a balance of performance and longevity.
- Aluminum: Valued for being lightweight, aluminum handles are easier to maneuver for prolonged periods, reducing hand and wrist strain. They are often more affordable than brass or stainless steel. However, aluminum is generally less robust and can be more prone to bending if mishandled. For many DIYers, the balance of lower cost, lighter weight, and reduced fatigue makes aluminum an attractive starting point, provided care is taken to prevent damage.
- Plastic: The most lightweight and often the most affordable option, plastic handles can be comfortable for occasional use. However, they are generally the least durable and may not withstand frequent or heavy-duty cleaning. For very budget-conscious individuals or those who clean windows infrequently, plastic may suffice, but its potential for quicker wear or breakage should be considered.
Handle Types:
- Fixed Handles: These are the standard, with the channel held in a static position. They offer less flexibility in movement but are often very durable.
- Swivel Handles: These handles allow the channel to pivot, offering greater flexibility. This is particularly useful when working with an extension pole or using fanning techniques to cover the glass, as it allows for easier maneuvering around obstacles and into corners. For home windows with varied designs, a swivel handle can significantly enhance ease of use.
- Adjustable Angle Handles: Some advanced handles, like the Moerman Excelerator 2.0, allow the angle of the channel relative to the handle to be adjusted and locked into various positions (e.g., -20, -5, 10, 25, and 40 degrees). This feature can be extremely helpful for reaching awkward spots, such as deep-set sills or windows above obstructions, potentially reducing the need for intricate detailing.
- Quick-Release Handles: These feature a lever or button mechanism that allows for rapid changing of squeegee channels. This is a convenience feature that can be appealing if you plan to switch between different channel sizes frequently.
Ergonomics and Interchangeability:
A comfortable, ergonomic grip is crucial, especially for larger cleaning tasks, as it helps prevent hand and wrist fatigue. Many modern squeegee handles feature rubberized or specially shaped grips for enhanced comfort and control.
While many squeegee handles and channels are designed to be interchangeable, even across different brands, it’s always wise to double-check compatibility before purchasing components separately. Some brands, like Sorbo, have specific compatibility requirements for their channels and rubber.
Squeegee Channels Explained
The channel is the backbone of the squeegee blade assembly, holding the rubber firmly and evenly against the glass.
Channel Materials:
 The materials used for channels mirror those for handles—brass, stainless steel, aluminum, and plastic—and carry similar characteristics regarding weight, durability, and corrosion resistance. Stainless steel and anodized aluminum offer superior corrosion resistance, which is a plus if tools might be stored damp or used with various cleaning solutions. Brass channels, while durable, can tarnish. Aluminum is lightweight but more prone to bending , while plastic is the lightest and cheapest but least durable.
Channel Types:
- Standard Channels: These are generally lighter, thinner, and often shorter in length. They are typically compatible with standard round-top squeegee rubber. For most typical home windows, standard channels are sufficient and easier to manage.
- Wide-Body Channels: Brands like Sorbo and some Ettore models (e.g., Ettore Super Channel) offer wide-body channels that are heavier, wider, and longer. These channels use flat-top (also known as T-top) squeegee rubber and can provide added stability when used on an extension pole or for very large panes of glass. While potentially overkill for most DIY applications, they are an option for those with expansive glass surfaces.
- Clipped vs. Clipless Channels:
- Clipped Channels: These use small metal (often brass) or plastic clips at one or both ends of the channel to secure the squeegee rubber in place. Larger channels usually have two clips, while smaller ones might have one.
- Clipless Channels: These designs rely on the tension from the squeegee handle or other built-in mechanisms within the channel (like end plugs on some Sorbo models ) to hold the rubber. Many modern quick-release handles are designed for clipless channels, offering greater convenience for blade changes. For DIYers, the simplicity of changing blades on a clipless system can be a significant advantage.
Channel Sizes:
Squeegee channels come in a wide array of sizes, typically ranging from 6 inches up to 36 inches. Smaller channels (6-10 inches) are ideal for small, divided window panes (French doors, for example) or tight areas where precision is needed. Medium sizes (12-16 inches) are versatile for standard residential windows. Large channels (18 inches or more) are best for expansive glass surfaces. A DIYer might benefit from a medium-sized channel (e.g., 12 or 14 inches) for general use and perhaps a smaller 6 or 8-inch channel for more detailed work.
The All-Important Squeegee Blade
The squeegee blade is where the rubber meets the road—or in this case, the glass. Its material, hardness, and condition are paramount to achieving that desired streak-free finish. A worn or damaged blade is a primary culprit for streaks and unsatisfactory results.
Squeegee Blade Materials Deep Dive:
The choice of blade material can seem daunting, but understanding their properties will help you select the best one for your needs.
- Natural Rubber (General): This is a common and often preferred material, known for its smooth glide, ability to produce a streak-free finish, and good durability for everyday use. It’s also non-marking, meaning it won’t leave stains on window frames.
- Gum Rubber: This is the softest type of natural rubber, offering excellent water removal and an inexpensive price point. However, it has the shortest lifespan and is not recommended for use with oily residues or harsh chemical cleaning solutions, as these can cause it to deteriorate quickly. For DIY window cleaning using mild, soapy solutions, gum rubber can be a budget-friendly initial option, provided you accept the need for more frequent replacement.
- Linatex-Type Rubber: This is a higher-performing, general-purpose natural rubber with better wear and tear resistance and a longer lifespan than gum rubber. It remains flexible and effective across a broader range of conditions but, like gum rubber, is best used with mild detergents and not harsh chemicals or oils. This offers a better balance of performance and longevity for the average DIYer compared to basic gum rubber.
- Synthetic Rubbers (General): Man-made rubbers are often formulated to be stronger and more resistant to chemicals and temperature variations than natural rubber.
- Silicone: Silicone blades have gained considerable popularity due to their excellent flexibility, resistance to harsh chemicals, and impressive durability. They tend to be less prone to wear and tear and perform well both indoors and outdoors, even in extreme cold, as they can be self-lubricating and maintain their properties. For DIYers who might experiment with various cleaning solutions or live in climates with temperature swings, silicone is a very strong contender, offering versatility and longevity. Sorbo is one brand known for quality silicone blades.
- Neoprene: This synthetic rubber is more durable than natural rubber and shows better resistance to chemicals, oils, and solvents. It’s typically more rigid than natural rubber. While some sources suggest it’s ideal for tougher surfaces like concrete , Ettore offers neoprene replacement blades for window squeegees , suggesting it can be suitable for glass. Its durability and chemical resistance could be appealing if priced reasonably for DIY use and if it glides well on glass.
- Urethane/Polyurethane: These are among the most durable synthetic rubbers, offering very high abrasion and chemical resistance. They excel with harsh chemicals or on rough surfaces (less relevant for smooth glass). However, they are also typically the most expensive and may be too rigid for optimal performance on glass in general window cleaning, potentially being overkill for typical DIY needs.
- Primothane: A premium type of urethane, offering outstanding flexibility, tear resistance, and resistance to oils, chemicals, and cold. This is a top-tier material and likely unnecessary and too costly for home use.
- TPE (Thermoplastic Elastomer): Also known as artificial rubber, TPE is petroleum-based and can be extruded or injection molded. It’s less commonly specified for window squeegee blades compared to natural rubber and silicone.
Table 1: Squeegee Blade Material Comparison
| Material | Key Properties | Ideal Use Cases | Pros | Cons | Relative Cost for DIY |
|---|---|---|---|---|---|
| Natural Rubber (Gum) | Very soft, excellent initial water removal, flexible | Smooth glass, mild detergents, budget-conscious | Inexpensive, good initial streak-free results | Shortest wear life, deteriorates with chemicals/oils, can degrade in extreme weather | Low |
| Natural Rubber (Linatex-type/Professional Grade) | Flexible, good wear resistance, long life (compared to gum) | General window cleaning, mild detergents | Durable for natural rubber, good streak-free performance, non-marking | Not for harsh chemicals/oils, can be affected by extreme temperatures | Low to Medium |
| Silicone | Very flexible, chemical resistant, durable, good in cold/hot, self-lubricating | All-purpose, various DIY solutions, varied climates | Long-lasting, excellent glide, versatile, maintains properties in extreme cold | Can be pricier than basic rubber | Medium to High |
| Neoprene | Durable, good chemical/oil resistance, more rigid than natural rubber | Windows requiring more robust blade, some solvents | Potentially very durable, resistant to some chemicals | May be too stiff for some, availability for window squeegees might be less than rubber/silicone | Medium |
| Urethane/Polyurethane | Extremely durable, high abrasion/chemical/oil resistance, very rigid | Specialized cleaning with harsh chemicals (not typical for DIY windows) | Highest durability and chemical resistance | Most expensive, may be too stiff for optimal streak-free finish on glass, overkill for DIY | High |
Blade Hardness (Soft, Medium, Hard):
 The hardness of a squeegee blade, often measured by durometer (lower numbers are softer), affects its performance in different conditions.
- Soft Rubber: Generally preferred for cooler weather (winter) as it remains flexible and conforms well to the glass surface, including slight irregularities near edges. It tends to break in quickly. However, soft rubber can wear out faster, especially in warmer temperatures. A durometer around 50-60 is considered soft.
- Medium Rubber: Often considered a versatile, all-around choice, particularly suitable for moderate to warmer temperatures (summer). It strikes a balance between flexibility and durability. Durometer is typically in the 60-75 range.
- Hard Rubber: Best suited for hot weather or extremely high temperatures, as it maintains its edge and resists softening. Hard rubber generally lasts longer but may require more pressure to achieve a clean wipe and can feel less forgiving on the glass. Durometer is usually 70-90.
Temperature and humidity are key factors in blade selection. Higher humidity often calls for a softer rubber to ensure a smooth glide. For most DIYers, who clean in a variety of conditions but not typically in professional daily extremes, a good quality soft or medium rubber is often the most practical choice for year-round use. The slight performance differences in extreme weather may not be as critical as they are for a professional who is on glass all day.
When and How to Replace Your Squeegee Blade:
Knowing when to change your blade is crucial for maintaining that streak-free finish.
- When to Replace: The most obvious sign is when your squeegee starts leaving streaks or water lines. Also inspect the blade for any nicks, tears, rounded or uneven edges, or a noticeable reduction in flexibility. Professionals who use their tools daily may change blades every day or every few weeks. For occasional DIY use, a blade can last several months if properly cared for. Some professionals go by hours of use, suggesting replacement after 6-8 hours or 15-25 hours of continuous cleaning. For a DIYer, visual cues and performance are the best indicators. Remember, a replacement rubber blade is relatively inexpensive compared to the frustration of poor results and the time wasted re-cleaning.
- How to Replace (General Steps): The basic process involves removing the old blade from the channel and inserting a new one. This might involve releasing clips, loosening screws, or disengaging a tension mechanism, depending on the squeegee design. The new blade should be inserted so it’s flush with the ends of the channel (or slightly protruding, depending on the system), correctly oriented, and securely held. If you buy rubber in rolls or longer strips, you’ll need to cut it to the correct size for your channel.
Specific Blade Replacement Instructions:
- Ettore Squeegees (Typically with Brass Clips):
- Gently pull the rubber blade from one end of the channel until the brass clip is exposed.
- Using your fingernail or needle-nose pliers (if the clip is stubborn or the rubber is old and brittle), carefully remove the brass clip. Repeat on the other side if there are two clips.
- Slide the old rubber out of the channel. You can flip it over and use the other edge if it’s still in good condition.
- To insert new rubber, or the flipped old rubber, take a new (or existing, if reusing) brass clip. Some professionals pre-spread the clip slightly.
- Place the clip onto the end of the rubber, leaving about 1/8 inch of rubber overhanging the clip.
- Pinch the clip firmly onto the rubber.
- Slide the rubber with the attached clip into the channel, pushing it until it’s fully seated. If it’s a tight fit, a slight tap on a hard surface can help. Repeat for the other side if applicable.
- Unger Standard Clipless Squeegees (Button Release/Tension Lever/EZ Change Screw):
- Button/Lever Type: Many Unger handles (like some ErgoTec models) feature a button or lever that, when depressed or activated, opens a set of teeth or a clamp within the handle that grips the channel or the rubber directly. To change the rubber/channel, depress the button/lever, slide the old assembly out, slide the new one in, and release the button/lever to lock it in place. Ensure the rubber is even on both sides.
- EZ Change Screw Type: Some Unger models, like the “EZ Change” squeegee, use a large screw on the underside of the handle to clamp the channel and rubber in place. To replace, loosen this screw (by hand or with a flathead screwdriver/coin if tight), remove the channel/blade, insert the new one (ensuring the teeth in the handle grip the flexible material of the blade), and retighten the screw.
- Unger Ninja Squeegees (SmartClip End Clips & TriLoc Handle System):
- The Unger Ninja channel uses “SmartClip” end clips. To release the rubber, unclip these clips on each side of the channel. This is often a simple push or flip action.
- The old rubber blade can then be easily slid out.
- Slide the new rubber blade into the channel. No need to wet the channel or rubber.
- Center the rubber in the correct position, typically with a couple of millimeters overhanging each end to act as a bumper.
- Re-engage or tighten the SmartClip end clips on both ends to secure the rubber.
- The Ninja handle often features the “TriLoc” system for attaching the channel to the handle. This usually involves a lever that is pulled down, the channel inserted between markers, and the lever pushed back up to lock. Some Ninja channels have two slots for rubber placement, offering more options.
- Sorbo Squeegees (Channel Plugs and/or Clips):
- Sorbo channels often use plastic end plugs, and the rubber is typically inserted from the end opposite the “Sörbo 3×4 Logo”. The logo end often has a tighter opening or a built-in clip within the plug itself that secures the rubber once it’s fully inserted.
- Pull the old rubber out from the non-logo end.
- Insert the new rubber into this open end. You may need to apply some force to push it through the tighter section or past the built-in clip at the logo end. A dab of soapy water on the rubber or clip can act as a lubricant to make insertion easier.
- While some Sorbo channels might only rely on the tension from the plugs (especially the tighter logo-end plug), an additional exterior end clip can be used on the non-logo end for extra security. If using an exterior clip, bend the rubber backward slightly, slide the clip on, and then let it go.
- Ensure the rubber is adjusted correctly, often with a slight overhang to protect frames. The 40-degree safety end plugs on models like the Cobra are designed to glide safely against frames.
Table 2: Squeegee Handle & Channel Material Comparison
| Material | Weight | Durability | Rigidity/Flexibility | Corrosion Resistance | Ergonomics/Handling Notes | Pros | Cons | Relative Cost |
|---|---|---|---|---|---|---|---|---|
| Aluminum | Lightweight | Good, but can bend/dent easier | More flexible than steel | Good (especially anodized) | Easy to handle for long sessions, less strain | Lightweight, affordable, reduces fatigue | Can bend/dent with rough use | Low to Medium |
| Stainless Steel | Medium to Heavy | Very Durable, long-lasting | Rigid | Excellent, resists rust/tarnish | Good balance, solid feel | Very durable, rust/tarnish proof, professional feel | Heavier than aluminum, can be more expensive | Medium to High |
| Brass | Heavy | Very Durable | Softer, more flexible than SS | Good, but can tarnish | Weight aids pressure but can cause fatigue | Durable, weight helps apply pressure, traditional look | Heaviest, can cause fatigue, tarnishes, can be malleable/bend | Medium to High |
| Plastic | Very Lightweight | Least Durable | Can be flexible or rigid | Varies, generally good | Comfortable for some due to light weight | Most affordable, very lightweight, comfortable for some | Less durable, may crack or wear out faster | Low |
Window Washers / Applicators / Scrubbers: Applying Solution & Tackling Grime
 Before the squeegee can work its magic, the window needs to be properly wetted and scrubbed. This is the job of the window washer, also known as an applicator or scrubber. These tools typically consist of a T-bar handle and an absorbent sleeve.
T-Bars: The Foundation of Your Scrubber
The T-bar is the handle component that holds the washer sleeve and allows you to apply even pressure across the glass. It can be used by hand for lower windows or attached to an extension pole for reaching higher areas.
T-Bar Types:
- Fixed T-Bars: These are locked in place and do not pivot. They are straightforward and often very durable.
- Swivel T-Bars: These feature a pivoting head, allowing the sleeve to be maneuvered at various angles. This is particularly advantageous when using an extension pole, as it helps navigate awkward angles, corners, and obstacles without needing to reposition constantly. This versatility can make cleaning varied residential windows much easier for a DIYer.
T-Bar Materials:
- Plastic: A common material for T-bars, often a hard, durable plastic or nylon. Many plastic T-bars feature grooves or perforations designed to hold extra water, aiding in solution retention during scrubbing. The Pulex Plastic T-Bar, for example, is noted for being lightweight, durable, having an ergonomic grip, good water retention, and compatibility with various sleeves.
- Aluminum: Some T-bars incorporate an aluminum bar or tubing, often paired with a plastic or nylon handle for grip. Aluminum offers a lightweight yet sturdy option. The Pulex Aluminum T-Bar, for instance, combines an aluminum bar with a durable nylon handle and is praised for being lightweight. However, one review noted difficulty emptying water from it, suggesting a potential design quirk in that specific model.
The choice between plastic and aluminum often comes down to personal preference regarding feel and weight distribution, as both can provide good durability for DIY use. Many T-bars, regardless of the primary material, feature ergonomic handles with rubber grips for enhanced comfort and control, reducing wrist strain during prolonged use.
Scrubber Sleeves: Material Matters
The scrubber sleeve is the part of the washer that absorbs the cleaning solution, transfers it to the glass, and physically loosens dirt and grime. The material and construction of the sleeve significantly impact its absorbency, scrubbing power, and gentleness on the glass.
Sleeve Materials & Properties:
- Microfiber: This is a highly popular material for washer sleeves due to its excellent properties. Microfiber is extremely absorbent, capable of holding a significant amount of water (some up to 7 times their weight ), which means fewer trips back to the bucket and better coverage, especially on hot days when solutions evaporate quickly. It’s also lint-free and generally very gentle on glass, making it suitable for delicate surfaces, including tinted windows. High-quality microfiber sleeves, like the Ettore Pro+ Microfiber, are very durable and can withstand hundreds of washes. However, some basic microfiber sleeves can wear out more quickly with very frequent use.
- Synthetic/Abrasive Materials: Many sleeves incorporate synthetic fibers, such as nylon bristles or abrasive pads/strips, to provide extra scrubbing power for tackling stubborn dirt, bug marks, bird droppings, or mineral deposits. These abrasive elements are designed to be effective without scratching the glass when used correctly with sufficient lubrication. The Ettore Porcupine sleeve, with its interwoven nylon bristles, is an example of a sleeve with aggressive scrubbing power.
- Hybrid Sleeves: Some sleeves offer the best of both worlds by combining microfiber with abrasive elements. For instance, the Pulex MicroTiger features alternating strips of microfiber and abrasive material, allowing for simultaneous gentle cleaning and more robust scrubbing. Such hybrid sleeves can be an excellent choice for DIYers, providing versatility for various levels of soiling without needing multiple specialized sleeves.
Key Sleeve Characteristics:
- Absorbency: As mentioned, high absorbency is generally desirable, allowing more cleaning between dunks in the bucket. This is particularly helpful for large windows or when working in direct sunlight. For indoor work where drips are a concern, a slightly less absorbent sleeve might be preferred.
- Scrubbing Power (Mild, Hybrid, Aggressive): The level of abrasiveness should be matched to the type and amount of dirt.
- Mild: Soft microfiber sleeves are best for light dust, routine cleaning, or delicate surfaces like interior glass or tinted windows.
- Hybrid: Good for general-purpose cleaning with mixed types of dirt.
- Aggressive: Necessary for heavily soiled exterior windows with caked-on grime, tree sap, or bird droppings. The Ettore Golden Glove with its scrubbing tab is a good example.
- Maintenance: Most professional-quality sleeves are machine washable. It’s generally recommended to air dry them to preserve the integrity of the fibers and prevent shrinkage. Fabric softeners should be avoided as they can reduce absorbency and cause streaking. It’s also a good practice to wash new sleeves before their first use to remove any loose fibers or manufacturing residues.
Table 4: Window Washer Sleeve Material Comparison
| Material Type | Absorbency Level | Scrubbing Power | Gentleness | Best For | Pros | Cons | Maintenance Tips |
|---|---|---|---|---|---|---|---|
| Standard Microfiber | High | Mild | Very Gentle | Light dust, regular maintenance, interior glass, tinted windows | Highly absorbent, lint-free, very gentle on surfaces | May wear faster with heavy scrubbing, less effective on stubborn grime | Machine wash, air dry, no fabric softener |
| Abrasive Microfiber/Nylon Blend (e.g., Ettore Porcupine) | Moderate to High | Aggressive | Gentle if used wet | Stubborn dirt, bird droppings, heavy grime, exterior windows | Excellent scrubbing for tough spots without scratching (when wet) | May be too harsh for very delicate surfaces if not used carefully | Machine wash, air dry, no fabric softener |
| Hybrid (e.g., Pulex MicroTiger) | Moderate to High | Hybrid | Moderately Gentle | General purpose, varied dirt levels, good all-rounder | Versatile, combines gentle cleaning with scrubbing power | May not be as gentle as pure microfiber or as aggressive as full abrasive | Machine wash, air dry, no fabric softener |
Extension Poles: Reaching New Heights Safely & Effectively
For any windows beyond comfortable arm’s reach, an extension pole is an indispensable tool, allowing you to clean safely from the ground and avoid the risks associated with ladders. These telescopic poles attach to your squeegee or washer, extending your reach significantly.
Material Showdown:
The material of an extension pole affects its weight, rigidity, durability, and cost.
- Aluminum: A common choice, aluminum poles are relatively lightweight and cost-effective, making them suitable for light to moderate DIY tasks. However, they can be more prone to bending or flexing, especially when fully extended, which can make precise control difficult.
- Fiberglass: Offering more rigidity and durability than aluminum, fiberglass poles are also non-conductive, which is a significant safety advantage if working near overhead power lines or other electrical hazards. This non-conductive property is a crucial safety feature for homeowners, as unseen electrical risks can exist around any property. Fiberglass is generally heavier than aluminum.
- Carbon Fiber: Representing the premium end, carbon fiber poles boast an exceptional strength-to-weight ratio. They are incredibly lightweight yet very rigid, even at significant extensions. This minimizes fatigue and allows for maximum control when cleaning high windows. While they are the most expensive option, for those with very high windows who clean frequently and prioritize ease of use, the investment can be worthwhile. For most occasional DIY use, the cost may be a barrier, but it’s the top-tier choice for performance.
Table 3: Extension Pole Material Comparison
| Material | Weight | Rigidity (at extension) | Durability | Conductivity | Typical Locking Mechanisms | Pros | Cons | Relative Cost |
|---|---|---|---|---|---|---|---|---|
| Aluminum | Lightweight | Moderate (can flex) | Good | Conductive | Twist lock, Lever/Flick lock (clamps) | Affordable, lightweight for shorter extensions | Can bend/flex at full extension, conductive | Low to Medium |
| Fiberglass | Medium to Heavy | Good to High | Very Good | Non-conductive | Twist lock, Lever/Flick lock (clamps) | More rigid than aluminum, durable, non-conductive (safer) | Heavier than aluminum | Medium |
| Carbon Fiber | Very Lightweight | Very High (very rigid) | Excellent | Conductive | Lever/Flick lock (clamps) | Extremely lightweight and rigid, best control at height, reduces fatigue | Most expensive, conductive | High |
Locking Mechanisms Demystified:
The mechanism that locks the pole sections at the desired length is crucial for both safety (preventing collapse) and efficiency (ease of adjustment).
- Lever Locks / Flick Locks (Clamps): These are generally the preferred type for reliability and ease of use. They use external levers or clamps that are flipped open to adjust the pole length and then flipped closed to lock securely. High-quality aluminum levers are more durable than plastic ones. They are easy to operate, even with gloves on, and provide a strong, dependable hold, minimizing the risk of the pole collapsing under pressure. This reliability makes them an excellent recommendation for DIYers.
- Twist Locks: This mechanism involves twisting the pole sections to loosen, adjust, and then retighten. While lighter than lever locks, they are often considered less reliable, as they can loosen unexpectedly during use or become difficult to tighten or loosen over time, especially if dirt gets into the mechanism. They can also be harder to grip and operate with wet or gloved hands. The internal mechanisms are also more difficult to repair if they fail.
- Button Locks: These use a push-button system to release and lock the pole sections. They can be quick to adjust and are lighter than lever locks. However, they may have a learning curve, require some arm strength, and, like twist locks, their internal mechanisms can be difficult to fix if they break.
For DIY use, the security and ease of use offered by lever/flick locks generally make them the most suitable choice, despite a slight weight penalty. Preventing a pole from collapsing unexpectedly is a significant factor for both safety and avoiding frustration.
Pole Tips:
 Ensure the pole tip is compatible with your window cleaning tools. Many professional tools use a tapered cone or a specific locking system (e.g., Ettore Pro+ Pole Tip). Some poles feature anti-spin tips to prevent tools from rotating during use.
Window Cleaning Buckets: More Than Just a Container
While seemingly basic, the right bucket can make your window cleaning process smoother and more organized.
Why Rectangular Reigns:
Most professional window cleaning buckets are rectangular, and for good reason. This shape is specifically designed to accommodate wide tools like 14-inch or 18-inch washers and squeegees, allowing for full submersion of washer sleeves for even solution uptake and easy rinsing of squeegee blades. Round buckets are often too narrow for these professional-style tools.
Size and Features:
Choose a bucket that is large enough to hold an adequate amount of cleaning solution but still portable and not too cumbersome to carry. Ergonomic handles can make carrying a full bucket much more comfortable. Some window cleaning kits even come with a perfectly sized bucket included. For a more thorough clean, consider using two buckets: one for your soapy cleaning solution and another filled with clean water for rinsing your washer sleeve. This two-bucket method, popular in car washing, helps prevent transferring dirt back onto the window by keeping your rinse water cleaner for longer.
Window Scrapers: For Stubborn Debris (Handle with Extreme Care!)
Window scrapers are tools designed to remove stubborn, adhered debris from glass surfaces, such as paint splatters, stickers, tape residue, or heavy, caked-on grime. However, they must be used with extreme caution, as improper use is a leading cause of scratched glass.
Types of Scrapers and Blades:
- Blade Material:
- Metal Blades: These are the most common for heavy-duty removal.
- Carbon Steel Blades: Tend to be sharper and stronger, good for tough debris, but they can rust if not kept dry.
- Stainless Steel Blades: More resistant to rust and corrosion, making them a good choice for tools frequently exposed to water.
- Plastic Blades: A safer alternative for more delicate surfaces where metal blades pose too high a risk of scratching, such as some types of tinted or coated glass. They are less aggressive than metal blades.
- Metal Blades: These are the most common for heavy-duty removal.
- Scraper Design:
- Pocket Scrapers: Small, simple scrapers, often with a retractable blade, for minor touch-ups.
- Safety Scrapers: Feature retractable blades that can be withdrawn into the handle when not in use, significantly reducing the risk of accidental cuts. Many also have ergonomic, anti-slip handles.
- Fixed Blade Scrapers: The blade is permanently set in the handle.
- Angled or Straight Heads: Some scrapers have angled heads for better leverage or reaching into corners, while others are straight.
- Sizes: Scraper blades typically range from about 1.5 inches for detail work up to 4 or 6 inches for covering larger areas.
Safe Scraping: Essential Techniques to Protect Your Glass:
The risk of scratching glass with a scraper is very real and can be costly. Adherence to proper technique is non-negotiable.
- ALWAYS Wet the Glass Thoroughly: Before any scraping, the glass surface must be generously lubricated with your cleaning solution. Soap up the window well. Never, ever scrape a dry window. The liquid helps to lift debris and allows the blade to glide, rather than dig into the glass.
- Clean Loose Debris First: Wash the window first to remove any loose grit or abrasive particles that could be trapped under the blade and cause scratches.
- Scrape Forward ONLY: Always push the scraper in a forward direction across the glass. Never pull it backward or drag it sideways, as this can trap dislodged particles under the blade and scratch the surface. Lift the scraper at the end of each stroke and start anew.
- Use a NEW, Sharp Blade: A fresh, sharp blade is crucial. Dull, chipped, or rusty blades are far more likely to cause scratches because they require more pressure and can catch on imperfections. Change blades frequently, especially if you feel any drag or hear unusual sounds.
- Gentle, Even Pressure: Apply only light, consistent pressure – let the sharpness of the blade do the work. Forcing the scraper can lead to loss of control and damage.
- Test an Inconspicuous Area First: Before scraping an entire window, especially if you are unsure of the glass type (e.g., tempered, coated), always test a small, hidden spot. After testing, examine the area closely from different angles and in various lighting conditions to check for any fine scratches.
- Listen Carefully: Pay attention to the sound the scraper makes. A gritty or scratching sound is a clear warning to stop immediately and reassess.
- Blade Care: When not in use, always retract the blade or replace its protective cover. Store replacement blades in a dry place to prevent rust.
- Avoid on Sensitive Glass: Be extremely wary of using metal scrapers on tinted window film (they will cut it), coated glass (e.g., Low-E coatings on the accessible surface), or heavily textured glass unless you are using a plastic blade and have tested extensively. Some tempered glass can also be prone to scratching due to “fabrication debris” on the surface; if you suspect this, it’s best to avoid scraping altogether.
Given the high risk of damage, it’s often advisable for DIYers to try less aggressive methods first for removing stubborn spots, such as specialized solvents (appropriate for the residue and glass type) or non-scratch abrasive pads like bronze wool , before even considering a metal scraper.
Holsters & Belts: Keeping Your Arsenal Organized & Accessible
 While perhaps seeming like a professional-only accessory, a simple tool belt with holsters or a Bucket-On-A-Belt (BOAB) system can significantly improve the efficiency and ergonomics of DIY window cleaning. They keep your essential tools—squeegee, washer, cloths—within easy reach, reducing bending, searching, and the risk of dropping tools.
- Belts: Typically made from durable nylon, window cleaning belts are adjustable to fit various waist sizes and often feature a quick-release buckle for convenience. They usually have one to three loops for directly attaching tools or holsters.
- Holsters: These attach to the belt and are designed to hold specific tools. Squeegee holsters and washer holsters are common, often made from nylon or leather. Loop sizes may vary to accommodate different tool dimensions. Scraper-specific holsters are also available and usually designed to safely cover the blade when the scraper is stowed.
- Pouches: These offer enclosed pockets on a belt, useful for carrying smaller items like spare scraper blades, bronze wool pads, or even your keys, preventing them from falling out.
- Bucket On A Belt (BOAB): This is a small, open-topped container that clips onto your belt, designed to hold a washer dipped in cleaning solution and often one or two squeegees. This keeps your wet washer conveniently at your side. BOABs come in fixed or detachable versions, with some high-end models made from military-grade materials for extreme durability.
For a DIYer, even a basic squeegee holster can make the job feel more fluid and less like a juggling act, especially when working on a step stool or repositioning.
Keeping Your Tools in Top Shape: Maintenance & Care Tips
Investing in good quality manual window cleaning tools is the first step; proper maintenance is the second. Well-cared-for tools not only last longer, saving you money, but they also perform better, directly impacting the quality of your window cleaning results. A dull squeegee blade or a gritty washer sleeve will inevitably lead to streaks and frustration.
- Squeegees:
- After Each Use: Rinse the handle, channel, and blade with clean water to remove dirt and cleaning solution residue. Dry them thoroughly.
- Storage: Store your squeegee with the rubber blade facing upwards, or in a holster where the blade is not resting on any surface. Pressure on the blade edge can cause nicks or warping. Keep it in a cool, dark place if possible, as prolonged exposure to heat and sunlight can cause rubber to deteriorate faster.
- Channel Check: Periodically ensure your squeegee channels are perfectly straight. A bent channel will result in uneven pressure and streaks.
- Handle Mechanisms: If your handle has swivel or quick-release mechanisms, check that they are functioning smoothly and are properly adjusted.
- Blade Care: As detailed in section 2.1, replace your squeegee rubber as soon as it shows signs of wear (nicks, tears, rounded edges) or stops providing a clean wipe. Remember, many blades have two usable edges, so flip it before replacing entirely.
- Window Washers / Applicators / Scrubbers:
- Sleeve Washing: Remove the washer sleeve from the T-bar regularly (e.g., weekly for frequent use, or after each major cleaning session) and wash it in warm water with a mild detergent. Avoid using fabric softener, as it can coat the fibers, reduce absorbency, and lead to streaking.
- Drying Sleeves: Always air dry washer sleeves. Do not put them in a machine dryer, as high heat can damage the fibers (especially microfiber) and cause shrinkage. Hang them in a shaded place out of direct sunlight.
- New Sleeves: Wash a new sleeve before its first use to remove any loose manufacturing fibers or lint that could otherwise be transferred to the windows.
- T-Bar Care: Rinse and dry the T-bar after use. Check that any swivel mechanisms are working correctly.
- Window Scrapers:
- Blade Safety: Always keep the protective cover on the blade, or retract the blade, when the scraper is not in active use. This is for your safety and to protect the blade edge.
- Blade Condition: Change scraper blades if they become dull, chipped, or rusty. For professionals, this might be every 1-2 days of use; for DIYers, change it when performance degrades or if any damage is visible. It’s far better to use a new blade than risk scratching expensive glass.
- Storage: Store replacement blades in a dry environment to prevent rust and keep them safely away from children.
- Extension Poles:
- Locking Mechanisms: Check that the joiners or locking mechanisms (clamps, twist locks) are not overtightened, as this can cause premature wear. Keep them clean from grit that could interfere with their operation.
- Grips and Tips: Ensure the pole grip is in good condition for safe handling, and that the end adapter/tip that holds your tools is secure.
- Cloths and Towels (especially Microfiber):
- Cleaning: Wash microfiber cloths separately or with other non-linting items. Use a mild detergent and avoid fabric softener and bleach, which can damage the fibers and reduce their effectiveness.
- Drying: Air drying is often best for microfiber, or machine dry on a low heat setting. High heat can melt the fibers.
- Quantity: Always have a good supply of clean, dry cloths ready before you start a window cleaning job.
By incorporating these simple maintenance habits, you’ll ensure your tools are always ready to deliver the best possible results, making your DIY window cleaning efforts more effective and enjoyable.
Avoiding Pitfalls: Common DIY Window Cleaning Mistakes
 Even with the best tools, a few common missteps can turn a window cleaning session into a frustrating, streak-filled ordeal. Understanding these pitfalls is key to avoiding them and achieving that coveted professional-looking finish.
- Cleaning in Direct, Hot Sunlight: This is a classic mistake. The heat from the sun causes your cleaning solution to evaporate too quickly on the glass, often before you can squeegee it off. This rapid drying is a primary cause of streaks and water spots.
- The Fix: Ideally, choose an overcast, cool day for window cleaning. If you must clean in sunny conditions, work on shaded sides of the house first, or clean in smaller, manageable sections, washing and squeegeeing quickly before the solution dries.
- Being Too Sparing with Cleaning Solution: Using too little cleaning fluid means there isn’t enough lubrication for your squeegee, and not enough cleaning agent to break down and lift the dirt effectively.
- The Fix: Ensure the window is thoroughly wetted with your cleaning solution. The washer sleeve should be nicely saturated, allowing it to glide easily and leave a good film of solution for the squeegee to work with.
- Using the Wrong Materials to Dry or Wipe: Many people reach for paper towels or old cotton t-shirts. Paper towels often leave lint behind and can break down when wet. Similarly, many cotton cloths are not lint-free and can leave fibers on the glass. The old advice to use newspaper is also flawed, as the ink can transfer to the glass or frames.
- The Fix: For wiping squeegee blades between strokes and detailing edges, use clean, dry, lint-free microfiber cloths. These are highly absorbent and designed not to leave residue.
- Incorrect Squeegee Technique: Simply dragging a squeegee across the glass randomly will likely result in a mess of streaks.
- The Fix: Proper technique involves:
- Starting with a dry strip at the top or side of the pane (by wiping with a cloth).
- Overlapping each squeegee stroke by about 1 to 1.5 inches over the previous dry stroke.
- Maintaining a consistent angle (around 45 degrees) and even pressure.
- Wiping the squeegee blade with a clean, dry cloth after every stroke to remove accumulated water and dirt.
- Working from top to bottom of the window pane.
- The Fix: Proper technique involves:
- Not Cleaning the Squeegee Blade: If the blade is dirty from a previous stroke, it will redeposit that dirt onto the next section of glass, causing streaks.
- The Fix: As mentioned above, wipe the blade clean with a lint-free cloth after every single pass across the glass.
- Dirty Water or Dirty Tools: Using dirty cleaning solution or a gritty washer sleeve will simply spread dirt around rather than remove it. A worn-out squeegee blade will also fail to clean effectively.
- The Fix: Change your cleaning water when it becomes visibly dirty. Rinse your washer sleeve frequently in the bucket. Ensure your squeegee blade is clean, sharp, and undamaged (see maintenance tips).
- Ignoring Window Frames and Tracks: Dirt, dust, and cobwebs from window frames and tracks can easily fall or be dragged onto freshly cleaned glass, ruining your work.
- The Fix: Always clean the window frames, sills, and tracks before you start cleaning the glass itself. A brush or vacuum can remove loose debris, followed by a wipe-down with a damp cloth.
- Using Harsh or Inappropriate Cleaning Solutions: Some household cleaners or overly strong chemical concoctions can damage window seals, frames (especially vinyl or wood), or leave a residue on the glass that attracts more dirt.
- The Fix: For most DIY window cleaning, a simple solution of a few drops of liquid dish soap in a bucket of warm water is effective and safe. If you need something stronger for specific stains, research solutions that are approved for window use and your window material type.
- Forgetting to Check Your Work from Different Angles: Windows can look clean from one angle but reveal streaks and smudges when viewed from another, or when the light changes.
- The Fix: After cleaning a section or a whole window, step back and look at it from various angles and in different lighting conditions to spot any missed areas or streaks that need a quick touch-up.
By being mindful of these common errors and actively working to avoid them, you’ll significantly improve the quality of your DIY window cleaning and achieve those sparkling, satisfying results much more consistently.
When to Hang Up Your Squeegee: The Case for Professional Window Cleaning
DIY window cleaning can be a rewarding and cost-effective endeavor. However, there are certain situations where tackling the job yourself may not be the safest, most practical, or most effective approach. Recognizing these limitations is just as important as knowing how to use your tools correctly. Hiring a professional window cleaning service isn’t an admission of DIY failure; rather, it’s a smart decision that prioritizes safety, quality, and the longevity of your windows.
Safety First: The Primary Consideration
- Working at Heights: This is the most significant factor. If your home has second-story (or higher) windows, or windows that are difficult to access (e.g., over sloped roofs, awnings, or dense landscaping), attempting to clean them yourself without proper training and safety equipment is inherently risky. Professionals are equipped with appropriate ladders, safety harnesses, fall arrest systems, and the expertise to use them correctly, minimizing the risk of falls, which can lead to severe injuries or worse. The Occupational Safety and Health Administration (OSHA) reports that window cleaning accidents contribute to a significant number of workplace injuries annually, underscoring the inherent dangers, even for those with experience.
- Unstable Ground or Obstacles: Setting up a ladder on uneven or soft ground can be treacherous. Similarly, navigating around electrical wires, tree branches, or other obstacles while trying to reach windows adds layers of risk that DIYers may not be equipped to manage safely.
- Adverse Weather Conditions: Professionals know to avoid working in high winds, rain, or snow, as these conditions dramatically increase accident risks and make effective cleaning nearly impossible. A DIYer might be tempted to push through less-than-ideal weather to get a job done, which can be unsafe.
Achieving Superior, Lasting Results
- Specialized Equipment and Solutions: Professionals have access to and experience with tools that go beyond the typical DIY kit. This can include water-fed pole systems that use purified water to clean and rinse windows without leaving spots, even at considerable heights, eliminating the need for ladders in many cases. They also use commercial-grade cleaning solutions formulated for specific types of grime or water conditions, achieving a level of clean that can be difficult to replicate with store-bought products.
- Streak-Free Guarantee: The hallmark of professional window cleaning is a flawless, streak-free finish. This comes from years of experience, refined techniques, and the right tools. While diligent DIYers can achieve good results, consistently perfect outcomes, especially on large or numerous windows, are more reliably delivered by pros.
- Tackling Tough Stains: Professionals are adept at removing stubborn residues like hard water stains, mineral deposits, paint overspray, or silicone caulk without damaging the glass. They understand which specific solvents or gentle abrasive techniques are safe and effective for different types of glass and stains.
Efficiency and Window Longevity
- Time Savings: Cleaning all the windows in a home can be a very time-consuming and physically demanding task for a homeowner. Professionals can typically complete the job in a fraction of the time due to their experience, efficient methods, and specialized equipment.
- Preserving Window Integrity: Regular cleaning by professionals does more than just improve the view; it helps extend the life of your windows. Dirt, grime, and pollutants can etch glass over time. Hard water stains, if left untreated, can become permanent. Mold and mildew can degrade window seals. Professionals remove these damaging contaminants, helping to prevent costly repairs or premature window replacement.
- Early Problem Detection: During the cleaning process, experienced professionals may spot potential issues with your windows, such as failing seals (indicated by condensation between panes), frame damage, or clogged weep holes, and bring them to your attention. Early detection can save you from more significant problems down the line.
Scenarios Favoring Professional Help:
Consider hiring a professional window cleaner if:
- You have multi-story windows or any windows that require a ladder for access, especially if you are not comfortable or experienced with ladder work.
- You have a large number of windows, and the time commitment for DIY is prohibitive.
- You’ve struggled to achieve satisfactory, streak-free results on your own.
- Your windows have stubborn stains, hard water deposits, or post-construction debris that you’re unsure how to remove safely.
- You have specialty glass, such as tinted, coated, or very old windows, that require expert care.
- You value the convenience, safety, and guaranteed high-quality results that professionals provide.
Ultimately, the decision to DIY or hire a professional is personal. However, for tasks involving significant heights, specialized cleaning needs, or when safety and a flawless finish are paramount, investing in professional window cleaning services is often the most prudent and rewarding choice.
Your Path to Brilliantly Clean Windows
 The journey to achieving brilliantly clean windows as a DIY enthusiast is paved with the right knowledge and the right tools. This guide has aimed to illuminate the path, detailing the essential manual window cleaning equipment from the critical squeegee to the supportive bucket and belt.
Understanding the nuances of each tool—the materials of a squeegee blade and its impact on different temperatures, the absorbency of a washer sleeve, the safety of an extension pole’s locking mechanism, and the cautious use of a scraper—empowers you to make informed choices and use them effectively.
Proper maintenance will ensure your tools serve you well for many cleaning sessions to come, while awareness of common DIY pitfalls will help you sidestep frustration and achieve those coveted streak-free results. However, the path to clean windows also involves recognizing when the task at hand exceeds the safe or practical limits of a DIY approach.
For high, hard-to-reach windows, stubborn stains, or simply when time and a guaranteed professional finish are paramount, calling in experienced window cleaners is a wise and valuable decision.
Whether you choose to meticulously assemble your own toolkit and master the techniques or opt for professional service, the goal remains the same: the pure, unobstructed joy of looking through windows so clean they seem to disappear. With the insights from this guide, you are now better equipped to choose your path and enjoy the sparkling results.


