I. Beyond Daily Cleaning – Understanding Specialized Floor Care
Maintaining clean and attractive floors often involves more than just daily sweeping or mopping. While routine cleaning removes surface dirt and debris, specialized floor care products and processes are necessary for long-term protection, aesthetic enhancement, and restoration of various flooring surfaces. This guide delves into the world of floor finishing and restoration products – treatments applied after routine cleaning that play a crucial role in preserving the integrity and appearance of your floors. These are distinct from daily cleaners, representing more intensive treatments often involving specific chemistries and application techniques.
A. Defining the Realm of Finishing & Restoration
The products covered in this guide serve specific functions beyond simple cleaning. They include finishes that create protective wear layers, sealers that guard porous materials against stains and damage, strippers that remove old coatings, polishes that enhance shine, and specialized compounds and pads used with machinery for deep restoration and maintenance. Understanding these categories is the first step towards implementing a comprehensive floor care strategy that goes beyond surface-level tidiness. These treatments address the underlying condition and protection of the floor itself, not just the daily accumulation of soil.
B. The “Why”: Importance of Advanced Floor Care
Investing time and resources in advanced floor care offers significant benefits:
- Enhanced Durability & Longevity: Protective coatings like sealers and finishes shield floors from scratches, stains, moisture penetration, and general wear and tear, significantly extending their functional lifespan, especially in high-traffic areas. Sealers penetrate porous materials to prevent damage from within, while finishes provide a renewable surface layer.
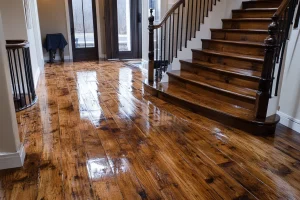
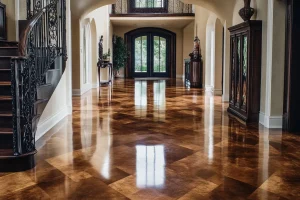
- Improved Aesthetics: These products can dramatically improve a floor’s appearance by restoring gloss, deepening color, filling minor imperfections, and creating a uniform, attractive surface. A well-maintained floor enhances the overall ambiance of any space.
- Easier Maintenance: Floors protected by sealers or finishes are generally easier to clean daily. Dirt and spills tend to sit on the protective layer rather than penetrating the flooring material, simplifying routine upkeep.
- Improved Hygiene: By filling microscopic pores and cracks in flooring materials like concrete, terrazzo, or grout, sealers eliminate hiding places for dirt, bacteria, and allergens, contributing to a healthier indoor environment.
C. Navigating This Guide
This guide provides detailed information on the primary categories of floor finishing and restoration products:
- Floor Finishes / Waxes
- Floor Sealers
- Floor Strippers
- Floor Polishes / Restorers
- Floor Buffing / Burnishing Compounds & Pads
- Grout Sealers
Each section explores the function, types, application, and considerations for the respective product category. The guide concludes with an analysis of why engaging professional cleaning services is often the most effective and safest approach for these specialized tasks.
Many of these products function as part of a larger floor care cycle. Some treatments, like sealing and finishing, represent proactive care, designed to prevent damage before it occurs. Others, such as stripping and heavy restoration, are reactive measures used to correct existing damage or deterioration. Understanding this cycle helps in planning appropriate maintenance schedules. Furthermore, achieving optimal results often involves using compatible products, ideally designed as a system by the same manufacturer. Mixing incompatible chemicals can lead to problems like peeling, bubbling, or uneven appearance, and may even void flooring warranties. This system-based approach underscores the importance of correct product selection and application.
Table 1: Quick Overview: Specialized Floor Care Product Categories
| Product Category | Primary Purpose | Typical Floor Types | Key Benefit |
|---|---|---|---|
| Floor Finishes / Waxes | Provide a renewable protective wear layer, enhance shine | Resilient (VCT, vinyl, linoleum), sealed hardwood, sealed concrete | Durability, Gloss, Easier Daily Cleaning |
| Floor Sealers | Protect porous materials from stains/moisture, improve finish adhesion | Concrete, terrazzo, unglazed tile, natural stone, grout, wood | Stain Prevention, Longevity, Surface Preparation |
| Floor Strippers | Chemically remove old finish/sealer buildup | Resilient floors requiring refinishing (e.g., VCT), some sealed hard floors | Preparation for New Finish, Removes Buildup |
| Floor Polishes / Restorers | Enhance shine, fill minor scuffs/scratches in existing finish | Finished hardwood, laminate, vinyl, tile with existing finish | Aesthetic Refresh, Minor Repair |
| Buffing / Burnishing Compounds/Pads | Used with machines to clean, polish, harden finish, achieve high gloss | Floors with maintainable finishes (esp. VCT, polished concrete, terrazzo) | High Gloss, Finish Hardening, Scuff Removal |
| Grout Sealers | Protect porous grout lines from staining and moisture | Grout lines between ceramic, porcelain, or stone tiles | Stain Prevention, Easier Grout Cleaning |
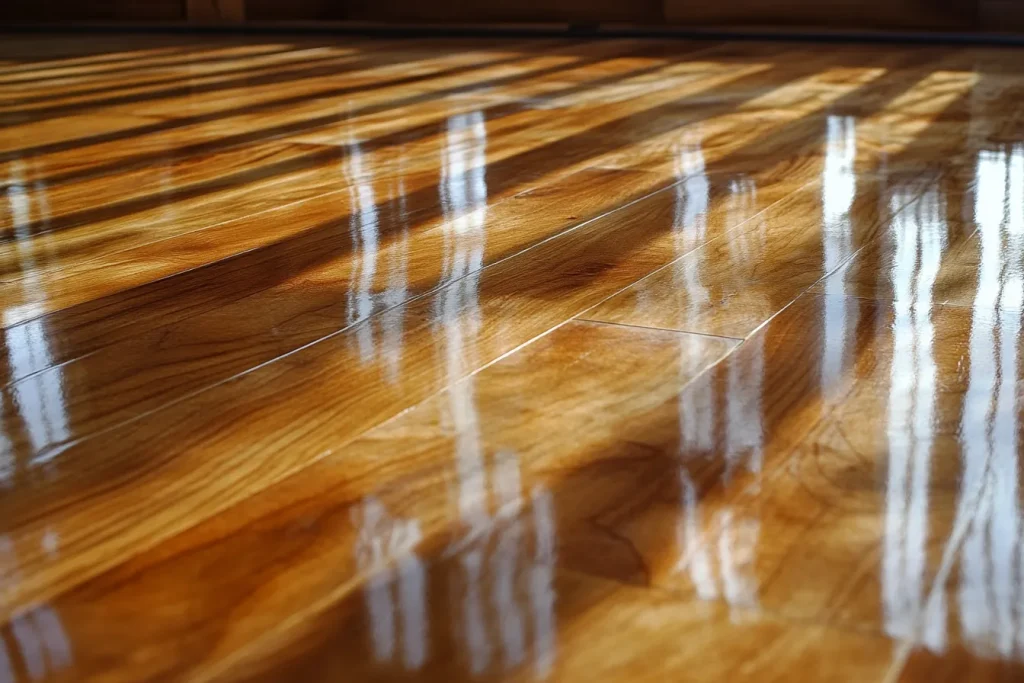
II. Floor Finishes / Waxes: Creating a Protective, Glossy Shield
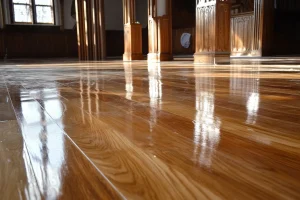 Often referred to interchangeably as “finish” or “wax,” these products are applied over sealed or non-porous hard floors to create a durable, renewable surface layer. They represent the primary defense against daily wear and tear for many commercial and residential floors.
A. Core Functions and Benefits
Floor finishes serve several critical functions:
- Protection: They act as a sacrificial layer, absorbing the brunt of foot traffic, scratches, scuffs, and spills, thereby protecting the underlying flooring material.
- Aesthetics: Finishes enhance the floor’s appearance, providing a consistent sheen that can range from a subtle matte to a brilliant high gloss.
- Durability: Formulated to withstand wear, finishes increase the floor’s resistance to damage, particularly in high-traffic environments.
- Maintenance: A properly finished floor simplifies daily cleaning, as dirt and contaminants rest on the easily cleaned finish surface.
B. Key Ingredients and Their Roles
Modern floor finishes are complex chemical formulations. While historically based on natural waxes like carnauba, contemporary products predominantly rely on synthetic components for enhanced performance :
- Acrylic Polymers: These are the primary film-forming components, essentially microscopic plastic particles dispersed in water (a polymer emulsion). When the water evaporates, these particles coalesce to form a hard, clear, continuous film that provides the finish’s core strength, durability, and gloss.
- Waxes (Synthetic): Additives like polyethylene waxes are incorporated to modify the finish properties. They enhance durability, gloss levels, scuff resistance, and reparability (the ability to be effectively buffed or burnished). These synthetic waxes offer superior performance compared to the natural waxes used in older formulations. Traditional paste wax, often containing beeswax or carnauba, is still used for specific applications like unglazed terracotta tiles or wood floors not sealed with urethane.
- Plasticizers: These agents add flexibility to the polymer film, preventing it from becoming brittle and cracking or powdering under stress. A noteworthy consideration is that new vinyl flooring can release its own plasticizers for several months, potentially interfering with the finish, causing tackiness or scuffing. Using vinyl that has aged slightly can mitigate this issue.
- Surfactants (Leveling Agents): These chemicals reduce surface tension, allowing the liquid finish to spread evenly across the floor without beading up, ensuring a smooth, uniform coat. Foam suppressants are often added to prevent bubbles caused by surfactants.
- Other Additives: Preservatives, coalescing agents (which help the polymer particles fuse together during drying), and other modifiers are included to optimize drying time, hardness, appearance, and overall resistance.
The transition from traditional “waxes” to modern polymer-based “finishes” is significant. While the term “wax” persists, users should understand that today’s products for resilient floors are chemically advanced coatings offering greater durability and different maintenance requirements than old-fashioned paste waxes.
C. Types and Characteristics
Floor finishes vary based on formulation and intended use:
- Water-Based (Acrylic/Polymer): The most common type for resilient floors (Vinyl Composition Tile – VCT, vinyl sheet, linoleum) and sealed hard floors. They are favored for their lower volatile organic compounds (VOCs), faster drying times, ease of cleanup (with water), and resistance to yellowing over time compared to older solvent-based or oil-modified options.
- Sheen Levels: Available in a spectrum of gloss levels, from extra matte to satin, semi-gloss, and high gloss, allowing customization of the floor’s final look.
- Durability Grades: Finishes are formulated for varying levels of foot traffic. Commercial-grade finishes typically have higher solids content and more robust polymer structures for demanding environments, while residential finishes might prioritize ease of application or specific aesthetic qualities.
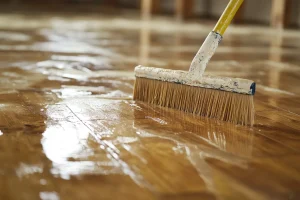
D. Application Considerations and Maintenance
Applying floor finish correctly is crucial for performance:
- Surface Preparation: The floor must be impeccably clean and free of contaminants. For previously finished floors, this usually involves stripping off all old finish layers and neutralizing any alkaline stripper residue. Some porous floors may require a compatible sealer application first.
- Application Method: Thin, even coats are applied using a clean microfiber mop or specialized finish applicator. Applying coats too thickly can lead to drying problems and reduced durability. Typically, 2 to 5 coats are applied, allowing adequate drying time between each.
- Drying/Curing Time: This is a critical phase where the water evaporates and the polymer particles fuse into a hard film. Drying time varies significantly based on the product, temperature, humidity, and airflow. While a coat might be dry to the touch in 30-60 minutes, full curing (achieving maximum hardness and chemical resistance) can take 24 hours or even several days, especially in high humidity. Rushing this process compromises the finish’s integrity.
- Maintenance: Routine cleaning should use pH-neutral cleaners to avoid damaging the finish. Periodic maintenance often involves spray buffing or high-speed burnishing (see Section VI) to restore gloss and remove minor scuffs. As the finish wears down over time, recoating (applying additional coats after a deep scrub) or complete stripping and refinishing will be necessary.
E. Risks and Precautions
Potential issues with floor finishes include:
- Buildup and Discoloration: Applying excessive coats over time without periodic stripping can lead to a thick, yellowed, or cracked finish that looks unsightly and traps dirt.
- Adhesion Failure: Peeling, flaking, or powdering can occur if the floor was improperly prepared (e.g., stripper residue left behind), if incompatible products were used (sealer/finish mismatch), or if contaminants were present during application. Using products designed as a system from one manufacturer can help prevent this.
- Environmental Factors: Applying finish in direct sunlight can cause blistering; applying to a cold floor can result in uneven film formation or haziness; high humidity significantly extends drying and curing times.
- Safety: Adequate ventilation is required during application to dissipate vapors. Wet floors are extremely slippery. Always consult the Safety Data Sheet (SDS) for the specific product regarding necessary personal protective equipment (PPE), such as gloves and eye protection, and handling procedures.
III. Floor Sealers: The First Line of Defense for Porous Surfaces
Floor sealers are foundational treatments designed primarily for porous flooring materials. Their main purpose is to penetrate or coat the surface to prevent absorption of liquids and contaminants, thereby protecting the floor from staining and damage, and often preparing it for subsequent finish coats. The necessity and type of sealer depend heavily on the floor’s porosity – its inherent ability to absorb liquids. Materials like unglazed tile, concrete, natural stone, and grout benefit significantly from sealing, while non-porous materials like glazed ceramic or solid vinyl generally do not require it.
A. Core Functions and Benefits
Sealers perform several vital roles:
- Stain Prevention: They block liquids from soaking into porous surfaces, preventing stains from spills like coffee, oil, or wine.
- Surface Protection: They guard against etching, efflorescence (white powdery deposits), and other forms of moisture-related damage.
- Easier Cleaning: By filling pores and creating a less absorbent surface, sealers make routine cleaning more effective as dirt is less likely to become trapped.
- Improved Hygiene: Sealing pores reduces areas where bacteria and mold can grow, especially important for grout lines and porous stone.
- Enhanced Finish Adhesion: Sealers create a uniform, stable base that promotes better bonding and performance of subsequently applied floor finishes.
- Aesthetic Control: Depending on the type, sealers can preserve the natural look of the floor or enhance its color and sheen.
B. Types of Sealers
Floor sealers generally fall into two main categories based on how they interact with the floor surface:
- 1. Penetrating (Impregnating) Sealers:
- Mechanism: These sealers have low viscosity and are designed to penetrate into the pores of the material, coating the internal structure without forming a significant film on the surface. They work from within to repel water and oil-based contaminants.
- Appearance: Typically, they do not significantly alter the floor’s appearance, preserving its natural color and texture. They usually leave a matte or “natural” look. They act as an “invisible shield.”
- Benefits: Provide excellent stain resistance and durability, often with longer intervals between reapplications compared to topical sealers. They allow the substrate to breathe (good moisture vapor transmission), which is important for some installations. Ideal for maintaining the authentic look of natural stone, terrazzo, or unglazed tile.
- Suitable For: Unglazed ceramic tile (quarry, terracotta), natural stone (marble, granite, slate, travertine), concrete, terrazzo, cementitious grout.
- 2. Topical (Surface) Sealers:
- Mechanism: These sealers have higher viscosity and work by forming a protective film or coating on top of the floor surface, bridging over pores and imperfections. They function like a layer of “visible armor.”
- Appearance: They often alter the floor’s appearance, typically adding a sheen (satin or gloss) and potentially enhancing or deepening the color.
- Benefits: Offer good surface protection against spills and wear. Can improve the aesthetic appeal by adding gloss or restoring richness to the color. They are effective at filling surface defects on materials like worn resilient flooring or concrete.
- Drawbacks: The surface film can wear down with traffic, potentially requiring more frequent reapplication than penetrating sealers. They can sometimes trap moisture if applied over a damp surface. Removal can be more difficult than removing floor finishes.
- Suitable For: Concrete, terrazzo, worn resilient flooring, and sometimes natural stone or tile where a surface sheen is desired.
While convenient “one-step” seal/finish combination products exist , they may represent a compromise. For maximum protection and performance, especially on highly porous or demanding floors, a dedicated sealer followed by a compatible finish often yields superior results, as each product is optimized for its specific function.
C. Suitable Floor Types
Sealers are essential for:
- Concrete (bare or stained)
- Terrazzo
- Unglazed Tiles (Quarry, Saltillo, Terracotta, Slate)
- Natural Stone (Marble, Granite, Limestone, Travertine)
- Grout Lines (Cementitious)
- Wood (specific types like penetrating oils or pre-finish conditioners)
- Worn Resilient Flooring (as a base for finish)
They are generally not needed for solid vinyl , glazed ceramic or porcelain tile surfaces (though the grout between them needs sealing), or heavily painted surfaces.
D. Application Process and Key Considerations
 Proper application is vital for sealer effectiveness:
- Preparation: The floor must be meticulously clean, completely dry, and free of any previous coatings, oils, or contaminants. Existing sealers may need to be chemically stripped first.
- Application: Apply evenly according to manufacturer directions using appropriate tools like low-pressure sprayers, lambswool applicators, rollers, or brushes. Avoid puddling. Multiple thin coats are often recommended over a single thick coat for better penetration and coverage.
- Excess Removal (Penetrating Sealers): Crucially, any excess penetrating sealer that does not soak into the pores within the specified time (e.g., 5-15 minutes) must be thoroughly wiped off the surface. Failure to do so can result in a tacky, sticky residue that is difficult to remove.
- Drying/Curing: Allow the sealer to dry and cure completely as per instructions before allowing foot traffic or applying floor finish. Environmental conditions like humidity and temperature will affect cure times.
- Compatibility: Ensure the chosen sealer is compatible with the flooring material and any finish that will be applied over it. Using products from the same manufacturer’s system is often recommended.
E. Sealers vs. Finishes: Understanding the Distinction
While both protect floors, sealers and finishes have distinct roles:
- Function: Sealers primarily protect the inherent structure of porous flooring materials from absorption and staining, often acting as a primer. Finishes primarily provide a renewable wear layer on top of sealed or non-porous floors for durability and gloss.
- Application: Sealers are applied to bare, clean surfaces (or stained wood) before any finish coats.
- Permanence: Sealers are often considered semi-permanent and can be more difficult to remove than finishes. Finishes are designed to be periodically maintained (buffed, recoated) and eventually stripped and replaced.
IV. Floor Strippers: Safely Removing Old Layers for a Fresh Start
Floor stripping is a periodic, heavy-duty maintenance process involving the chemical removal of accumulated layers of old floor finish, wax, and sometimes certain types of sealers. It’s a necessary step when finishes become excessively worn, scratched, discolored (yellowed), or built-up to the point where routine cleaning and lighter maintenance (like scrubbing or buffing) are no longer effective. Stripping prepares the floor surface for a completely new application of sealer and/or finish, essentially providing a “reset”. It is crucial to understand that stripping is an aggressive, labor-intensive process, not part of routine cleaning, and should only be performed when necessary to avoid excessive wear on the floor itself.
A. Core Function and Necessity
The primary goal of stripping is the complete removal of existing coatings down to the bare floor surface. This is required when:
- Finish is deeply scratched, scuffed, or embedded with dirt.
- Finish has yellowed or darkened significantly.
- Multiple layers have built up, causing cracking, powdering, or adhesion issues.
- A different type of finish needs to be applied.
- The floor requires deep restoration before refinishing.
B. Key Characteristics and Chemical Makeup
Traditional floor strippers are powerful chemical solutions:
- High Alkalinity: Most effective strippers rely on high pH (typically 9.5 to 13+) to chemically attack and break down (re-emulsify or dissolve) the polymer structure of acrylic floor finishes. Common alkaline agents include sodium hydroxide or potassium hydroxide , or monoethanolamine (MEA).
- Solvents: Some formulations incorporate solvents to enhance their ability to cut through multiple layers or specific types of finishes. However, solvent-heavy strippers may pose greater health and environmental risks.
- Water-Based: Many modern strippers are water-based emulsions containing alkaline agents and surfactants.
- Alternative Chemistries: Recognizing the hazards of traditional strippers, manufacturers offer alternatives like:
- Lower pH / Less Aggressive Strippers: Suitable for removing fewer layers or specific finish types.
- Bio-Enzymatic Strippers: Utilize enzymes and microorganisms to break down finishes; often non-toxic, biodegradable, and low-VOC, but may require longer dwell times.
- “Green” Strippers: Formulated with less hazardous ingredients and lower environmental impact.
C. The Stripping Process: A Step-by-Step Overview
Floor stripping is a multi-step process requiring careful execution:
- Preparation: Clear the area completely. Protect adjacent surfaces (walls, carpet) with plastic sheeting. Ensure good ventilation. Put on appropriate PPE. Sweep or vacuum the floor thoroughly.
- Dilution: Accurately dilute the stripper concentrate with cool water according to the manufacturer’s label. Using hot water can increase hazardous fumes and may decrease the effectiveness of some ammonia-based strippers. Incorrect dilution (too strong or too weak) will impede performance and can damage floors.
- Application: Liberally apply the diluted solution to a manageable section of the floor (e.g., 10ft x 10ft) using a mop. Work in small enough sections that can be completed within the recommended dwell time.
- Dwell Time: Allow the solution to sit undisturbed on the floor for the manufacturer-specified time (usually 5-15 minutes). This allows the chemicals to penetrate and break down the finish. Crucially, the floor must remain wet during this period. If it starts to dry, reapply more solution.
- Agitation: Using a low-speed rotary floor machine equipped with an aggressive stripping pad (black, brown, or specialized stripping pads), scrub the floor thoroughly to loosen the emulsified finish. Edges and corners may require scrubbing with a doodlebug pad holder or deck brush.
- Removal: Immediately remove the resulting slurry (a mixture of dissolved finish, dirt, and stripper solution) using a high-quality wet/dry vacuum. Mops can be used but are less efficient and may spread residue.
- Rinsing: Thoroughly rinse the floor with clean, cool water. Use a clean mop or an auto-scrubber with water only. Remove the rinse water with the wet/dry vacuum. Repeat the rinsing process at least once, or until the floor is completely free of residue. Check for residue by wiping a small area with a white cloth or hand; if residue appears, rinse again.
- Neutralization: Apply a floor neutralizer (a mildly acidic solution) according to directions, allow it to dwell briefly (e.g., 5 minutes), and then remove it thoroughly with a wet/dry vacuum or mop. This step is critical to counteract any remaining alkalinity from the stripper, which could otherwise prevent the new finish from adhering properly or cause it to yellow.
- Drying: Allow the floor to dry completely before applying any sealer or finish. Use air movers to speed up drying if necessary.
The stripping process is prone to errors, each potentially leading to significant problems. Insufficient rinsing or neutralization, for instance, almost guarantees failure of the new finish, necessitating a complete re-strip – a costly and time-consuming mistake often referred to as the “domino effect” of stripping errors.
D. Risks and Crucial Safety Precautions
Floor stripping involves significant risks:
- Chemical Hazards: Highly alkaline strippers are corrosive and can cause severe skin burns and eye damage upon contact. Inhalation of fumes can cause respiratory irritation. Always follow SDS precautions.
- Floor Damage:
- Incompatibility: Using the wrong stripper can permanently damage certain flooring materials like linoleum, rubber, asphalt tile, marble, terrazzo, granite, and some types of LVT. Always test in an inconspicuous area first.
- Drying: Allowing stripper solution to dry on the floor can make removal extremely difficult and may etch or damage the surface.
- Residue: Failure to completely remove and neutralize stripper residue will likely cause adhesion failure, discoloration (yellowing), or powdering of the new finish.
- Slip Hazard: Wet floors during the stripping process are extremely slippery. Use wet floor signs and restrict access to the area.
- Ventilation: Good air circulation is essential to minimize exposure to chemical fumes (VOCs).
- Personal Protective Equipment (PPE): Mandatory PPE includes chemical-resistant gloves (e.g., butyl, nitrile), splash-proof goggles and potentially a face shield, waterproof boots, and protective clothing. A respirator may be needed depending on the product and ventilation.
- Disposal: Used stripper slurry is considered chemical waste and must be disposed of according to local environmental regulations, not simply poured down the drain.
Table 2: Floor Stripping Safety & Best Practice Checklist
| Step/Consideration | Key Action | Why It’s Critical |
|---|---|---|
| PPE | Wear chemical-resistant gloves, eye/face protection, waterproof boots, protective clothing. Respirator if needed. | Protects skin, eyes, and respiratory system from corrosive chemicals and fumes. |
| Ventilation | Ensure good airflow during and after stripping. Open windows/doors, use fans if necessary. | Reduces concentration of potentially harmful chemical fumes (VOCs). |
| Floor Compatibility | Test stripper in an inconspicuous area before full application. Check manufacturer guidance. | Prevents irreversible damage to sensitive flooring materials like linoleum, LVT, marble, etc.. |
| Correct Dilution | Mix stripper concentrate with cool water precisely according to label instructions. | Ensures effectiveness without being overly aggressive; prevents floor damage and excessive fumes. |
| Manageable Sections | Strip only an area that can be kept wet, agitated, and vacuumed within the recommended dwell time. | Prevents stripper from drying on the floor, which causes damage and removal difficulties. |
| Keep Floor Wet | Do not allow the stripper solution to dry on the floor during the dwell time. Reapply if needed. | Dry stripper is ineffective and can damage the floor surface. |
| Thorough Rinsing | Rinse the floor multiple times with clean water, vacuuming thoroughly after each rinse. Check for residue. | Removes all traces of alkaline stripper and dissolved finish, crucial for new finish adhesion. |
| Neutralization | Apply floor neutralizer after rinsing, allow dwell time, and remove completely. | Counteracts residual alkalinity, ensuring proper bonding and preventing yellowing of the new finish. |
| Complete Drying | Ensure the floor is totally dry before applying sealer or finish. | Prevents trapping moisture, which can cause finish failure (clouding, poor adhesion). |
| Proper Disposal | Dispose of used stripper slurry and containers according to local environmental regulations. | Protects waterways and complies with hazardous waste rules. |
V. Floor Polishes / Restorers: Enhancing Shine and Repairing Minor Imperfections
 Floor polishes and restorers are maintenance products designed for application between major recoating or stripping cycles. Their primary purpose is to quickly enhance the gloss of an existing floor finish and mask or fill in minor surface imperfections like scuffs and light scratches. They offer a relatively easy way to refresh a floor’s appearance without the labor and downtime of a full refinishing process.
A. Core Functions and Benefits
These products typically aim to:
- Restore Gloss: Bring back shine to dull or worn areas of the floor finish.
- Minor Repair: Fill in superficial scratches and scuff marks, improving the uniformity of the surface.
- Extend Finish Life: By improving appearance and potentially adding a very thin protective layer, they can help postpone the need for more intensive recoating.
- Convenience: Many are designed for simple mop-on application, requiring no specialized machinery.
The appeal of these products lies in their ability to provide a “quick fix” for floors that are starting to look tired but do not yet require full restoration. However, it’s important to recognize their limitations: they are superficial treatments and cannot correct significant damage or wear. Over-reliance on restorers without addressing the underlying need for deep cleaning or recoating can lead to build-up issues over time.
B. Distinction from Floor Finishes
While often containing similar ingredients (like acrylic polymers), polishes/restorers differ from floor finishes:
- Purpose: Polishes/restorers are for interim maintenance and aesthetic touch-ups on existing finishes. Finishes are foundational protective coatings applied in multiple layers after stripping or sealing.
- Durability: They generally offer much lower durability and wear resistance than a full coat of finish. They deposit a thinner film.
- Build-up Potential: Frequent use without proper deep cleaning can lead to a build-up of polish residue, which may eventually dull the appearance, attract dirt, or interfere with future finish adhesion.
The term “floor polish” itself can be ambiguous. In a DIY context, it often refers to these mop-on or wipe-on restorer products. In professional floor care, “polishing” often refers to high-speed burnishing with machines (covered in Section VI). This guide uses “polish/restorer” for the maintenance products applied by hand or mop.
C. Common Types and Ingredients
- Water-Based Formulations: Most modern floor polishes and restorers are water-based emulsions, often containing acrylic polymers similar to finishes, but likely at lower concentrations or with modifications for faster drying and easier application. The versatility of acrylic chemistry allows formulators to create products ranging from robust finishes to these lighter maintenance solutions.
- Mop-On Applications: Designed to be poured onto the floor and spread evenly with a microfiber mop.
- Spray Formulas: Some products come in spray bottles for targeted application or use with buffing machines (spray buffing).
D. Application and Suitable Floor Types
- Suitable Floors: These products are intended for use on floors that already have a stable finish or sealer, such as polyurethane-finished hardwood, laminate, vinyl (VCT, LVT, sheet), sealed tile, and linoleum. They should not be used on unsealed porous surfaces or unfinished wood.
- Preparation: The floor must be thoroughly cleaned and completely dry before application. Applying polish over dirt will trap it and detract from the appearance.
- Application: Apply a thin, even coat using a clean mop or applicator as directed. Avoid over-application or puddling. Work in manageable sections.
- Drying Time: Generally dry faster than full finish coats, often ready for light foot traffic within an hour, but follow specific product instructions.
E. Considerations and Limitations
- Not a Substitute for Refinishing: Polishes/restorers cannot fix deep scratches, worn-through finish, or heavily damaged floors.
- Compatibility: Always test the product in an inconspicuous area first to ensure compatibility with the existing floor finish and to check the resulting appearance.
- Build-Up Risk: Avoid overuse. Regular deep cleaning (scrubbing) is still necessary to prevent polish residue from accumulating and potentially causing haziness or attracting dirt. Eventually, the floor will still need to be stripped and refinished.
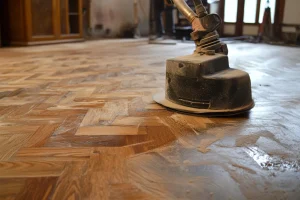
VI. Floor Buffing / Burnishing Compounds and Pads: Achieving High Gloss and Durability
Buffing and burnishing are mechanical processes used in professional floor maintenance, primarily on floors coated with maintainable finishes (like acrylic finishes on VCT) or certain hard surfaces like polished concrete or terrazzo. These processes utilize floor machines equipped with specialized pads and often employ chemical compounds or sprays to clean, repair minor imperfections, enhance gloss, and harden the floor finish.
A. Core Functions and Relationship to Machines
- Buffing: Typically involves a standard-speed rotary floor machine (175-350 RPM). It can be used for several tasks:
- Spray Buffing: Lightly cleaning the floor and removing scuffs while simultaneously polishing the finish using a spray solution and a polishing pad (e.g., red or white).
- Applying Polish: Working a liquid polish or restorer into the finish.
- Smoothing: Lightly smoothing the surface after applying a coat of finish (less common with modern finishes). Buffing primarily cleans and enhances shine through mechanical action combined with a chemical solution.
- Burnishing: Employs a high-speed (1500-3000+ RPM) or ultra-high-speed (UHS) floor machine. Its purpose is not primarily cleaning, but rather polishing an already clean floor to achieve a very high gloss (“wet look”) and to harden the finish. The high speed generates significant friction and heat, which slightly melts and reflows the topmost layer of the polymer finish, smoothing out microscopic scratches and creating a denser, more durable, and glossier surface. Burnishing is therefore a key step in maintaining the appearance and durability of many commercial floor finishes.
It’s important to clarify terminology: while “polishing” in general surface care might imply a more aggressive process than “buffing” , in floor care, “polishing” is often used synonymously with the high-speed burnishing process. “Buffing” refers to the slower speed operation.
B. Buffing/Burnishing Compounds and Sprays
 These chemical solutions work in conjunction with the machines and pads:
- Spray Buff Solutions: Light detergent and polish mixtures sprayed ahead of a buffer to lift light soil and restore shine simultaneously.
- Restorer Solutions: Sometimes used with burnishers, these may contain higher levels of polymers or conditioning agents to help repair minor wear and maximize gloss during the high-speed process.
- Burnishing Compounds: Formulated specifically for UHS burnishing, often containing lubricants to reduce pad drag and agents that react with the finish under heat and pressure to enhance gloss and hardness.
- Function: These chemicals lubricate the pad, help suspend dirt (in spray buffing), fill microscopic imperfections, and contribute chemically to the final polished appearance.
C. Floor Pads: The Workhorses of Mechanical Floor Care
Floor pads are critical components, providing the physical contact and abrasion needed. They are typically made of non-woven synthetic fibers (polyester, nylon) or may include natural fibers (like hog hair for aggressive burnishing). A standardized color-coding system generally indicates the pad’s aggressiveness, although variations exist between manufacturers :
- White/Beige/Tan/Natural Hair: Least aggressive. Used for polishing clean, dry floors with standard buffers or for high-speed burnishing to achieve maximum gloss. Designed to polish without significantly removing finish.
- Red: Light duty. Used for daily cleaning, spray buffing, or light scrubbing. Removes minor scuffs and surface dirt.
- Blue/Green: Medium to heavy scrubbing. Blue is often for general scrubbing, while green is more aggressive for removing embedded dirt, deeper scuffs, and black heel marks without stripping the finish.
- Brown/Black/Maroon: Most aggressive. Designed for heavy-duty stripping to remove multiple layers of old finish in conjunction with chemical strippers. They have an open weave to avoid clogging. (Maroon is also used for specialized surface preparation pads ).
Pad selection is crucial. Using a pad that is too aggressive for the task can damage or remove too much floor finish. Conversely, a pad that is too soft may not achieve the desired cleaning or polishing effect. The right pad depends on the specific task (cleaning, buffing, burnishing, stripping), the type and condition of the floor finish, and the speed of the machine being used. This selection requires knowledge and experience, as the optimal choice involves balancing effectiveness with the risk of damage.
D. Machine Types and Their Effects
- Buffers (Rotary Floor Machines): Operate at lower speeds (175-350 RPM) and provide higher torque, making them suitable for aggressive tasks like stripping and scrubbing, as well as cleaning and spray buffing.
- Burnishers (High-Speed Machines): Operate at much higher speeds (1500-3000+ RPM) and are designed specifically for polishing/hardening clean, finished floors. They generate heat through friction, which is key to achieving the “wet look” gloss and improving finish durability.
- Orbital Machines: Use a different, oscillating motion. They can be versatile tools used for stripping, scrubbing, cleaning, and even sanding wood floors, often with less risk of swirl marks than rotary machines.
Effective buffing and burnishing result from a synergy between the machine’s mechanical action, the pad’s properties, the chemical compound used (if any), and the characteristics of the floor finish itself. The finish must be formulated to respond positively to the heat and pressure of burnishing to achieve optimal results.
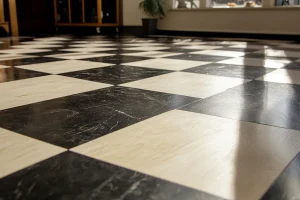
VII. Grout Sealers: Protecting the Vulnerable Lines Between Tiles
While ceramic, porcelain, and stone tiles themselves can be highly durable and resistant to staining (especially if glazed), the grout lines between them are often a weak point. Standard cementitious grout is porous and acts like a sponge, readily absorbing spills, dirty water, and harboring mildew or bacteria. Grout sealers are specialized products designed to penetrate or coat these grout lines, creating a protective barrier. Sealing grout is therefore essential for maintaining the overall appearance, hygiene, and longevity of a tiled surface.
A. Why Grout Needs Sealing
- Porosity: Cement-based grout contains microscopic pores that easily absorb liquids.
- Staining: Spills like coffee, wine, juice, or oily substances can quickly lead to permanent stains in unsealed grout. Dirt from mopping water also gets trapped easily.
- Mold and Mildew: In damp environments like bathrooms and kitchens, absorbed moisture creates ideal conditions for mold and mildew growth within the grout.
- Appearance Degradation: Unsealed grout quickly looks dirty and discolored, detracting significantly from the aesthetic appeal of the tile installation.
It is important to note an exception: epoxy grout. Unlike traditional cementitious grout, epoxy grout is inherently non-porous and chemically resistant, meaning it does not require sealing. Knowing the type of grout installed is crucial before deciding to seal.
B. Core Functions of Grout Sealers
Grout sealers primarily aim to:
- Block Absorption: Create a barrier that prevents water, oils, and other liquids from penetrating the grout pores.
- Resist Stains: Make it much harder for spills to cause permanent discoloration.
- Inhibit Mold/Mildew: Reduce moisture absorption, thus limiting growth conditions for mold and mildew.
- Simplify Cleaning: Sealed grout is smoother and less porous, making it easier to wipe clean and preventing dirt from becoming deeply embedded.
- Preserve Appearance: Help maintain the original color and clean look of the grout lines for longer.
C. Types of Grout Sealers
Similar to floor sealers, grout sealers come in two main types:
- 1. Penetrating (Impregnating) Sealers:
- Mechanism: These are the most common type for grout. They soak into the porous structure of the grout, coating the sand and cement particles internally. They do not form a visible film on the surface.
- Appearance: They are typically invisible once cured and do not change the color or sheen of the grout.
- Best For: Most applications, especially high-moisture areas like shower floors and bathroom floors, as they provide protection from within while allowing some moisture vapor transmission. Ideal when preserving the grout’s original look is desired.
- 2. Topical (Membrane-Forming) / Non-Penetrating Sealers:
- Mechanism: These form a continuous coating over the surface of the grout line.
- Appearance: They often add a slight sheen and can be formulated as “color sealants” which contain pigments to change or restore the grout color while sealing.
- Best For: Situations where a color change is desired (e.g., refreshing old, stained grout) or in lower-moisture areas like backsplashes.
- Drawbacks: The surface coating can wear off, especially in high-traffic or wet areas, potentially requiring more frequent reapplication. They might trap moisture if the grout underneath is not completely dry during application.
D. Application Process
 Applying grout sealer requires care and attention to detail:
- Timing: For new installations, grout must be fully cured (check grout manufacturer’s specifications, often 48-72 hours) and completely dry before sealing. Sealing damp grout traps moisture and prevents proper sealer penetration.
- Cleaning: For existing grout, clean it meticulously using a grout cleaner and brush to remove all dirt, grease, soap scum, and mildew. Rinse thoroughly and allow the grout to dry completely (can take 24 hours or more). Any cracks should be repaired first.
- Application Method: Choose an appropriate applicator :
- Applicator Bottle with Brush/Wheel Tip: Allows precise application directly onto the grout line. Often considered the best method for control.
- Small Artist’s Brush or Foam Brush: Good for careful, controlled application.
- Spray Bottle: Faster for large areas but difficult to control overspray onto tiles. If used, immediate wiping of tiles is essential. Apply the sealer generously enough to saturate the grout line according to product directions.
- Wiping Excess: Within the time specified by the manufacturer (usually 5-15 minutes), wipe any excess sealer off the face of the tiles using a clean, damp cloth. Dried sealer residue on tiles can leave a haze that is difficult to remove later.
- Multiple Coats: Depending on the porosity of the grout and the sealer type, a second coat may be necessary after the first coat is dry (follow product instructions).
- Drying/Curing: Allow the sealer to dry and fully cure for the recommended time (often 24-72 hours) before exposing the area to heavy use, water, or cleaning chemicals.
- Testing: Once cured, test the seal by placing a few drops of water on the grout line. The water should bead up on the surface. If it soaks in, another coat of sealer may be needed.
The choice of application method involves a trade-off. While spraying is faster, brush application offers superior control, minimizing waste and unwanted residue on tiles.
E. Maintenance and Reapplication Frequency
Sealed grout still requires regular cleaning with pH-neutral, non-abrasive cleaners. Avoid harsh chemicals (bleach, acids) that can degrade the sealer over time. The sealer itself will eventually wear down and require reapplication. Frequency depends heavily on location and usage :
Table 3: Grout Sealing: Recommended Resealing Frequency
| Area Type | Typical Moisture/Traffic Level | Recommended Frequency |
|---|---|---|
| Shower Floors | High Moisture, High Traffic | Every 6 months to 1 year |
| Bathroom Floors | High Moisture, Moderate Traffic | Every 1 year |
| Kitchen Countertops | Moderate Moisture, High Use | Every 1 year |
| Shower Walls | Moderate Moisture, Low Traffic | Every 1-2 years |
| Kitchen Backsplashes | Low Moisture, Low Traffic | Every 2-3 years |
| Low-Traffic Tiled Floors | Low Moisture, Low Traffic | Every 3-5 years or longer |
Watch for signs that resealing is needed, such as water absorbing quickly into the grout, grout darkening when wet, or increased difficulty in cleaning stains.
VIII. Why Hiring a Professional Cleaning Service is Often the Best Choice for Floor Finishing & Restoration
 While DIY approaches to floor care are possible, the complexities, risks, and specialized requirements associated with finishing, sealing, stripping, and restoring floors often make hiring a professional cleaning service the more prudent and ultimately cost-effective choice. The preceding sections have detailed the nuances of various products and processes; this section synthesizes why professional expertise frequently yields superior and safer outcomes.
A. Expertise and Experience: Navigating the Complexities
Professional floor care technicians bring knowledge gained through training and hands-on experience that is difficult for a homeowner to replicate:
- Correct Product Selection: They can accurately identify floor types (which can sometimes be tricky, e.g., differentiating between vinyl types or natural stones) and select the most appropriate and compatible chemicals. Using the wrong product can lead to ineffective results or, worse, irreversible damage. Professionals understand nuances like the potential for plasticizer leaching from new vinyl affecting finish adhesion or the specific care requirements recommended by flooring manufacturers.
- Proper Techniques: Professionals are skilled in correct application methods – achieving thin, even coats of finish, ensuring proper dwell times for strippers, executing thorough rinsing and neutralization, and correctly operating machinery. They understand critical process details often overlooked by DIYers, such as the non-negotiable need for neutralization after stripping to ensure new finish adhesion.
- Problem Diagnosis: Experienced technicians can assess floor conditions beyond the surface, identifying underlying issues like excessive wear patterns needing different strategies, moisture problems, or even subfloor damage that might impact the restoration process.
- Understanding Systems: Professionals are more likely to understand and utilize integrated floor care systems, ensuring chemical compatibility between cleaners, strippers, sealers, and finishes to avoid adverse reactions like peeling or discoloration.
B. Specialized Equipment and Supplies: The Right Tools for the Job
Professional services utilize equipment that significantly enhances efficiency and results, often beyond the practical reach of DIYers:
- Industrial Machinery: Access to high-speed burnishers, heavy-duty rotary floor machines, auto-scrubbers, powerful wet/dry vacuums, and potentially orbital machines allows for faster work and a higher quality finish than manual methods or consumer-grade equipment.
- Diverse Pads/Brushes: Professionals maintain an inventory of various pads (stripping, scrubbing, polishing, burnishing in multiple grades) and brushes, enabling them to select the precise tool needed for each specific task and floor type. Pad selection requires expertise to be effective without causing damage.
- Professional-Grade Chemicals: They often use more concentrated or specialized formulations that may offer superior performance or durability compared to readily available retail products.
C. Time, Effort, and Convenience: Reclaiming Your Resources
Floor restoration tasks are notoriously labor-intensive and time-consuming :
- Significant Labor: Stripping and refinishing even a moderately sized room can take many hours, involving moving furniture, meticulous preparation, chemical application, scrubbing, rinsing, and multiple coats with drying times.
- Professional Efficiency: Due to experience, proper tools, and often working in teams, professionals can complete these demanding jobs significantly faster and more efficiently than a DIYer.
- Reduced Disruption: Hiring professionals minimizes the disruption to a household or business, allowing occupants to avoid the mess, fumes, and extended downtime associated with a lengthy DIY project.
D. Risk Mitigation: Avoiding Costly Mistakes and Hazards
 Attempting complex floor care tasks without adequate knowledge or equipment carries substantial risks:
- Floor Damage: Incorrect chemical choice or application is a major risk. Stripping chemicals can etch stone or bleach LVT ; incompatible finishes can peel ; improper sealing can trap moisture or fail. Correcting such mistakes can be extremely expensive, potentially requiring floor replacement and wiping out any initial DIY savings. A significant portion of professional value lies in preventing such damage.
- Safety Hazards: Floor strippers and some sealers contain harsh chemicals requiring careful handling, proper ventilation, and specific PPE to avoid skin burns, eye damage, or respiratory problems. Professionals are trained in safe work practices. Wet floors during these processes also pose significant slip-and-fall risks.
- Wasted Resources: DIY errors often lead to wasted product and the need to purchase additional materials, further increasing the “true cost” of the project.
- Warranty Issues: Improper DIY maintenance or restoration may void manufacturer warranties on flooring materials or finishes. Professionals are more likely to follow procedures that keep warranties intact.
E. Superior, Long-Lasting Results and Cost-Effectiveness
While professional services have a higher upfront cost, they often provide better value in the long run:
- Quality Finish: Expertise and specialized equipment typically result in a more uniform, durable, and aesthetically pleasing finish compared to DIY efforts.
- Longevity: Professionally applied sealers and finishes, chosen correctly and applied properly, tend to last longer and perform better, extending the time between necessary maintenance cycles and prolonging the life of the floor itself.
- True Cost-Effectiveness: When factoring in the cost of potential DIY mistakes, tool rental/purchase, wasted materials, the value of personal time, and the longer lifespan of a professional job, hiring experts can be more economical over the life of the floor. Consistent professional maintenance helps avoid high-cost repairs or premature replacement.
- Guarantees: Reputable professional services often stand behind their work with guarantees or warranties, providing recourse if issues arise.
F. Proper Chemical Handling and Disposal
Professionals are trained in the safe handling, storage, and environmentally responsible disposal of cleaning and restoration chemicals and their residues, adhering to health, safety, and environmental regulations. This is particularly important for potent chemicals like floor strippers.
Table 4: DIY vs. Professional Floor Restoration: A Comparative Summary
| Factor | DIY Reality | Professional Advantage |
|---|---|---|
| Initial Cost | Lower (materials + potential tool rental). | Higher (labor + materials + equipment overhead). |
| True Cost (incl. risks) | Can escalate significantly due to mistakes, wasted materials, tool purchases, potential floor damage. | More predictable; includes expertise to avoid costly errors; may be more cost-effective long-term. |
| Time Investment | Very high; can take days or weeks depending on project size and complexity. | Minimal homeowner time required; professionals work much faster. |
| Skill Required | High; requires understanding materials, chemicals, techniques, equipment operation. | High level of expertise, training, and experience applied. |
| Equipment Access | Limited to rented or purchased consumer-grade tools; may lack specialized machinery. | Access to industrial-grade buffers, burnishers, auto-scrubbers, diverse pads, etc.. |
| Risk of Damage | High; potential for chemical damage, application errors, voiding warranties. | Low; professionals trained to prevent damage, select compatible products, follow best practices. |
| Quality of Result | Variable; often uneven, less durable, prone to issues like streaks, peeling, poor gloss. | Typically superior; more even, durable, aesthetically pleasing finish. |
| Longevity | Often shorter due to application issues or lower-quality products. | Generally longer-lasting results due to proper preparation, application, and potentially higher-grade products. |
| Safety | Increased risk of chemical exposure, slips/falls if proper precautions aren’t taken. | Trained in safe chemical handling and work procedures; insured. |
| Warranty/Guarantee | None for DIY labor; potential to void product warranties. | Often offer workmanship guarantees; maintain product warranties. |
While the allure of DIY floor care exists, the specialized nature of finishing and restoration products and processes—coupled with the significant risks of errors, safety hazards, and potential for costly damage—strongly favors the engagement of qualified professionals. Their expertise, equipment, and efficiency typically lead to superior, safer, and more durable results, representing a sound investment in preserving the value and appearance of flooring assets.


