Copper, with its warm glow and timeless elegance, has graced homes for centuries, from the gleaming bottoms of gourmet pans to the intricate details of cherished decorative pieces. Its exceptional heat conductivity makes it a favorite in the kitchen, while its aesthetic versatility allows it to complement a wide range of interior styles. However, copper is a “living metal,” meaning its appearance changes over time due to its interaction with the environment.
1. The Enduring Appeal of Copper: Understanding Its Shine and Tarnish
Copper’s allure lies in its unique combination of beauty and utility. In the kitchen, copper-bottomed pans are prized not only for their visual appeal but primarily for their superior heat conductivity, which allows for precise temperature control and even cooking. As decorative elements, copper items introduce warmth, sophistication, and a touch of rustic or antique charm to any space.
However, the very reactivity that contributes to copper’s character also leads to tarnish. Understanding this process is the first step in effective copper care.
The Science of Tarnish: What Happens When Copper Loses Its Luster
The most common cause of tarnish is the reaction of copper with oxygen in the air, a process called oxidation. This reaction forms a layer of copper(II) oxide (CuO), which typically appears as a black or dark brown coating on the metal’s surface. This is a natural and, over time, inevitable process.

Beyond simple oxidation, other environmental factors contribute to copper’s changing appearance:
- Sulfur Compounds: Sulfur-containing gases in the atmosphere, often from pollution or even household sources, can react with copper to form copper sulfide (CuS or Cu2S), which also contributes to darkening and tarnish.
- Moisture and Acidity: Moisture acts as a catalyst, speeding up oxidation and other chemical reactions on the copper surface. Acidic substances, including acid rain or even acidic foods, can aggressively react with copper, leading to discoloration and corrosion.
- Patina Formation: With prolonged exposure to oxygen, moisture, carbon dioxide, and other atmospheric elements, copper can develop a distinctive greenish-blue layer known as patina, or verdigris. This is often a complex mixture of copper carbonates, sulfates, and chlorides.
- Other Accelerants: Heat can make copper more reactive. Oils and salts from human skin can also accelerate tarnishing upon contact. Dust, which can contain various chemical residues, may also play a role.
It’s important to recognize that tarnish isn’t a single, simple reaction but rather a complex interplay of copper with its environment. The specific color and nature of the tarnish (brown, black, or the greenish patina) can offer clues about the primary environmental aggressors. This understanding is crucial because it informs preventative care strategies, which must be multifaceted—addressing not just air exposure but also humidity, handling practices, and contact with reactive substances.
Furthermore, the concept of copper as a “living finish” means that not all discoloration is necessarily undesirable. While many seek to restore a bright, polished shine, some patinas are intentionally cultivated or highly valued for the character and antique charm they impart to an object. Your desired aesthetic will significantly influence your cleaning approach, whether it’s vigorous polishing to remove all traces of tarnish or gentle cleaning to preserve a prized patina.
2. The Science Behind the Sparkle: How Copper Cleaners Work
To effectively combat tarnish and restore copper’s shine, cleaning methods rely on a few key principles: acidity, abrasion, and sometimes chelation.
- Acidity: Acids are the workhorses in many copper cleaners. They chemically react with the copper oxides and other compounds that form tarnish, dissolving them or breaking their bonds with the copper surface. Common household acids used for this purpose include citric acid (found in lemons) and acetic acid (the primary component of vinegar). Commercial cleaners may also employ these or other acids like oxalic acid.
- Abrasion: Mild abrasives are used to physically scrub away the tarnish once it has been loosened by acids or to remove more stubborn deposits. Salt and baking soda are common DIY abrasives. Commercial products often contain finely ground minerals like quartz, silica, or kaolin clay for this purpose.
- Chelation: Some cleaning agents, particularly in commercial formulations, can form stable, water-soluble complexes with copper ions. This process, known as chelation, helps to lift the tarnish from the surface. Ammonia, for instance, can form copper-ammonia complexes, aiding in tarnish removal.
Focus: The Lemon and Salt Method – A Scientific Deep Dive
The widely recommended lemon and salt method is a classic example of combining acidity and mild abrasion for effective copper cleaning.
-
- Citric Acid (C6H8O7) vs. Tarnish: Lemon juice is a natural source of citric acid, a weak organic acid. Copper tarnish is primarily composed of copper(II) oxide (CuO, black/brown) and sometimes copper(I) oxide (Cu2O, reddish). More complex patinas can include copper carbonate (CuCO3) or copper sulfate (CuSO4) (green/blue).
The citric acid reacts with these tarnish compounds. For example, with copper(II) oxide, the reaction can be represented (simplified) as:
CuO(s)+C6H8O7(aq)→Copper Citrate Complex(aq)+H2O(l)
The copper citrate formed is soluble in water, allowing the tarnish to be effectively washed away. The acidic environment provided by the lemon juice helps to break the chemical bonds holding the tarnish to the copper surface, making it easier to remove.
- Citric Acid (C6H8O7) vs. Tarnish: Lemon juice is a natural source of citric acid, a weak organic acid. Copper tarnish is primarily composed of copper(II) oxide (CuO, black/brown) and sometimes copper(I) oxide (Cu2O, reddish). More complex patinas can include copper carbonate (CuCO3) or copper sulfate (CuSO4) (green/blue).
- The Role of Salt (NaCl): A Gentle Abrasive Partner: Salt (sodium chloride) serves as a mild abrasive in this cleaning duo. Its crystalline structure provides the necessary friction to scrub away the tarnish particles that have been loosened by the citric acid. Ideally, when used correctly, the salt particles are intended to be less hard than the copper itself, thus removing tarnish without significantly scratching the metal.
Additionally, in an acidic solution, the chloride ions (Cl−) from the salt can sometimes participate in the dissolution of copper compounds by forming soluble copper chloride complexes. However, its primary role in this household method is as a physical scrubbing agent.
The combination of lemon juice and salt is effective because of this synergistic action: the citric acid chemically loosens the tarnish, and the salt physically helps to scrub it away. Without the acid, salt alone would be less effective and would require more scrubbing force, thereby increasing the risk of scratching the copper. Conversely, acid alone might dissolve some tarnish but could leave behind a film that needs to be wiped off; the salt aids in achieving a cleaner surface more efficiently. For very light tarnish, applying just lemon juice with a soft cloth might be sufficient, minimizing the abrasive action.
It is important to note that the term “gentle” when referring to salt’s abrasiveness is relative. The actual impact depends on the crystal size of the salt used and the pressure applied during scrubbing. Some sources suggest that even this method can leave micro-scratches, especially on highly polished or delicate surfaces. For instance, coarser salt varieties like some kosher or sea salts will be more abrasive than fine table salt. Therefore, for delicate, antique, or intricately patterned copper items, it is wise to use the finest salt available and apply minimal pressure, or even test on an inconspicuous area first.
3. DIY Copper Cleaning: Your Pantry’s Secret Weapons
 Many effective copper cleaning solutions can be found right in your kitchen pantry. These DIY methods are often cost-effective and can be surprisingly powerful. Remember to always test any cleaning solution on a small, inconspicuous area first, especially on delicate or valuable items.
The Classic Lemon & Salt Method
This is perhaps the most well-known DIY copper cleaner, praised for its simplicity and effectiveness, particularly on moderately tarnished items.
- Preparation:
- Pre-wash: Always begin by washing the copper item with warm water and mild dish soap. This removes any surface grease, dust, or loose debris, allowing the lemon and salt to work directly on the tarnish. Rinse and dry.
- Direct Application: Cut a lemon in half. Sprinkle table salt (for delicate items or intricate designs) or a slightly coarser salt like kosher salt (for more robust cookware surfaces) directly onto the cut surface of the lemon.
- Paste Formation (Optional): Alternatively, squeeze lemon juice into a small bowl and mix with salt to form a paste. Proportions can vary; some suggest equal parts lemon juice and salt , while others recommend a higher ratio of lemon juice to salt (e.g., 3 parts lemon juice to 2 parts salt ) or vice-versa depending on desired consistency. Add more salt if the paste is too runny.
- Application:
- Take the salted lemon half or a soft cloth dipped in the lemon-salt paste and gently rub it onto the tarnished copper surface. Use small, circular motions.
- Continue rubbing, applying more salt to the lemon or more paste to your cloth as needed. You should see the tarnish begin to lift.
- For stubborn stains or heavily tarnished areas, you can let the paste sit on the surface for 5 to 10 minutes before scrubbing. Some sources even suggest applying a second coat for tough spots.
- Rinsing & Drying:
- Once the tarnish is removed and the copper is shining, rinse the item thoroughly with warm water. Ensure all traces of lemon juice and salt are washed away, especially from crevices.
- Dry the copper item immediately and completely with a soft, clean, lint-free cloth (microfiber towels work well). This is crucial to prevent water spots from forming and to inhibit new tarnish.
- For an extra gleam, buff the dry copper with a fresh, clean cloth.
- Variation: Lemon-Salt-Flour Paste:
For a thicker paste that adheres well to vertical surfaces or provides a bit more gentle scrubbing power, flour can be added to the lemon and salt mixture.- Create a paste using lemon juice, salt, and enough all-purpose flour to achieve a spreadable consistency. Some recipes suggest equal parts lemon juice and salt with flour added , or specific measures like ½ cup lemon juice, 1 tablespoon of table salt, and then flour.
- The flour acts as a thickener and a very mild abrasive, helping the acidic lemon and salty scrub stay in contact with the tarnish for longer.
- Apply this paste to the copper, let it sit for a few minutes if the tarnish is heavy, then rub gently. Rinse thoroughly and dry completely as described above.
Vinegar & Salt: Another Powerful Duo
White vinegar, with its acetic acid content, serves as an excellent alternative to lemon juice. When combined with salt, it forms another effective tarnish-removing solution.
- Direct Application/Solution:
- Mix white vinegar with salt. Common ratios include 1 tablespoon of salt per 1 cup of white vinegar , or a solution of equal parts white vinegar and water with 1 tablespoon of salt added. Some simply suggest dissolving salt in vinegar.
- Dip a soft cloth into the solution and apply it to the copper surface, rubbing gently in circular motions.
- For more stubborn tarnish, allow the solution to sit on the copper for a few minutes before rubbing.
- Rinse the item thoroughly with warm water and dry immediately with a soft, clean cloth.
- Paste (with Flour):
Similar to the lemon-based paste, a vinegar-salt-flour paste is a popular and effective option, especially for tougher jobs or when a thicker cleaner is needed.- In a bowl, combine salt (e.g., ¼ cup) and all-purpose flour (e.g., ¼ cup). Gradually add white vinegar, stirring continuously, until a thick paste is formed.
- Apply this paste to the copper surface using a soft cloth. Rub gently to remove tarnish.
- Some methods suggest letting the paste dry completely on the copper surface before removal , while others proceed directly to rinsing.
- Rinse thoroughly with warm water and dry completely with a soft cloth.
- The Boiling Method (for heavily tarnished, non-lacquered, sturdy items):
This method is often recommended for heavily soiled or oxidized copper items that can withstand immersion in hot water.- Select a large pot, preferably made of stainless steel to avoid any unwanted reactions. Ensure it’s large enough to completely submerge the copper item(s).
- Create a solution in the pot using water, white vinegar, and salt. Typical proportions are 3-4 cups of water, 1 cup of white vinegar, and 1 tablespoon of salt. Some sources suggest 3 parts water to 1 part vinegar with 2-3 tablespoons of salt.
- Place the tarnished copper item(s) into the solution.
- Bring the solution to a boil and continue to boil gently until you observe the tarnish lifting or falling away from the copper.
- Carefully remove the copper item(s) from the boiling solution (using tongs or a heat-resistant utensil) and allow them to cool.
- Once cooled, wash the item(s) with warm soapy water. Some gentle scrubbing with a soft cloth or sponge may be necessary to remove any loosened but still adhering tarnish.
- Rinse thoroughly and dry immediately and completely.
- Important Cautions: This method is not suitable for lacquered copper items, as the boiling water can damage or remove the lacquer. It’s also inappropriate for items with delicate components, glued parts, or materials that are sensitive to heat or acidic solutions. Be mindful that prolonged boiling or excessive heat can potentially warp thinner copper pieces.
- Scientific Explanation: The acetic acid in vinegar (CH3COOH) reacts chemically with copper oxide and other tarnish compounds, dissolving them. Salt acts as a mild abrasive, and its chloride ions can also contribute to the dissolution of copper compounds in the acidic environment. The heat in the boiling method significantly accelerates these chemical reactions, making it effective for stubborn tarnish.
Baking Soda: The Gentle Scrubber
Baking soda (sodium bicarbonate, NaHCO3) is often praised for its gentle abrasive qualities and can be used alone or in combination with an acid.
- Creating a Paste:
- With Water: Mix baking soda with a small amount of water to form a thick paste.
- With Acid: Combine baking soda with lemon juice or distilled white vinegar. A common ratio is three parts baking soda to one part acid. This mixture will fizz due to the release of carbon dioxide gas as the baking soda neutralizes the acid; this fizzing action may provide some minor agitation to help loosen dirt.
- Application:
- Apply the baking soda paste to the tarnished copper surface using a soft cloth or sponge.
- Rub gently in small circular motions.
- For more heavily tarnished pieces, you can allow the paste (especially if mixed with acid) to sit on the surface for 10-15 minutes before scrubbing.
- Rinsing & Drying:
Rinse the copper item thoroughly with warm water to remove all traces of the paste. Dry immediately and completely with a soft, clean cloth. - Scientific Explanation: Baking soda is a mild alkali and acts primarily as a gentle abrasive. Its fine particles can help to lift tarnish without being overly aggressive. When combined with an acid like lemon juice or vinegar, the acid component works to dissolve the tarnish chemically, while the baking soda provides the gentle scrubbing action. Some sources suggest that baking soda is less likely to scratch copper than salt when applied correctly with a soft cloth.
- Cautions on Abrasiveness: While generally considered mild, it’s important to use baking soda gently. Some sources warn that it can still scratch softer copper, particularly copper jewelry, if not applied with care or if rubbed too vigorously. Always use a soft cloth and avoid excessive force.
Ketchup & Tomato-Based Cleaners: The Surprising Solution
 It might seem unconventional, but ketchup and other tomato-based products like tomato paste or tomato juice can effectively clean copper tarnish.
- The Science: The cleaning power of tomato products comes from the acids they contain – primarily acetic acid (from vinegar added during processing) and citric acid (naturally present in tomatoes). These acids react with and dissolve the copper oxide tarnish. Many ketchups also contain salt, which can contribute a mild abrasive effect. The reaction often involves the formation of copper acetate, which is soluble and can be rinsed away.
- Application:
- Apply a generous layer of ketchup or tomato paste directly onto the tarnished copper surface.
- Allow the tomato product to sit on the surface for a period ranging from a few minutes to an hour, depending on the severity of the tarnish.
- Gently rub the surface with a soft cloth or sponge. There’s usually no need for vigorous scrubbing.
- Rinse the item thoroughly with warm water, possibly using a mild dish soap to remove all ketchup residue. Dry immediately and completely with a soft cloth.
- Effectiveness and Considerations: Ketchup is generally effective for light to moderate tarnish. It can be particularly useful for cleaning large copper items that cannot be easily soaked, such as sinks or decorative pieces, as the paste-like consistency of ketchup allows it to adhere to surfaces. However, some users find it messy , and it may leave a cloudy finish compared to commercial cleaners, especially on heavily tarnished items. It’s also important to rinse thoroughly, as the sugar content in ketchup could attract dirt if left behind.
Other DIY Options to Consider
- Cream of Tartar & Lemon Juice:
- Method: Create a paste (the consistency of toothpaste) by mixing lemon juice with cream of tartar (potassium bitartrate). Some recipes suggest equal parts. Apply this paste to the tarnished copper, let it sit for about 20 minutes, then scrub gently with a sponge. Rinse well and dry thoroughly.
- Science: Cream of tartar is acidic and acts as a mild abrasive. When combined with the citric acid from lemon juice, it creates an effective tarnish remover.
- Pros: Utilizes common baking ingredients and is reported to be effective.
- Cons: Cream of tartar might not be as universally available in all kitchens as salt or baking soda.
- Worcestershire Sauce:
- Method: Similar to ketchup, Worcestershire sauce contains vinegar and salt, which contribute to its cleaning ability. Apply it to the copper surface with a soft cloth, rub gently, then rinse thoroughly and dry.
- Pros: May be readily available in some households.
- Cons: Can be messy. It may be less effective than more targeted cleaning methods. If used on copper jewelry that also contains pearls or delicate gemstones, caution is advised as the sauce could damage these components.
- Coca-Cola:
- Method: For small items, submerge the tarnished copper in Coca-Cola for about an hour. No scrubbing is typically needed; simply rinse and dry afterwards.
- Science: Coca-Cola contains phosphoric acid, which can dissolve metal oxides.
- Pros: Very easy method, requires no physical effort.
- Cons: May not be the most environmentally friendly option. There’s a potential for a sticky residue if not rinsed meticulously. This method is likely best suited for light tarnish on small, fully submersible items.
The “best” DIY method is not a one-size-fits-all answer; it is highly contextual. The choice depends significantly on the specific copper item being cleaned (cookware, décor, jewelry), the severity of the tarnish, the desired final appearance (shiny vs. preserving some patina), and the ingredients readily available to the user. For instance, the boiling method with vinegar and salt is excellent for heavily tarnished, sturdy cookware but wholly unsuitable for delicate antiques or lacquered items. Ketchup is a good option for large, non-soakable items like sinks , but might be found messy or less effective than lemon and salt for other applications.
Furthermore, while these DIY methods are often described as “natural” or “safe,” it’s crucial to remember that they involve chemical reactions (acids reacting with oxides) and physical abrasion (from salt or baking soda). The term “natural” should not be equated with “zero risk.” Gentle application is paramount to avoid scratching the relatively soft copper surface. Always test any method on an inconspicuous area first , especially on valuable or delicate pieces. Thorough rinsing after cleaning is also essential to remove any chemical residues that could cause further reactions, attract dirt (like the sugar in ketchup ), or be harmful if the item is used for food.
The common technique of adding flour to create a paste (with either lemon/salt or vinegar/salt) is a practical modification that enhances the effectiveness of these basic cleaners. The flour thickens the mixture, allowing it to cling better to vertical surfaces and increasing the contact time with stubborn tarnish. It also contributes a very mild scrubbing action. This makes pastes particularly useful for heavily tarnished spots or items where soaking isn’t feasible.
Table: At-a-Glance Comparison of DIY Copper Cleaning Methods
To help you choose the most suitable DIY method, here’s a comparative overview:
| Method | Key Ingredients | How It Works (Brief Science) | Best For | Pros | Cons | Relative Abrasiveness | Key Safety/Item Suitability Notes |
|---|---|---|---|---|---|---|---|
| Lemon & Salt (Direct) | Lemon, Salt | Citric acid dissolves tarnish; salt abrades. | Light to moderate tarnish; cookware, general décor. | Simple, effective, readily available ingredients. | Can scratch if coarse salt/too much pressure used. | Low to Medium | Use fine salt for delicate items. Test first. Rinse thoroughly. Dry immediately. Not for lacquered items. |
| Lemon-Salt-Flour Paste | Lemon, Salt, Flour | Citric acid dissolves tarnish; salt & flour abrade/thicken. | Moderate to heavy tarnish; good for clinging to surfaces. | Enhanced contact time, gentle scrubbing from flour. | More prep than direct method. | Low to Medium | Test first. Rinse thoroughly. Dry immediately. Not for lacquered items. |
| Vinegar & Salt (Solution) | Vinegar, Salt | Acetic acid dissolves tarnish; salt abrades. | Light to moderate tarnish; general items. | Inexpensive, effective. | Strong odor. Can corrode if left too long. | Low to Medium | Test first. Rinse thoroughly. Dry immediately. Not for lacquered items. |
| Vinegar-Salt-Flour Paste | Vinegar, Salt, Flour | Acetic acid dissolves tarnish; salt & flour abrade/thicken. | Moderate to heavy tarnish; good for clinging. | Effective for heavier tarnish. | Messy paste. Strong odor. | Low to Medium | Test first. Some methods suggest letting paste dry. Rinse thoroughly. Dry immediately. Not for lacquered items. |
| Boiling Method | Water, Vinegar, Salt | Heat accelerates acid/salt reaction with tarnish. | Heavy tarnish on sturdy, non-lacquered, submersible items (e.g., pots). | Very effective for stubborn tarnish. | Not for delicate/lacquered items, or items with heat-sensitive parts. Can warp thin copper. | N/A (Chemical) | Use stainless steel pot. Ensure item is fully submerged. Cool before handling. |
| Baking Soda & Acid | Baking Soda, Lemon Juice/Vinegar | Acid dissolves tarnish; baking soda gently abrades. Fizzing. | Light to moderate tarnish; general items. | Gentle abrasion. | Can scratch soft copper/jewelry if not used very gently. Less effective for heavy tarnish. | Low | Use with soft cloth. Test first. Rinse thoroughly. Dry immediately. Not for lacquered items. |
| Ketchup/Tomato Paste | Ketchup, Tomato Paste | Acetic/citric acids dissolve tarnish. Salt in ketchup helps. | Light to moderate tarnish; good for non-soakable items (sinks). | Readily available, clings well. | Messy. Can be less effective than other methods. Sugar may attract dirt if not rinsed. | Low | Rinse very thoroughly. Dry immediately. Not for lacquered items. |
| Cream of Tartar & Lemon | Cream of Tartar, Lemon Juice | Acids dissolve tarnish; cream of tartar is mildly abrasive. | Moderate tarnish. | Effective, uses baking ingredients. | Cream of tartar not always on hand. | Low to Medium | Test first. Rinse thoroughly. Dry immediately. Not for lacquered items. |
4. Commercial Copper Cleaners: Choosing the Right Product
 While DIY methods are often sufficient for light to moderate tarnish, there are times when a commercial copper cleaner might be a more effective or convenient choice.
When to Opt for a Store-Bought Solution
Consider using a commercial copper cleaner in the following situations:
- Heavy or Stubborn Tarnish: If DIY methods prove insufficient for removing deeply set tarnish or oxidation, a commercial product formulated for tougher jobs may be necessary.
- Desire for an Even, Professional Finish: DIY cleaning can sometimes result in a slightly uneven or cloudy appearance. Commercial cleaners are often engineered to provide a more uniform and brilliant shine.
- Convenience and Speed: Pre-formulated commercial cleaners can save time and effort compared to mixing DIY solutions, offering quick results.
- Added Protective Ingredients: Many commercial copper polishes contain anti-tarnish agents or protective waxes that help to slow down future tarnishing, a benefit not typically found in simple DIY recipes.
Types of Commercial Cleaners: Creams, Liquids, Powders, Sprays, Gels
Commercial copper cleaners are available in various forms, each with its own application characteristics:
- Creams and Pastes: These are often thick and cling well to surfaces, making them suitable for both horizontal and vertical applications. They typically require rubbing and buffing. Examples include Wright’s Copper Cream and Twinkle Brass & Copper Cleaning Kit (paste form).
- Liquids: Liquid polishes are easy to apply with a cloth and are often used for general polishing. Some may require shaking before use. Examples include Brasso and Bar Keepers Friend Soft Cleanser.
- Powders: Powdered cleaners are usually mixed with water to form a paste before application. They can be very effective but may be more abrasive than liquid or cream forms. Examples include Bar Keepers Friend Cleanser (powder) and Bon Ami.
- Sprays: Spray cleaners offer convenient application, especially for larger or intricately shaped items. An example is Flitz Instant Brass & Copper Tarnish Remover.
- Gels: Gel cleaners, like Everbrite HD Gel Copper Cleaner , offer good cling and are often formulated for heavy-duty cleaning, sometimes with environmentally friendly properties.
Spotlight on Popular Brands: Active Ingredients, Mechanisms, Usage, and Safety
Understanding the composition and intended use of popular commercial cleaners can help you make an informed choice. Always consult the product label and Safety Data Sheet (SDS) for the most accurate and detailed information.
- Bar Keepers Friend (BKF):
- Active Ingredients: A primary active ingredient in many BKF products (especially the powder cleanser) is oxalic acid. It also typically contains mild abrasives like feldspar and surfactants (surface-active agents) such as DDBSA (linear sodium dodecyl benzene sulfonate). Some liquid formulations, like the Cooktop Cleaner, may list citric acid as the main active ingredient.
- Mechanism of Action: The acid (oxalic or citric) chemically reacts with and dissolves tarnish and oxides. The abrasives provide mechanical scrubbing action to help remove the loosened debris.
- Recommended Usage: For the powder form, it’s typically mixed with a small amount of water to create a paste. Liquid or soft cleanser forms are applied directly. Wet the copper surface, apply BKF, rub gently with a soft sponge or cloth. Crucially, for copper, it is often recommended to let BKF sit for NO MORE THAN ONE MINUTE to avoid potential discoloration or etching of the copper. Rinse the surface thoroughly with water immediately after this short contact time. Dry completely with a soft cloth. Always test on a small, inconspicuous area first.
- Safety Precautions: BKF is an eye irritant and can cause serious eye irritation or damage. It can also cause mild skin irritation. Wear protective gloves, especially for prolonged use or if you have sensitive skin, and always wear eye protection. Ensure good ventilation. Do NOT mix Bar Keepers Friend with other household chemicals, especially bleach or ammonia, as this can produce hazardous gases. It is generally not recommended for use on gold, silver (sterling silver is usually okay), lacquered or painted surfaces, mirrors, granite, or marble.
- Brasso:
- Active Ingredients: Brasso is a more complex formulation. It typically contains abrasives (such as pumice or calcium carbonate ), solvents (like isopropyl alcohol and aromatic mineral spirits/petroleum distillates ), an acid (oxalic acid has been listed in some formulations ), and ammonia or ammonium hydroxide. Tall oil may also be present as a polishing ingredient.
- Mechanism of Action: Brasso works through a combination of chemical dissolution and physical abrasion. The ammonia can form soluble complexes with copper tarnish, helping to lift it. The abrasives then scrub away the loosened tarnish and surface imperfections. Solvents help to dissolve grease and oils. Some formulations may also leave a thin oily film to fill micro-scratches and provide temporary shine.
- Recommended Usage: Shake the product well before use. Apply Brasso to a soft, clean cloth. Rub it thoroughly onto the copper surface. Allow it to dry to a haze, then buff to a shine with a separate clean, dry cloth. Typically, rinsing is not required.
- Safety Precautions: Brasso is often flammable due to its solvent content; keep away from heat, sparks, and open flames. It is an eye and skin irritant. Vapors can be harmful and may cause respiratory irritation, headaches, or dizziness; use only in a well-ventilated area. Contains petroleum distillates, which can be harmful if swallowed. Wear gloves and eye protection. Brasso is generally not recommended for use on aluminum.
- Wright’s Copper Cream:
- Active Ingredients: Key ingredients include quartz (a crystalline silica abrasive), citric acid (an acidic cleaner), and ammonium chloride (a cleaning agent and flux). It also contains thickeners like magnesium aluminum silicate and other cleaning agents/surfactants like poloxalene.
- Mechanism of Action: The citric acid chemically dissolves the tarnish, while the fine quartz particles provide an abrasive action to scrub it away. Ammonium chloride can also help in cleaning metal surfaces.
- Recommended Usage: Always test on an inconspicuous area first. It’s recommended to wear rubber gloves. Rinse the copper item in warm water. Apply Wright’s Copper Cream directly to the copper surface using the sponge often provided with the product or a clean, soft cloth. Rub gently but thoroughly. Rinse the item completely with water, then dry and buff with a clean, soft cloth to a shine. The product is often described as gentle enough for everyday use.
- Safety Precautions: Wright’s Copper Cream is an eye irritant and can cause serious eye damage. It may also cause skin irritation. It is harmful if swallowed. Do not use on lacquered surfaces, as it can strip the lacquer. Use with adequate ventilation.
- Twinkle Brass & Copper Cleaning Kit:
- Active Ingredients: Formulations can vary, but ingredients often include abrasives like kaolin clay (calcined) or silicon dioxide , ammonium chloride as a cleaning agent , and sometimes citric acid. Surfactants and emulsifiers are also typically present. A key feature often highlighted is an anti-tarnish ingredient.
- Mechanism of Action: The product works through a combination of chemical cleaning (from acids/ammonium chloride) and abrasion to remove tarnish. The anti-tarnish agent leaves a protective film to help keep copper brighter for longer.
- Recommended Usage: The kit usually includes an applicator sponge. The product is designed to quickly dissolve tarnish and cooked-on stains, often with minimal or no scrubbing required. Follow the specific instructions provided with the kit.
- Safety Precautions: Twinkle products can be eye irritants and contain abrasives. Keep out of reach of children. As with all cleaners, test on an inconspicuous area first and use in a well-ventilated space.
It is evident that “commercial cleaner” is not a monolithic category. Products differ significantly in their chemical makeup, primary cleaning mechanisms (acid-based, solvent-based, ammonia-based), and the type and harshness of abrasives used. This diversity allows users to select products tailored to their specific needs – for example, a strong acid-based cleaner for heavy oxidation versus a gentler cream for routine polishing. However, this also means that users cannot assume all commercial cleaners are interchangeable and must read labels carefully.
A notable advantage of some commercial products is the inclusion of anti-tarnish agents or protective ingredients. These components leave a film on the copper surface that helps to slow down the rate of future tarnishing, reducing the frequency of cleaning needed. This is a benefit not typically offered by simple DIY recipes, which would require a separate waxing or sealing step to achieve similar long-term protection.
Given the potent chemical nature of many commercial copper cleaners, understanding and adhering to safety precautions is paramount. Safety Data Sheets (SDS) are invaluable resources that provide detailed information on potential hazards, handling instructions, first aid measures, and necessary protective equipment. These documents consistently warn about risks such as eye and skin irritation, respiratory issues from fumes, and flammability for some products. The guide must strongly emphasize the importance of consulting the product label and, if available, the SDS before use, and always using recommended personal protective equipment (PPE) like gloves and eye protection, and ensuring adequate ventilation. The cleaning power of these commercial products comes with an increased responsibility for safe and informed use.
Safe Usage: Reading Labels, Ventilation, Protective Gear
Regardless of the commercial cleaner chosen, certain safety practices are universal:
- Read the Label: Always read and meticulously follow the manufacturer’s instructions and warnings on the product label before use.
- Ensure Adequate Ventilation: Work in a well-ventilated area, especially when using products that emit strong fumes (like those containing ammonia or solvents). If possible, work outdoors or open windows and use a fan to circulate air.
- Wear Protective Gear:
- Gloves: Chemical-resistant gloves (nitrile gloves are often recommended ) should be worn to protect your skin from irritation, chemical burns, or absorption of harmful substances.
- Eye Protection: Safety goggles or a face shield are essential to protect your eyes from splashes or fumes.
- Avoid Mixing Chemicals: Never mix different cleaning products, particularly bleach with ammonia-containing cleaners or acidic cleaners, as this can create dangerous and toxic gases.
- Test First: Always test the cleaner on a small, hidden area of the copper item to ensure it doesn’t cause discoloration, scratching, or other damage before applying it to the entire piece.
Table: Overview of Common Commercial Copper Cleaners
| Brand Name | Primary Form | Key Active Ingredients | Primary Cleaning Mechanism | Best For | Key Safety Precautions (from SDS/Product Info) |
|---|---|---|---|---|---|
| Bar Keepers Friend Cleanser | Powder | Oxalic acid, feldspar (abrasive), surfactants (e.g., DDBSA) | Acidic dissolution of tarnish + abrasion | General tarnish, mineral deposits, rust stains | Eye irritant, skin irritant. Wear gloves/eye protection. Do NOT mix with bleach/ammonia. Max 1 min contact on copper. Not for lacquered surfaces, gold, marble. |
| Brasso Metal Polish | Liquid | Abrasives (pumice, calcium carbonate), solvents, oxalic acid, ammonium hydroxide | Solvent cleaning + abrasion + chelation (ammonia complexes) | General polishing for shine, tarnish removal | Flammable. Eye/skin irritant. Vapors harmful; use in well-ventilated area. Contains petroleum distillates. Not for aluminum. |
| Wright’s Copper Cream | Cream | Quartz (abrasive), citric acid, ammonium chloride | Acidic dissolution of tarnish + abrasion | Cookware, decorative copper; removes heat discoloration | Eye irritant, skin irritant. Harmful if swallowed. Wear gloves. Do NOT use on lacquered surfaces. |
| Twinkle Brass & Copper Kit | Paste/Kit | Abrasives (kaolin clay, silicon dioxide), ammonium chloride, citric acid | Chemical cleaning + abrasion + anti-tarnish agent | Tarnish & cooked-on stains; provides anti-tarnish protection | Eye irritant. Contains abrasives. Keep out of reach of children. Test first. |
5. Lacquered vs. Unlacquered Copper: Knowing Your Finish
 Before you begin cleaning any copper item, the most crucial first step is to determine whether it has a protective lacquer coating. Applying the wrong cleaning method to a lacquered piece can result in irreversible damage to this protective layer.
How to Tell if Your Copper is Lacquered
Several clues can help you identify a lacquered finish:
- Persistent Shine: Lacquered copper typically maintains a shiny, glossy finish that does not easily tarnish, change color, or brown with normal use or exposure to air. If your copper item has remained bright for a long time without polishing, it’s likely lacquered.
- Tarnish Under a Clear Coat: Sometimes, if the lacquer is old or damaged, you might see small specks of tarnish appearing underneath a clear, shiny coating. This tarnish cannot be removed by surface polishing.
- Age and Origin: Most decorative copper items and kitchenware sold in the U.S. over the past 30-40 years are manufactured with a protective lacquer coating to prevent tarnishing.
- The Vinegar/Baking Soda Test: One simple test involves dipping a cotton swab or rag in white vinegar, then into a bit of baking soda, and gently rubbing an inconspicuous spot on the copper item. If this action removes tarnish and reveals brighter copper underneath, the piece is likely unlacquered. If it has no effect on the shine or tarnish (or if it seems to dull a very shiny surface), it’s probably lacquered.
Cleaning Lacquered Copper: Gentle Does It
If your copper item is lacquered and the lacquer is in good condition, cleaning is straightforward and requires minimal effort:
- Routine Care: Lacquered copper generally only needs occasional dusting with a soft cloth or gentle washing with warm (not hot) soapy water and a soft sponge or cloth to remove fingerprints, dust, or light grime.
- Avoid Abrasives and Harsh Chemicals: It is critical to avoid using abrasive cleaners, scouring powders, steel wool, harsh scrubbing, or acidic polishes (like the lemon and salt method or many commercial copper cleaners) on lacquered copper. These can scratch, dull, or even strip the protective lacquer coating.
- Soaking: Do not soak lacquered copper items for extended periods. If washing is necessary, clean with a damp cloth rather than full immersion, or limit soaking time.
- Drying: After washing, dry the lacquered copper thoroughly with a soft, clean cloth to prevent water spots.
Cleaning Unlacquered Copper: Applying the Methods Above
Unlacquered copper, by its nature, will tarnish when exposed to air and moisture. It requires more frequent cleaning and polishing to maintain a bright, shiny appearance. All the DIY methods (lemon and salt, vinegar and salt, baking soda, ketchup) and most commercial copper cleaners discussed in previous sections are intended for use on unlacquered copper surfaces.
Dealing with Damaged Lacquer: When and How to Remove It
Over time, or due to heat or moisture exposure, lacquer coatings can become damaged, leading to an undesirable appearance.
- When to Consider Lacquer Removal:
- The lacquer is visibly peeling, cracking, flaking, or blistering, resulting in a “splotchy” or uneven appearance.
- Tarnish spots are forming underneath the damaged lacquer, and these cannot be reached by normal polishing.
- You wish for the copper to develop a natural patina, which the lacquer prevents.
- A lacquered copper piece is intended for cooking (e.g., a pot or pan). The lacquer must be removed before the item comes into contact with food or high heat, as the lacquer is not food-safe and can release harmful fumes or particles.
- The lacquer has become cloudy, whitish, or discolored, often due to prolonged exposure to steam or moisture.
- How to Remove Lacquer:
- Baking Soda and Boiling Water Method: This is often the first method to try for most common lacquers.
- In a large pot (stainless steel or enamel, big enough to immerse the item or sections of it), prepare a solution of 1 tablespoon of baking soda per 1 quart (approximately 1 liter) of water.
- Bring the solution to a boil.
- Carefully immerse the lacquered copper item in the boiling solution. For very large items, you may need to treat sections at a time, using tongs to hold and dip them.
- Continue to simmer. You should observe the lacquer starting to peel, lift, or a clear scum may rise to the surface of the water.
- Once the lacquer appears loosened, carefully remove the item from the hot water. Immediately, while the item is still warm, scrub it with a soft cloth, sponge, or nylon scrubber and a mild copper cleaner or polish (or one of the DIY pastes) to remove the softened lacquer and any underlying tarnish. You may need to repeat the boiling and scrubbing process a few times for stubborn lacquer.
- Acetone or Lacquer Thinner Method: If the baking soda method is ineffective (some modern lacquers can be very resistant), chemical solvents may be necessary.
- Products like acetone (often found in nail polish remover) or dedicated lacquer thinners can dissolve many types of lacquer.
- Always work in a well-ventilated area, away from open flames or sparks, and wear appropriate protective gear (gloves, eye protection). These solvents are flammable and their fumes can be harmful.
- Test on an inconspicuous area first to ensure the solvent does not adversely affect the copper itself.
- Apply the solvent to a soft cloth and rub it onto the lacquered surface. The lacquer should soften and begin to dissolve. Wipe away the loosened lacquer with clean cloths.
- Follow the specific instructions and safety precautions on the solvent product label. Do not use a wire brush or harsh abrasives with solvents, as this can severely scratch the copper.
- After lacquer removal, clean and polish the copper as you would for an unlacquered piece.
- Caution with Solvents: Acetone and lacquer thinners are strong chemicals. Use them sparingly and only when necessary, reserving them for stubborn lacquers that don’t respond to the boiling water method.
- Baking Soda and Boiling Water Method: This is often the first method to try for most common lacquers.
Identifying the correct finish—lacquered or unlacquered—is the foundational step in copper care. Attempting to polish a lacquered piece with an abrasive cleaner meant for bare copper will likely scratch and damage the protective coating, potentially leading to a worse appearance than before. This distinction is critical to prevent users from inadvertently harming their copper items.
When lacquer becomes damaged, it can trap dirt and moisture, leading to uneven tarnishing underneath and a generally unsightly appearance. In such cases, removing the compromised lacquer is often the best course of action. This not only allows for proper cleaning and polishing of the copper itself but also enables the owner to choose whether to re-lacquer the item for continued shine protection or to allow it to develop a natural patina. While lacquer serves as a barrier against tarnish, it’s not an indestructible or permanent shield. Age, heat, moisture, and physical wear can degrade it over time, often necessitating its eventual removal and a decision about future surface treatment.
6. Tailored Care: Cleaning Different Types of Copper Items
The general principles of copper cleaning apply broadly, but specific types of copper items—cookware, decorative pieces, and jewelry—have unique considerations due to their construction, use, and materials.
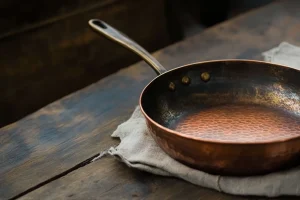
Copper Bottom Pans (Cookware)
Copper cookware, especially pans with copper exteriors or bottoms, requires careful cleaning to maintain both its appearance and cooking performance, with special attention to food safety.
- Protecting Non-Copper Parts (Handles, Linings):
- Handles: Copper pans often have handles made of other materials like stainless steel, cast iron, brass, wood, or heat-resistant plastics. When cleaning the copper exterior with acidic or abrasive solutions, try to avoid prolonged contact with these handle materials, as they may react differently or be damaged. For instance, wood handles should not be soaked.
- Linings (Tin or Stainless Steel): The interior cooking surface of most copper cookware is lined with a non-reactive metal, typically tin or stainless steel, to prevent copper from leaching into food.
- Tin Linings: Tin is a relatively soft metal and can be scratched or worn away by harsh abrasives or vigorous scrubbing. Clean tin linings gently with warm water, mild dish soap, and a soft sponge or cloth. For burnt-on food, one method involves bringing water to a boil in the pan, adding a generous amount of pure, unscented ammonia, and letting it soak for 24-48 hours outdoors (due to ammonia fumes being an irritant). Afterward, the residue should be gently removable with a plastic scouring pad. Another approach for discoloration or oily residue is to boil water with a large quantity of baking soda in the pan; this alkaline solution helps neutralize fatty acids and lift residues. After boiling and cooling, gently scrub with a non-scratch sponge and a paste of baking soda and water. Be cautious not to scrub too hard, as gray rinse water can indicate you are abrading the tin itself. Lye-based oven cleaners should be avoided on tin.
- Stainless Steel Linings: Stainless steel is much more durable than tin and can generally withstand more robust cleaning if necessary, including the use of mildly abrasive cleaners like Bar Keepers Friend or Comet for stubborn food residues. However, it’s always best to start with the gentlest method (soap and water) and only escalate if needed.
- Food Safety: Ensuring No Harmful Residues and Intact Linings:
- Lining Integrity: This is paramount for food safety. Copper is a reactive metal and can be toxic if ingested in significant quantities, especially with acidic foods which can cause copper to leach. If the lining (tin or stainless steel) is scratched, chipped, pitted, or worn through, exposing the underlying copper, the pan is generally no longer considered safe for cooking, particularly with acidic ingredients.
- Re-tinning: Tin-lined pans with damaged linings can often be professionally re-tinned to restore their cooking surface and safety. Stainless steel linings, however, typically cannot be repaired in this way; a pan with a damaged stainless steel lining should usually be replaced or repurposed.
- Cleaning Residues: Thoroughly rinse all cleaning solutions—whether DIY acidic/salty mixtures or commercial polishes—from both the interior and exterior of cookware. This prevents any potentially harmful chemical residues from contaminating food.
- Protective Coatings: While some clear coatings like ProtectaClear are marketed as food-safe once cured for surfaces like sinks and countertops , their application to the direct cooking surface of a pan (beyond its original lining) needs careful consideration regarding heat resistance and long-term durability under cooking conditions. Organic ketchup is noted as safe for cleaning interiors but won’t polish non-copper linings. Generally, the pan’s original metallic lining is the intended food-contact surface.
The construction and intended use of any copper item fundamentally dictate the appropriate cleaning methods. Cookware, with its food-contact surfaces and linings, demands a different approach than purely decorative items, where aesthetics might be the primary concern, or jewelry, which might incorporate other delicate materials. A one-size-fits-all cleaning strategy is risky and can lead to damage or safety concerns.
Therefore, the first step is always to carefully assess the item. For copper cookware, food safety is a non-negotiable priority. This hinges on maintaining the integrity of the non-reactive lining and ensuring the complete removal of any cleaning residues. Any compromise in the lining means the pan should be professionally assessed for repair (re-tinning) or retired from cooking acidic foods.
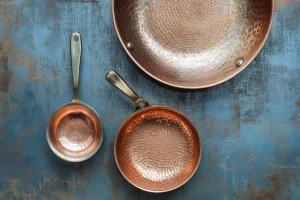
Copper Decorative Items
Decorative copper pieces, ranging from vases and bowls to wall art and figurines, often feature intricate designs, varied finishes, and may or may not be lacquered.
- Tackling Intricate Designs and Crevices:
- For cleaning detailed areas, crevices, and embossed patterns, use soft-bristled brushes (an old soft toothbrush or small artist’s brushes work well) or cotton swabs. These tools allow you to apply cleaning solutions and gently scrub away tarnish and grime from hard-to-reach spots without damaging the details.
- When using pastes or solutions, ensure they penetrate these areas.
- Thorough rinsing is critical to remove all cleaning residues from crevices, as trapped substances can cause further corrosion or discoloration.
- Drying these intricate areas completely is equally important to prevent water spots and new tarnish formation. A hairdryer on a low/cool setting can sometimes help, or gently dabbing with absorbent cloth tips.
- Preserving or Enhancing Patina (If Desired):
- Many copper decorative items are valued for their aged appearance or intentionally developed patina. If you wish to preserve an existing patina, avoid aggressive polishing. Gentle cleaning with mild dish soap and water, followed by careful drying, may be all that’s needed to remove dust and grime without disturbing the patina.
- If you want to encourage or create a patina, this can be done naturally through controlled exposure to air and moisture, or more quickly (“forced patina”) using various chemical treatments. Common methods for forcing a patina involve exposure to solutions or fumes of vinegar, salt, and ammonia, or even organic materials like hardboiled eggs (which release sulfur compounds). The specific chemicals and application methods will influence the color and texture of the resulting patina.
- Once a desired patina is achieved, it can often be protected and its color preserved by applying a sealant, such as a specialized wax (e.g., Renaissance Wax, Butcher’s Wax, Carnauba wax) or a clear lacquer specifically designed for patinated metal surfaces.
For decorative copper items, the owner’s aesthetic preference—whether a brilliant, mirror-like shine or a rich, aged patina—is a primary driver for cleaning choices. This often means deciding whether to clean aggressively to remove all tarnish, to clean gently to preserve an existing patina, or even to employ techniques to enhance or create a specific patinated look.
Copper Jewelry
 Copper jewelry requires gentle handling due to its often delicate nature and potential inclusion of other materials.
- Gentle Cleaning Techniques:
- The lemon and salt paste method is commonly recommended for copper jewelry, using fine table salt and gentle rubbing with a soft cloth.
- A vinegar and salt solution can also be used, again with gentle application.
- Baking soda paste (with water or lemon juice) can be an option, but extreme caution is advised as it can scratch softer copper alloys or delicate finishes if not applied very gently.
- Commercial jewelry polishing cloths, often impregnated with a mild polish, are a good choice for routine buffing and light tarnish removal. Specialized liquid jewelry cleaners formulated for copper may also be used.
- Always rinse thoroughly with warm (not hot) water after using any wet cleaning method, and dry completely with a soft cloth.
- Protecting Gemstones or Other Materials:
- Many copper jewelry pieces incorporate gemstones, pearls, enamel, or other materials. It’s crucial to be cautious when cleaning, as acidic solutions (lemon juice, vinegar) or harsh chemicals in some commercial cleaners can damage these components.
- If unsure, it’s best to use a method that allows precise application to the copper parts only, or consult a professional jeweler. Avoid soaking pieces with vulnerable elements. When rinsing, use warm, not hot, water, as sudden temperature changes can also harm some gemstones.
7. Maintaining the Radiance: Polishing, Protection, and Prevention
Once your copper items are clean, the next step is to polish them to your desired finish and take measures to protect that shine and prevent rapid re-tarnishing. Consistent preventative care is often more effective in the long run than infrequent, aggressive cleaning.
Polishing Techniques: Achieving Matte vs. High-Shine Finishes
The final look of your copper—whether a soft matte glow or a brilliant, mirror-like shine—is often a deliberate outcome of the polishing process, which may be distinct from basic tarnish removal.
- For a High-Shine Finish:
- After cleaning, vigorous buffing with a clean, dry, soft cloth is key. Microfiber cloths are excellent for this as they are non-abrasive and good at picking up residues.
- Commercial copper polishes are specifically formulated to enhance shine and often contain very fine abrasives and glossing agents.
- For enthusiasts or those tackling larger projects, power tools can achieve a very high polish. This involves using buffing wheels (such as spiral sewn for initial buffing, followed by loose muslin or flannel wheels for final polishing) attached to a drill or bench grinder, in conjunction with a series of polishing compounds. These compounds typically progress from a coarser “cutting” compound (like Brown Tripoli, which removes fine scratches and smooths the surface) to a finer “coloring” or “finishing” compound (like White or Green Rouge, which brings out the high luster). Fine-grit grinding belts (600-1000 grit or higher) can also be used in a progression to achieve a very smooth, reflective surface prior to final buffing.
- For a Matte or Satin Finish:
- A matte finish is typically achieved by using slightly coarser abrasives during the cleaning or initial preparation stage, or by employing specific brushing techniques. For example, using coarse-grit grinding belts or abrasive pads can create a textured, non-reflective surface.
- Fine steel wool (e.g., grade #0000) can be used very gently (often with a lubricant like oil) to create a soft, satin sheen, but extreme care must be taken not to scratch the copper. Some sources mention using hardware store wool with detergent for dark spots.
- After achieving the desired matte texture, avoid vigorous buffing with fine polishes, as this will tend to increase the shine. A gentle wipe-down may be all that’s needed.
- Tools for Polishing:
- Manual/Home Use: Soft cloths (flannel, microfiber are excellent ), polishing pads , and very fine steel wool (grade #0000, used with caution ).
- Advanced/Power Tools: Electric drills or bench grinders with attachments like buffing wheels (sisal mops for cutting, stitched cotton mops for general polishing, loose-fold cotton or flannel mops for final high shine ). Polishing compounds are essential with these tools, typically sold in bar form and applied to the spinning wheel. Examples include Gray (cutting), Brown Tripoli (intermediate/coloring), White Rouge (finishing for shine), and Green Rouge (mirror finish). Grinding belts of various grits are used with belt sanders or specialized grinding machines. Dry polishing pads are also available for some applications.
Preventing Future Tarnish
Preventing tarnish is as crucial as removing it. Several strategies can help keep your copper looking its best for longer:
- Thorough Drying: This is the simplest yet one of the most effective preventative measures. Moisture is a key catalyst for tarnishing, so always dry your copper items immediately and completely after washing or cleaning. Use a soft, absorbent cloth. Avoid air-drying, as this can lead to water spots and encourage tarnish formation.
- Smart Storage Solutions:
- Environment: Store copper items in cool, dry places with low humidity.
- Protective Wraps/Containers: For copper jewelry and smaller decorative items, storing them in airtight containers, tarnish-resistant cloth pouches, or ziplock bags with anti-tarnish strips can significantly slow down oxidation.
- Cookware Storage: Avoid stacking copper cookware directly on top of each other, as this can cause scratches. If stacking is necessary, place soft cloths, paper towels, or specialized pan protectors between each piece. Hanging pots and pans on a rack is an ideal storage solution if space permits.
- Display: For displayed items, try to minimize their exposure to direct sunlight (UV rays can accelerate tarnishing), areas of high humidity (like bathrooms, unless well-ventilated), and sources of airborne pollutants (e.g., near a busy street or industrial area).
- Protective Coatings: Applying a barrier between the copper surface and the environment is a very effective way to prevent tarnish. The choice of coating depends on the item’s use, desired appearance, and your maintenance commitment.
- Waxes: A thin, even coat of a quality wax can provide good protection and a pleasing luster.
- Types: Carnauba wax (a hard, natural wax often found in car polishes and high-quality furniture waxes ), Renaissance Wax (a microcrystalline wax polish developed for museum conservation, known for its clarity and durability ), Butcher’s Bowling Alley Wax (a very tough, durable wax ), or even some high-quality furniture waxes or automotive paste waxes can be used.
- Application: Apply sparingly to a clean, dry copper surface with a soft cloth. Allow it to haze slightly (if the product directions indicate), then buff to a shine with a clean, soft cloth. Waxes create a physical barrier against moisture and oxygen. They will wear off over time with handling and washing, so reapplication is necessary periodically (e.g., every few months, or once or twice annually for less handled items).
- Oils: A very light coat of baby oil or mineral oil wiped onto cleaned copper can provide a temporary barrier against air and moisture, helping to slow down the tarnishing process. This is a simple, quick measure but offers less durable protection than waxes or lacquers.
- Lacquers and Sealants: For more long-lasting protection, a clear lacquer or sealant can be applied.
- Types: Many commercial clear lacquer sprays are specifically designed for use on metals, including copper. These create a hard, transparent film.
- Application: Lacquer application requires a very clean, grease-free surface. It’s often best applied in thin, even coats, following the manufacturer’s instructions carefully, usually in a well-ventilated area. Lacquer can chip or peel over time, especially if the copper flexes or is subject to abrasion, and re-lacquering often requires stripping the old layer completely.
- Food-Safe Options: For copper items that may come into contact with food, such as sinks or countertops (not direct cooking surfaces), specialized food-safe coatings like ProtectaClear are available. These are formulated to be durable and non-toxic once fully cured. Everbrite also offers a product called CrobialCoat for pans, though its specific food-contact suitability for heated surfaces needs verification. Always check if a sealant is rated food-safe if the item will be used with food.
- Clear Nail Polish: For very small copper items like jewelry, a thin coat of clear nail polish can provide a protective seal on areas prone to tarnish or that contact the skin. This is best for items not subject to heavy wear.
- Waxes: A thin, even coat of a quality wax can provide good protection and a pleasing luster.
Routine Light Cleaning for Lasting Shine
Consistent, gentle cleaning is far better for your copper than infrequent, aggressive scrubbing.
- Wipe Down After Use: For copper jewelry, wipe it with a soft cloth after each wear to remove skin oils, sweat, and cosmetics that can accelerate tarnishing. For copper cookware, wash with mild dish soap and warm water immediately after use to remove food residues, then dry thoroughly.
- Address Tarnish Early: Clean your copper items as soon as you notice the first signs of tarnish. Light tarnish is much easier to remove than heavy, set-in oxidation.
- Frequency: The frequency of routine cleaning depends on the item, its exposure to tarnish-inducing elements, and your desired level of shine. Cookware should be cleaned after every use. Decorative items might need dusting weekly and light polishing monthly or as tarnish appears. Outdoor copper items will likely require more frequent attention due to weather exposure.
The overarching principle for long-term copper care is that prevention is as vital, if not more so, than reactive cleaning. By diligently drying copper, storing it thoughtfully, and applying appropriate protective coatings, you significantly reduce the rate of tarnish formation. This proactive approach minimizes the need for frequent and potentially abrasive cleaning, thereby preserving the copper’s surface integrity and beauty for a much longer time.
 The choice of protective coating itself is a nuanced decision, guided by the item’s function, the desired aesthetic, and the owner’s willingness to perform periodic maintenance. Waxes offer a natural look and are relatively easy to reapply but are less durable than lacquers. Lacquers provide robust, long-lasting protection but can be more challenging to apply evenly and may eventually chip or yellow, requiring complete stripping and reapplication. Oils provide simple, temporary protection. For items like kitchen sinks or countertops, specialized food-safe sealants like ProtectaClear offer a practical solution that balances protection with safety. Users must match the coating’s characteristics to their specific needs and the item’s use.
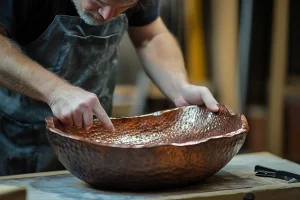
8. When to Call the Professionals: Beyond DIY Cleaning
While many copper cleaning tasks can be successfully managed at home, there are situations where the expertise, specialized tools, and controlled conditions of a professional metal restorer or conservator are necessary to achieve the best results and avoid costly mistakes.
Identifying Situations Requiring Expert Help
Consider seeking professional assistance if you encounter any of the following:
- Valuable Antiques or Irreplaceable Heirlooms: If the copper item is historically significant, holds substantial monetary value, or is a cherished heirloom, DIY cleaning methods pose a significant risk. Improper cleaning can strip original patinas, cause scratches, or otherwise diminish the item’s value and integrity. Professional conservators are trained to assess and treat such items with appropriate care, often using museum-quality techniques.
- Severe Corrosion, Deep Pitting, or Heavy Encrustation: When copper is heavily corroded, deeply pitted, or covered in thick, stubborn encrustations, standard DIY methods are often ineffective and may even cause further damage if applied too aggressively. Professionals have access to stronger, controlled chemical treatments (like specific acid washes or electrolytic reduction) and mechanical methods to safely remove severe degradation.
- Significant Physical Damage (Dents, Scratches, Broken Parts): Repairing dents, deep scratches, broken handles, or other structural damage to copper items requires specialized metalworking tools and skills that go far beyond cleaning and polishing.
- Damaged Lacquer Requiring Professional Stripping and Reapplication: While DIY lacquer removal is possible for some common lacquers , very resistant or improperly applied lacquers can be difficult to remove evenly without damaging the underlying copper. Professionals can safely strip old, damaged lacquer and apply a new, high-quality, even coat for optimal protection and appearance.
- Suspected Hazardous Residues on Very Old Pieces: Antique copper items may have residues from old, potentially hazardous polishes (e.g., containing lead or arsenic), or they might have accumulated environmental contaminants over many years. Conservators can identify and safely remove such hazardous materials.
- Need for Re-tinning Copper Cookware: If the tin lining of copper cookware is worn, scratched, or damaged, it is no longer food-safe and requires professional re-tinning. This is a specialized process that restores a safe and functional cooking surface.
- Intricate Details, Inlays, or Combined Materials: Copper items with extremely fine, delicate details, inlays of other materials (like ivory or enamel), or components made of different, sensitive metals can be easily damaged by inexpert DIY cleaning attempts. Professionals have the techniques and precision tools to clean such complex pieces safely.
- Uncertainty or Lack of Confidence: If you are unsure about the type of copper, its finish, the nature of the tarnish or damage, or the appropriate cleaning method, and you fear causing irreversible harm, it is always wiser to consult a professional.
The decision to call a professional often comes down to a risk-benefit analysis. For common, sturdy copper items with light to moderate tarnish, DIY methods are generally safe and effective. However, for items of significant value (monetary, historical, or sentimental), or those with complex issues, the potential cost of a DIY mistake—such as irreversible damage or significant loss of value—can far outweigh the expense of professional restoration services.
Services Offered by Professional Metal Restorers
Professional metal restorers and conservators offer a wide range of services that go well beyond simple cleaning:
- Expert Cleaning and Polishing: Using methods and materials appropriate for the specific copper alloy, finish, and condition of the item.
- Tarnish, Oxidation, and Corrosion Removal: Including the safe removal of heavy or stubborn corrosion products.
- Structural Repairs: Dent removal, scratch repair, soldering or brazing broken parts, and reinforcing weakened areas.
- Re-tinning of Copper Cookware: Applying a new, food-safe tin lining to worn copper pots and pans.
- Lacquering and Protective Coatings: Professional stripping of old lacquer and application of new, durable clear coats or specialized protective finishes.
- Patina Management: Application of new patinas (patination), restoration of existing historical patinas, or careful removal of undesirable patinas while preserving the underlying metal.
- Refinishing: Creating or restoring various surface textures, such as grained, brushed, satin, or mirror-polished finishes.
- Handling of Specialized Alloys and Finishes: Expertise in dealing with different copper alloys (like brass and bronze) and their unique finishing requirements.
- Use of Specialized Chemicals and Equipment: Access to and safe use of industrial-grade cleaning agents, controlled chemical baths, electrolytic cleaning setups, precision polishing machines, and other specialized equipment not typically available to homeowners.
It’s important to understand that professional restoration is often much more than just “heavy-duty cleaning.” It can involve intricate repairs, complex chemical treatments, skilled refinishing, and the application of advanced preservation techniques that are firmly in the realm of skilled craftspeople and conservators. For very old or archaeologically significant copper items, professional assessment is also crucial for identifying and safely managing potentially hazardous materials from previous treatments (e.g., arsenic-based patinas, lead solder) or from the object’s historical context. This adds an important health and safety dimension to seeking professional expertise for certain antiques.
The Benefits: Expertise, Specialized Tools, Value Preservation, and Longevity
Choosing professional restoration offers several key advantages:
- Expertise: Professionals possess in-depth knowledge of metallurgy, copper alloys, historical finishes, chemical reactions, and appropriate conservation-grade treatments. They can accurately diagnose issues and select the safest and most effective methods.
- Specialized Tools and Chemicals: Restorers have access to, and are trained in the use of, specialized equipment and chemical formulations that allow for more controlled, effective, and safer treatments than most DIY approaches.
- Value Preservation and Enhancement: For antiques, artwork, or valuable collectibles, professional restoration is crucial for preserving, and sometimes even enhancing, their monetary and historical value. Improper DIY cleaning is a common way to devalue such items.
- Longevity: Professional restoration, often including the application of high-quality protective coatings, can significantly extend the life of copper items, ensuring they can be enjoyed for generations.
- Quality Assurance: Reputable professional restorers often provide guarantees for their work, offering peace of mind that the job will be done correctly.
9. Environmental Impact and Cost-Effectiveness Considerations
When choosing how to clean your copper, it’s worth briefly considering the environmental impact and overall cost-effectiveness of different approaches.
- Environmental Impact:
DIY methods using common food-grade ingredients like lemon, vinegar, salt, and baking soda are generally considered more eco-friendly than many conventional chemical cleaners. However, some commercial cleaners are now marketed as biodegradable or environmentally friendly, such as Everbrite HD Gel Copper Cleaner. The production of copper itself through mining and smelting has significant environmental impacts. Therefore, properly caring for and extending the lifespan of your existing copper items can be seen as an environmentally positive action, as it may reduce the demand for newly mined copper. When using any chemical cleaners, whether DIY or commercial, responsible disposal is important to prevent harmful substances from entering waterways. For example, copper sulfate, which can be a component of some patinas or older agricultural products (though not a primary cleaning agent discussed here), can be toxic to aquatic life if it leaches into the environment. The choice of cleaning method does have environmental implications, generally favoring natural DIY options or specifically designated eco-friendly commercial products when feasible. - Cost-Effectiveness:
DIY methods are typically the most cost-effective upfront, as they utilize inexpensive and readily available household ingredients. Commercial cleaners involve a purchase cost but may offer greater effectiveness for heavy tarnish or include protective agents, potentially saving time and reducing the frequency of cleaning. Professional restoration is the most expensive option per instance but can be a highly cost-effective investment for valuable, antique, or severely damaged items by preserving or even increasing their long-term value and preventing further costly deterioration. True cost-effectiveness should consider not just the initial outlay for cleaning materials but also the value of your time, the effectiveness of the cleaning, the longevity of the restored shine, and the potential impact on the item’s overall value and lifespan. A cheap DIY attempt that damages a valuable antique is far more costly in the long run than professional restoration.
10. Enjoying Your Gleaming Copper Treasures
 Caring for copper bottom pans and decorative items is a rewarding endeavor that combines a little bit of science with practical application. By understanding the nature of copper and the processes that cause it to tarnish, you are empowered to make informed choices about how to best maintain its beauty and functionality.
The key principles of effective copper care can be summarized as follows:
- Identify the Finish: Determine if your copper is lacquered or unlacquered before attempting any cleaning, as this dictates the appropriate methods.
- Choose Wisely: Select a cleaning method—whether a simple DIY recipe using pantry staples like lemon and salt, or a specialized commercial product—that is appropriate for the type of copper item, the severity of the tarnish, and your desired outcome.
- Gentle Application: Regardless of the cleaner, gentle application with soft cloths or sponges is crucial to avoid scratching or damaging the copper surface.
- Rinse and Dry Thoroughly: After cleaning, always rinse the copper item completely to remove any residues, and dry it immediately and thoroughly to prevent water spots and inhibit new tarnish formation.
- Embrace Prevention: Proactive care, including proper storage and the occasional application of a protective wax or sealant, will do more to prolong copper’s shine than any single cleaning method.
Copper care is an ongoing process, but it doesn’t have to be a daunting one. Whether your goal is to restore a brilliant, mirror-like shine to your favorite cookware, preserve the distinguished patina on an antique decorative piece, or simply keep your everyday copper items looking their best, the knowledge and techniques outlined in this guide provide a comprehensive toolkit.
By balancing an understanding of copper’s unique chemical properties with the careful application of appropriate cleaning and maintenance strategies, you can ensure that your copper treasures continue to radiate their characteristic warmth and charm for many years to come. The “best” approach will always be subjective, guided by the specific item, its value, its intended use, your aesthetic preferences, and your comfort level with DIY versus professional services. The ultimate aim is to equip you to make the right choices for your copper, ensuring its enduring appeal in your home.