Automotive cleaning and car detailing encompass a meticulous array of services aimed at the comprehensive cleaning, polishing, protection, and restoration of passenger cars, trucks, and SUVs.
The importance of automotive detailing lies not only in aesthetic enhancement but also in its significant contributions to vehicle maintenance, preservation of value, and overall driver and passenger experience. Regular and thorough detailing can protect a vehicle’s paintwork from environmental damage, extend its operational lifespan by mitigating wear and tear, improve interior air quality, enhance safety through clearer visibility, and ultimately contribute to a higher resale value.
1. Understanding Automotive Detailing
Automotive detailing is a systematic process of thoroughly cleaning, restoring, and finishing a vehicle to achieve the highest level of cleanliness and polish. Unlike a typical car wash, which is often an automated process primarily focused on removing superficial dirt from the vehicle’s exterior, car detailing is a significantly more labor-intensive and meticulous endeavor performed by hand.
Detailing services target specific stains, damage, and grime, aiming to restore a vehicle’s paint job and interior to a near like-new condition. This involves addressing areas often overlooked in a standard wash, such as door jambs, emblems, and under the hood, utilizing precision tools and techniques.
The benefits of car detailing are multifaceted, impacting vehicle maintenance, appearance, and value.
- Enhanced Appearance: Detailing restores a vehicle’s original aesthetic, removing contaminants that dull paintwork and applying protective coatings for a radiant, mirror-like finish.
- Paintwork Protection: The application of waxes, sealants, or ceramic coatings during detailing forms a protective barrier against environmental hazards like UV rays, acid rain, and bird droppings, preventing oxidation, fading, and staining.
- Increased Resale Value: A well-detailed car creates a strong positive first impression on potential buyers, often justifying a higher asking price due to the implied level of care and maintenance.
- Extended Vehicle Lifespan: By addressing corrosive elements like salt and grime, and maintaining interior materials, detailing helps to prevent rust and premature deterioration of components.
- Improved Interior Air Quality: Thorough interior cleaning removes dust, allergens, and bacteria from upholstery, carpets, and ventilation systems, contributing to a healthier driving environment.
- Enhanced Safety and Visibility: Clean glass and clear headlights, achieved through detailing, are crucial for optimal visibility, particularly in adverse weather conditions or at night.
- Long-Term Cost Savings: Addressing minor issues like scratches or stains early through detailing can prevent them from escalating into more costly repairs.
2. Exterior Washing & Drying
The foundation of any comprehensive automotive detail is a meticulous exterior wash and dry process. This stage is critical for removing loose contaminants and preparing the paintwork for subsequent polishing and protection steps.
2.1. Pre-Wash Preparations
Before commencing any cleaning, it is essential to ensure that all exterior surfaces of the vehicle are cool to the touch and that the work is conducted in a shaded environment, ideally a garage. Cleaning hot surfaces or working in direct sunlight can cause cleaning chemicals to dry prematurely, potentially damaging paint and other materials. Gathering all necessary supplies and familiarizing oneself with product application instructions and safety guidelines is a prerequisite to avoid errors and ensure personal safety.
2.2. Pre-Rinse
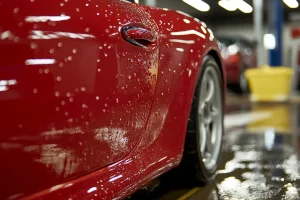
The initial step in the washing process is a thorough pre-rinse of the vehicle using a hose or pressure washer. This helps to remove loose dirt, dust, and larger debris from the paint surface. Particular attention should be paid to high-impact areas such as bumpers, rocker panels, and mirrors, which tend to accumulate more significant contamination. This pre-rinse minimizes the risk of inflicting wash-induced scratches during subsequent hand washing.
2.3. Foam Cannon Application
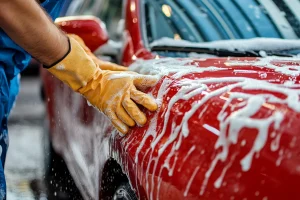
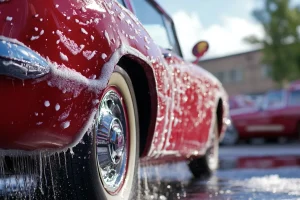
Following the pre-rinse, a foam cannon attached to a pressure washer is often employed to cover the vehicle in a thick layer of car wash foam. The primary purpose of this foam is to further loosen and encapsulate surface dirt and grime, providing lubrication that allows these particles to be rinsed away with reduced risk of scratching the paint. While the foam itself has minimal intrinsic cleaning power, the detergents within the car soap perform the actual cleaning action. Some detailers may rinse this initial foam layer off before proceeding to a contact wash, while others may apply it and then begin the hand wash directly.
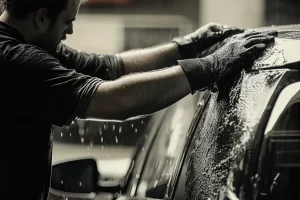
2.4. Two-Bucket Hand Wash
The two-bucket hand wash method is a widely accepted best practice for minimizing swirl marks and scratches during the contact washing phase. This technique involves using two separate buckets: one filled with soapy water (car shampoo mixed with water) and the other with clean rinse water. A high-quality wash mitt, typically made of microfiber, is dipped into the soapy water and used to clean a section of the vehicle. Before reloading the mitt with soap, it is thoroughly rinsed in the clean water bucket to remove any dislodged dirt and grit.
Many detailers also place grit guards at the bottom of each bucket; these devices help to trap dirt particles at the bottom, preventing them from being reintroduced onto the wash mitt and subsequently the vehicle’s paint. Washing should proceed from the top of the vehicle downwards, cleaning panel by panel, often using straight-line motions rather than circular ones.
2.5. Pressure Washing
Pressure washers are versatile tools in the detailing process, utilized not only for the pre-rinse and foam cannon application but also for the final rinsing of the vehicle after the hand wash. When rinsing, it is important to ensure all soap residue is thoroughly removed from all surfaces, including crevices and panel gaps.
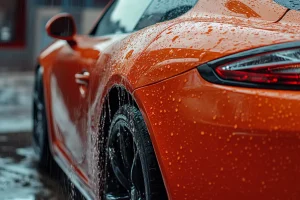
2.6. Wheel & Tire Cleaning (Initial Phase)
Wheels and tires should ideally be cleaned before washing the rest of the vehicle to prevent brake dust and dirty water from splattering onto freshly cleaned paint. This initial clean focuses on removing the bulk of the grime. A dedicated wheel cleaner, compatible with the specific wheel material (e.g., painted, chrome, polished aluminum), should be used. Non-acidic formulas are generally recommended for safety on most wheel types. The cleaner is typically sprayed onto cool, dry wheels and tires, allowed to dwell as per product instructions, and then agitated with various specialized brushes (e.g., wheel face brushes, barrel brushes, tire brushes) to dislodge brake dust and road grime. A more in-depth wheel and tire detailing process is covered in a later section.
2.7. Bug & Tar Removal
Stubborn contaminants like insect remains and road tar require targeted treatment. These substances can etch into the paint if left for extended periods. Specialized bug and tar remover products are formulated to break down these residues without harming the paintwork. The typical process involves spraying the product directly onto the affected areas, allowing it to dwell for a few minutes to loosen the contaminants, and then gently wiping them away with a soft microfiber towel or bug sponge. For fresh bug splatters, a gentle car shampoo or foam cannon pre-soak might be sufficient, but dedicated removers are often necessary for dried-on residues.
2.8. Clay Bar Treatment
 After the vehicle is washed and rinsed but before drying, a clay bar treatment is performed to remove bonded surface contaminants that regular washing cannot eliminate. These contaminants include industrial fallout, brake dust, tree sap mist, and paint overspray, which leave the paint feeling rough. A piece of detailing clay is used in conjunction with a specialized clay lubricant (or a quick detailer spray). The lubricant allows the clay bar to glide smoothly across the paint surface. As the clay is gently rubbed over the lubricated surface in straight lines (side-to-side and front-to-back motions are recommended ), it picks up and encapsulates these embedded particles. The clay should be kneaded frequently to expose a clean surface. If dropped, a clay bar should be discarded as it can pick up grit that will scratch the paint. Clay bar treatment leaves the paint feeling exceptionally smooth, enhances gloss, and creates an ideal surface for polishes and waxes to bond effectively. After claying, it is often recommended to rewash or thoroughly rinse the vehicle to remove any dislodged particles.
2.9. Thorough Drying
Properly drying the vehicle after washing is crucial to prevent water spots and streaks, which are mineral deposits left behind as water evaporates. Several methods and tools are employed for safe and effective drying:
- Forced Air Dryers/Blowers: Using a dedicated car blow dryer or even a leaf blower (on a low setting and with caution) is an excellent touchless method to remove water from the vehicle’s surface, especially from grilles, emblems, mirrors, wheels, and other crevices where water tends to accumulate. This minimizes physical contact with the paint, reducing the risk of scratching.
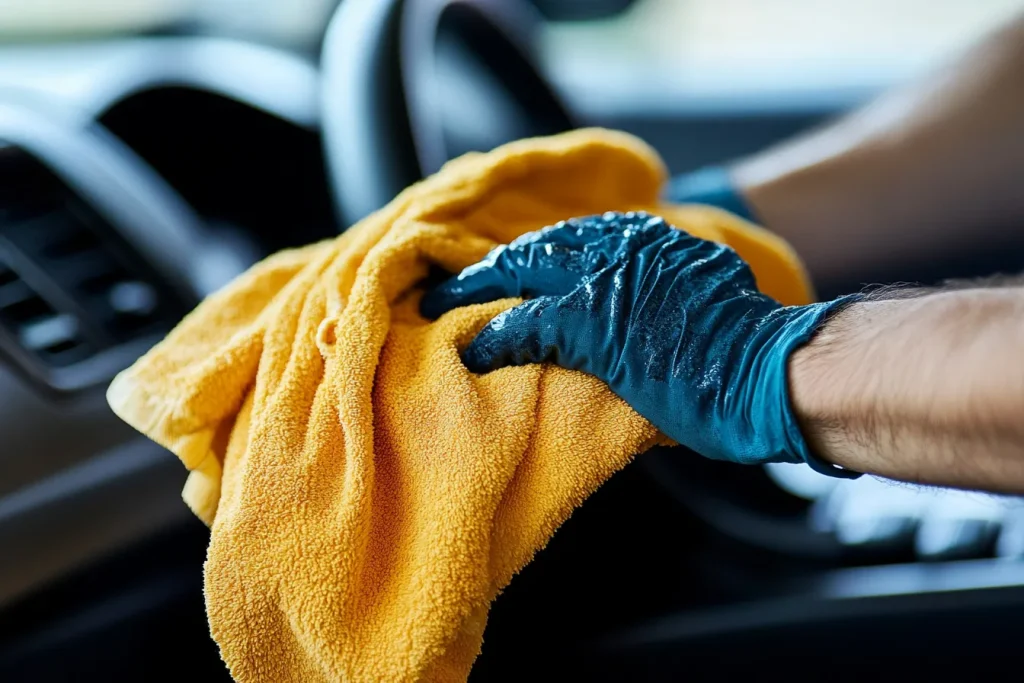
- Microfiber Drying Towels: High-quality, plush microfiber drying towels are highly absorbent and soft, making them ideal for safely drying a vehicle. Large waffle-weave or twisted-loop microfiber towels are popular choices. The “blotting” or “patting” technique is preferred over dragging the towel across the paint, as this further reduces the chance of inducing micro-scratches or swirl marks. Towels should be folded into sections, and a fresh, dry section used as the current one becomes saturated.
- Drying Aids: Spraying a drying aid product (such as Chemical Guys After Wash ) onto the wet surface before toweling can enhance the drying process. These products add lubrication, reducing friction between the towel and paint, help water sheet off more effectively, and can add a layer of gloss and protection.
It is advisable to dry the vehicle in sections, starting from the top and working down, to manage water runoff and prevent spots from forming on already dried areas.
The meticulous nature of these exterior washing and drying steps underscores a core principle in automotive detailing: minimizing physical abrasion on the paint surface at every stage. Each step, from the pre-rinse to the final drying method, is designed to lift and remove contaminants with the least possible risk of scratching or marring the finish.
This careful approach is what differentiates a professional detail from a quick wash and is fundamental to preserving the paint’s integrity and appearance over time. Furthermore, the thorough cleaning achieved prepares the surface optimally for paint correction and protection, ensuring that subsequent treatments can bond effectively and deliver their intended aesthetic and protective benefits.
3. Exterior Polishing & Waxing/Sealing
Once the vehicle’s exterior is impeccably clean and dry, the focus shifts to refining the paintwork and applying long-lasting protection. This phase typically involves paint correction to remove imperfections and the application of a protective layer like wax, sealant, or a ceramic coating.
3.1. Paint Correction: Compounding & Polishing
Paint correction is the process of restoring and rejuvenating the vehicle’s paint finish by removing surface imperfections such as swirl marks, scratches, oxidation, water spots, and etchings from bird droppings or bug splatter. This process aims to level the clear coat, creating a smooth, reflective surface that enhances gloss, depth, and clarity. It is a critical step before applying high-quality protectants, as it ensures the paint is in its best possible condition.
- Assessment of Paint Condition: Before beginning paint correction, a thorough inspection of the paintwork is necessary, often under specialized lighting (such as LED or halogen lamps) that reveals defects not visible in normal daylight. A paint thickness gauge may also be used by professionals to measure the depth of the clear coat, ensuring that there is sufficient material to work with and to avoid removing too much, which could lead to paint failure.
- Compounding: This is the first and most aggressive step in paint correction, typically used for paint with moderate to severe defects like deeper scratches and significant swirl marks. Compounding involves using a cutting compound (a more abrasive polish) with a cutting pad (e.g., foam, microfiber, or wool) on a machine polisher (dual-action or rotary). The process physically removes a very thin layer of the clear coat to level out the imperfections. It is crucial to work in small, manageable sections (e.g., 2×2 feet), applying even pressure and ensuring the compound is worked thoroughly until it breaks down and the defects are diminished.
- Polishing: After compounding, the surface may exhibit some hazing or micro-marring from the aggressive nature of the compound and pad. Polishing is the subsequent step that refines the finish. This involves using a finer polish (less abrasive) with a softer polishing or finishing pad on a machine polisher. Polishing removes any remaining micro-scratches, enhances gloss, and restores clarity to the paintwork, creating a deep, wet look. Multiple polishing stages with progressively finer polishes and pads may be used to achieve a flawless finish, especially in multi-stage corrections.
- Tools and Materials: Key tools include dual-action (DA) or rotary polishing machines, a variety of buffing pads (cutting, polishing, finishing pads made of foam, microfiber, or wool), different grades of compounds and polishes, high-quality microfiber towels for residue removal, and good inspection lighting.
- Process Considerations: The vehicle must be impeccably clean before any machine polishing. Performing a test spot on an inconspicuous area is highly recommended to determine the least aggressive combination of pad, product, and technique required to achieve the desired results. Polishing pads should be cleaned frequently during the process to prevent an accumulation of product and removed paint material, which can reduce effectiveness and potentially cause new defects. After correction, panels are often wiped down with an isopropyl alcohol (IPA) solution to remove any polishing oils and reveal the true state of the corrected surface.
The level of paint correction can vary, often described in stages (e.g., Stage 1, Stage 2, Stage 3), indicating the number of compounding and polishing steps performed to achieve a certain level of defect removal. A Stage 1 correction might involve a single polishing step for light enhancement, while a Stage 3 correction could involve heavy compounding, multiple polishing stages, and even spot wet sanding for severe defects.
3.2. Application of Car Waxes, Synthetic Sealants, or Ceramic Coatings
After the paint has been corrected and is free of imperfections, applying a protective product is essential to shield the finish from environmental contaminants, UV radiation, and to maintain its gloss and hydrophobic properties. The choice of protectant depends on desired durability, appearance, and budget.
- Carnauba Wax: Derived from the leaves of the Brazilian Carnauba palm, carnauba wax is a traditional favorite among enthusiasts for the deep, warm, wet-look gloss it imparts to paintwork. It is available in paste, liquid, and spray forms.
- Benefits: Excellent aesthetic enhancement, easy to apply, affordable.
- Drawbacks: Shorter lifespan, typically lasting from a few weeks to a couple of months, and offers less robust protection against harsh environmental factors compared to sealants or ceramic coatings.
- Application: Ensure the car is clean and dry. Apply a thin, even coat of wax to one panel or section at a time using a foam applicator pad, often in overlapping circular or straight-line motions. Allow the wax to dry to a haze (typically 5-15 minutes, depending on the product and conditions), then buff off the residue with a clean, soft microfiber towel to reveal the shine.
- Synthetic Paint Sealants: These are man-made protectants, typically formulated with polymers, that chemically bond to the vehicle’s paint surface. They are designed to offer longer-lasting protection and greater durability than natural waxes.
- Benefits: Better durability (often lasting 4-12 months), enhanced protection against UV rays and environmental contaminants, good water beading, and a slick, glossy finish.
- Drawbacks: The shine may be perceived as more clinical or reflective rather than the warm glow of carnauba wax by some users. Surface preparation is critical for proper bonding.
- Application: The surface must be thoroughly cleaned, decontaminated (clayed), and ideally polished. Apply a small amount of sealant to a foam or microfiber applicator pad and spread a thin, even coat over a section of the paint, using overlapping motions. Allow the sealant to cure for the manufacturer-recommended time (often 15-30 minutes, but can vary) until it hazes. Then, buff off the residue with a clean microfiber towel. Some sealants can also be applied by machine polisher on a low speed with a soft finishing pad.
- Ceramic Coatings (Nanocoatings): Ceramic coatings are liquid polymers, often based on Silicon Dioxide (SiO2) or Titanium Dioxide (TiO2), that, when applied to a vehicle’s paint, cure to form a hard, transparent, and extremely durable protective layer. This layer chemically bonds with the factory paint, creating a semi-permanent shield.
- Benefits: Exceptional durability (typically lasting 2-5 years or even longer, depending on the product and maintenance), superior resistance to chemicals, UV rays, light scratches, bird droppings, and water spots. They create a highly hydrophobic (water-repelling) surface, making the vehicle easier to clean and stay clean longer. They also provide intense gloss and depth to the paint.
- Drawbacks: Higher cost compared to waxes and sealants. The application process is meticulous, time-consuming, and requires extensive surface preparation (flawless paint correction is a must, as the coating will lock in any imperfections). Professional application is often recommended and sometimes required for warranty purposes due to the precision needed. Improper application can lead to high spots or an uneven finish that is difficult to correct. They are not impervious to all damage (e.g., deep scratches, rock chips).
- Application: This is a multi-step process. The paint must be perfectly clean, decontaminated, and paint corrected to a high standard. An IPA wipe-down is performed to remove all oils and residues. The coating is then applied panel by panel in small sections using a special applicator, allowed to “flash” (partially cure) for a specific time (usually a few minutes), and then meticulously leveled and buffed with microfiber towels to remove any excess. Curing times can be 12-24 hours or longer, during which the vehicle should be kept dry and clean. Some “ceramic-infused waxes” or “ceramic spray coatings” offer easier application and some ceramic-like properties but do not provide the same level of durability as true professional-grade ceramic coatings.
The choice between carnauba wax, synthetic sealant, and ceramic coating depends on factors such as the owner’s budget, the desired level and duration of protection, aesthetic preferences, and the amount of time and effort they are willing to invest in application and maintenance. Each product category offers distinct advantages, with ceramic coatings representing the pinnacle of long-term paint protection currently available. The careful execution of paint correction followed by the diligent application of a chosen protectant represents a significant investment in the vehicle’s appearance and its defense against the elements.
4. Interior Detailing
A comprehensive automotive detail extends beyond the exterior to meticulously clean and rejuvenate the vehicle’s interior. This process aims to create a clean, fresh, and aesthetically pleasing environment for the driver and passengers, while also preserving the condition of interior materials.
4.1. Thorough Vacuuming (Including Trunk)
 The first step in interior detailing is the removal of all loose items, trash, and personal belongings. Floor mats are typically removed to be cleaned separately. A thorough vacuuming of the entire cabin, including seats, carpets, floorboards, dashboard, center console, and the trunk, is then performed.
Using various vacuum attachments, such as crevice tools for tight spaces (e.g., between seats, along seat tracks) and brush attachments for upholstery and carpets, ensures effective removal of dust, crumbs, pet hair, and other debris. It is generally recommended to work from the top of the interior downwards (e.g., headliner, then dashboard, then seats, then carpets) to allow dislodged dirt to fall onto uncleaned areas.
4.2. Steam Cleaning
Steam cleaning is a highly effective method for deep cleaning and sanitizing various interior surfaces without the use of harsh chemicals. High-temperature steam penetrates porous materials like fabric upholstery and carpets to lift embedded dirt, grime, and stains. It is also effective for cleaning hard surfaces, dashboards, consoles, door panels, and even intricate areas like air vents and cup holders.
A significant benefit of steam cleaning is its ability to kill bacteria, germs, dust mites, and mold spores, thus improving interior air quality and sanitizing surfaces. When steam cleaning, appropriate attachments should be used for different surfaces, and care should be taken around electronics. Surfaces are typically wiped down with a microfiber towel after steaming to remove loosened dirt and excess moisture.
4.3. Carpet and Upholstery Shampooing/Extraction
For heavily soiled carpets and fabric upholstery, a more intensive cleaning process involving shampooing and extraction is often necessary.
- Shampooing: This involves applying a specialized fabric cleaner or upholstery shampoo to the surface. The cleaner helps to break down and emulsify dirt, oils, and stains. The product is often agitated into the fibers using a soft to medium-stiff brush or a drill brush attachment to loosen the soil.
- Extraction: Following agitation, a hot water extractor (also known as a carpet extractor or shampooer) is used. This machine sprays hot water (sometimes mixed with a rinsing agent) onto the fabric and immediately vacuums up the dirty solution, along with the loosened grime and shampoo residue. This process deeply cleans the fibers and helps to remove a significant amount of moisture, reducing drying times. Steam cleaning may be performed prior to extraction to further aid in loosening stubborn stains and sanitizing the fabric.
4.4. Leather Cleaning and Conditioning
Leather surfaces require specific care to maintain their appearance, suppleness, and prevent cracking or fading.
- Cleaning: After vacuuming to remove loose debris, leather seats and surfaces should be cleaned with a pH-balanced leather cleaner specifically designed for automotive leather. The cleaner is typically applied to a soft microfiber towel or a soft-bristled leather cleaning brush and gently worked into the leather to lift dirt and oils from the pores and grain. It’s important to avoid oversaturating the leather and to wipe away any excess cleaner and lifted dirt with a clean microfiber towel.
- Conditioning: Once the leather is clean and dry, a high-quality leather conditioner should be applied. The conditioner replenishes natural oils, moisturizes the leather, helps to keep it soft and flexible, and often provides UV protection to prevent drying, cracking, and fading. The conditioner is typically applied with a clean microfiber applicator or towel, worked gently into the leather, allowed to absorb for a period, and then any excess is buffed off with a clean, dry microfiber towel.
4.5. Cleaning and Dressing of Plastic, Vinyl, and Rubber Surfaces
Interior components such as the dashboard, center console, door panels, and trim pieces are often made of plastic, vinyl, or rubber. These surfaces can accumulate dust, grime, and body oils, and are susceptible to UV damage.
- Cleaning: These surfaces should be cleaned using a suitable interior cleaner or an all-purpose cleaner diluted to the appropriate strength. The cleaner can be sprayed onto a microfiber towel and then wiped onto the surface, or for more soiled areas, sprayed directly and agitated with a soft brush or detailing swab before wiping clean.
- Dressing/Protecting: After cleaning and drying, an interior dressing or protectant is applied to enhance the appearance (e.g., restore richness, provide a satin or matte finish) and offer protection against UV rays, which can cause fading and cracking over time. These products are available in various formulations (water-based, silicone-based) and finishes. It is crucial to avoid applying dressings to control surfaces like the steering wheel, pedals, or gear shifter, as they can make these surfaces slippery and unsafe.
4.6. Cleaning Vents, Buttons, Screens, and Controls
These intricate areas require careful attention to detail.
- Air Vents: Dust and debris can be removed from air vents using soft detailing brushes, cotton swabs, or compressed air. Steam cleaning can also be effective for sanitizing vents.
- Buttons and Knobs: These can be cleaned with a soft brush to dislodge dust from crevices, followed by wiping with a microfiber towel lightly dampened with an appropriate interior cleaner or electronics-safe cleaner. Care should be taken to avoid excessive moisture seeping into electronic components.
- Touch Screens and Displays: These sensitive surfaces should be powered off before cleaning. A clean, dry microfiber cloth is typically used to gently wipe away fingerprints and dust in circular motions. For more stubborn smudges, the cloth can be very lightly dampened with distilled water or a cleaner specifically designed for electronic screens. Harsh chemicals, ammonia-based cleaners, or abrasive materials must be avoided as they can damage the screen or its anti-glare coating.
4.7. Cleaning Headliner
The headliner (the fabric lining the vehicle’s ceiling) is a delicate area that requires careful cleaning to avoid damage, such as dislodging the fabric from its backing or causing sagging.
- Vacuuming: Start by gently vacuuming the headliner with a soft brush attachment to remove loose dust and debris.
- Spot Cleaning: For stains, use a mild upholstery cleaner or a dedicated headliner cleaner. Spray a small amount of cleaner onto a clean microfiber towel (not directly onto the headliner) and gently blot or dab the stained area. Avoid aggressive rubbing or scrubbing, which can damage the fabric or adhesive.
- Overall Cleaning: If the entire headliner needs cleaning, work in small sections, applying the cleaner lightly to a microfiber towel and wiping gently. Avoid saturating the fabric. After cleaning, a clean, damp microfiber towel can be used to wipe away any excess cleaner, followed by allowing the headliner to air dry completely, preferably with windows open for ventilation. Heat should not be used to speed up drying. Steam cleaning is generally not recommended for headliners due to the risk of loosening the adhesive.
4.8. Cleaning Door Jambs
Door jambs (the areas of the body and door that are visible when the door is open) often accumulate significant dirt, grease, and road grime and are frequently overlooked.
- Cleaning: These areas can be cleaned using an all-purpose cleaner, degreaser, or a rinseless/waterless wash solution. Spray the cleaner onto the jambs, allow it to dwell for a short period to break down grime, and then agitate with detailing brushes or a microfiber towel, paying attention to hinges and crevices.
- Rinsing/Wiping: Depending on the product used and the level of soiling, the jambs can be rinsed carefully with a low-pressure stream of water (taking care not to get water into the interior) or wiped clean with damp microfiber towels.
- Drying and Protection: After cleaning, the door jambs should be dried thoroughly with a clean microfiber towel. Applying a layer of spray wax or sealant can provide protection and make future cleaning easier.
4.9. Interior Glass Cleaning
 Clean interior glass is essential for visibility and overall appearance.
- Products and Tools: Use a high-quality automotive glass cleaner that is ammonia-free (especially if the vehicle has tinted windows) and clean microfiber towels (waffle weave towels are often preferred for glass).
- Technique: The two-towel method is highly effective: one towel lightly dampened with glass cleaner is used to wipe the glass, and a second, clean, dry towel is used immediately to buff the glass to a streak-free shine. To avoid overspray onto the dashboard or other interior surfaces, spray the cleaner directly onto the towel rather than the glass. Wipe in one consistent direction (e.g., horizontally for interior glass, vertically for exterior) to help identify which side any remaining streaks are on. Pay attention to the edges and corners of the windows. For the inside of the windshield, sitting in the passenger seat can provide better access.
The comprehensive nature of interior detailing, addressing every surface from the headliner to the carpets, not only enhances the vehicle’s aesthetic appeal but also contributes significantly to a healthier and more pleasant driving environment. The removal of accumulated dirt, allergens, and bacteria, coupled with the restoration and protection of various materials, preserves the interior’s condition and value over time.
5. Specialized Detailing Services
Beyond the fundamental exterior and interior cleaning processes, a range of specialized detailing services cater to specific areas and needs of a vehicle, further enhancing its condition, appearance, and longevity.
5.1. Engine Bay Cleaning
A clean engine bay not only improves the vehicle’s overall appearance, especially for show purposes or prior to sale, but can also help in identifying potential issues like leaks more easily.
- Safety Precautions: This process requires caution. The engine must be cool to the touch before starting. Sensitive electrical components such as the alternator, air intake, distributor, and battery terminals (the negative terminal should be disconnected, and the battery potentially removed) must be covered with plastic bags or waterproof coverings to prevent water damage.
- Process:
- Preparation: Remove loose debris with compressed air or a brush.
- Degreasing: Apply a dedicated engine degreaser or a suitable all-purpose cleaner to all surfaces, allowing it to dwell and break down grease and grime.
- Agitation: Use various detailing brushes (soft to medium stiffness) to agitate heavily soiled areas, reaching into nooks and crannies.
- Rinsing: Rinse the engine bay carefully with a low-pressure stream of water from a hose or pressure washer, avoiding direct spray on covered sensitive components.
- Drying: Thoroughly dry the engine bay using compressed air and/or microfiber towels.
- Dressing: Once dry, apply a water-based dressing (e.g., Chemical Guys VRP , Auto Finesse Dressle ) to plastic, rubber, and vinyl components to restore their appearance and provide protection. Dressings should be allowed to cure as per product instructions.
5.2. Undercarriage Cleaning
Cleaning the vehicle’s undercarriage is important for removing road salt, mud, grime, and other corrosive contaminants that can lead to rust and deterioration of chassis components, brake lines, and the exhaust system.
- Process: This typically involves elevating the vehicle (using ramps or a lift for better access, if available) and using a pressure washer, potentially with a specialized undercarriage nozzle or an underbody blaster attachment, to direct water and cleaning solutions to the chassis and underbody components. A car-safe degreaser or all-purpose cleaner can be applied, agitated with long-handled brushes if necessary, and then rinsed thoroughly. Care should be taken to avoid spraying sensitive components directly. After cleaning, an undercarriage protectant or rust inhibitor can be applied. Specialized tools like chassis flushers with 360° jets are also available for cleaning inside chassis rails.
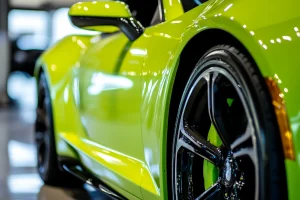
5.3. Wheel & Tire Detailing (Advanced)
This goes beyond the initial cleaning during the wash phase and involves deep cleaning, polishing (if applicable), and protecting the wheels and tires.
- Deep Cleaning Wheels: Wheels are exposed to harsh conditions, accumulating brake dust (which can be corrosive), road grime, and tar.
- Cleaners: The choice of wheel cleaner depends on the wheel type (e.g., painted, clear-coated, chrome, polished aluminum, anodized) and the severity of contamination. Options range from pH-neutral cleaners for regular cleaning (e.g., Chemical Guys Diablo Wheel Gel ) to more potent alkaline or acidic cleaners for heavily soiled wheels, or color-changing iron removers that dissolve ferrous brake dust particles. Acidic cleaners should be used with extreme caution and only on compatible surfaces.
- Tools & Technique: Various brushes are essential: soft wheel face brushes, larger barrel brushes for cleaning the inner wheel, smaller detailing brushes for lug nuts and intricate areas, and tire brushes for scrubbing sidewalls. The cleaner is applied, allowed to dwell, agitated thoroughly, and then rinsed completely.
- Polishing Wheels: Metal wheels, such as chrome or polished aluminum, can become dull, oxidized, or stained over time and may benefit from polishing to restore their shine.
- Products: Use a polish specifically formulated for the type of metal (e.g., chrome polish, aluminum polish).
- Tools & Technique: Polishing can be done by hand with microfiber towels or applicators, or by machine using a polisher (rotary or DA) with appropriate pads (e.g., wool or foam for aluminum ) or specialized polishing attachments for drills (e.g., polishing balls or cones). For chrome, very fine #0000 steel wool may be used with polish, but extreme care and testing in an inconspicuous area are necessary to avoid scratching. After polishing, the residue is wiped off.
- Protection: After polishing, it’s crucial to apply a protective layer, such as a wheel-specific wax, sealant, or ceramic coating, to maintain the shine, make future cleaning easier, and protect against brake dust adhesion and corrosion.
- Dressing Tires: Applying a tire dressing restores a deep black, rich appearance to the tire sidewalls and provides UV protection to help prevent cracking, browning, and premature aging.
- Products: Tire dressings are available in water-based or solvent-based formulations, and in spray or gel forms, offering varying levels of shine (from matte to high gloss).
- Application: Ensure tires are thoroughly clean and dry. Apply the dressing evenly using a foam applicator pad or a tire dressing brush. Wipe off any excess product from the tire surface to prevent “sling” (where dressing flings onto the car’s paintwork when driving) and to control the desired level of shine. Allow the dressing to dry and saturate the rubber as per product instructions. Multiple layers can sometimes be applied to enhance the look.
5.4. Glass Cleaning & Treatment
Achieving perfectly clear, streak-free glass is paramount for both aesthetics and driving safety.
- Streak-Free Cleaning of All Interior/Exterior Glass: While basic interior glass cleaning was covered previously, exterior glass often faces tougher contaminants like dried bugs, road film, and stubborn water spots. A thorough wash (Section 2) typically removes most of these. For persistent issues, a clay bar can be used on exterior glass surfaces to remove bonded contaminants. The two-towel method remains crucial for a streak-free finish on both interior and exterior glass: one towel (often a waffle-weave microfiber) is used with the glass cleaner to wipe the surface, and a second clean, dry microfiber towel is used for the final buff. A helpful technique is to wipe exterior glass in one direction (e.g., vertically) and interior glass in the opposite direction (e.g., horizontally); this allows for easy identification of which side any remaining streaks are on.
- Application of Rain Repellent/Hydrophobic Coatings: Applying a rain repellent or hydrophobic coating to exterior glass, particularly the windshield and front side windows, significantly improves visibility during wet weather conditions. These products create a super-slick surface that causes water to bead up and roll away at driving speeds, often reducing the need for wiper use in light to moderate rain. They also make it easier to remove ice, snow, bugs, and dirt.
- Products: Options include spray-on glass cleaners with built-in water repellents (e.g., Rain-X 2-in-1 , Rain-X Pro Cerami-X Glass Cleaner + Water Repellent ), dedicated glass sealants, or even ceramic coatings formulated for glass.
- Application (for spray-on types): The glass must be impeccably clean and dry. Shake the product well. Spray it directly onto the glass surface, working one section at a time. Wipe with a clean, dry towel to spread the product and remove any remaining dirt. Perform a final buff with another clean, dry side of the towel to achieve a streak-free, water-beading finish. Some products, especially ceramic-infused ones, may recommend a curing time (e.g., one hour) before exposure to water to ensure optimal bonding and durability. Ceramic-infused glass treatments can offer repellency for extended periods, such as up to 6 weeks.
5.5. Headlight Restoration
 Over time, polycarbonate headlight lenses can become faded, yellowed, cloudy, or oxidized due to UV exposure, road debris, and environmental contaminants. This not only detracts from the vehicle’s appearance but, more importantly, significantly reduces light output, impairing nighttime visibility and safety.
- Identifying Faded or Oxidized Headlights: The degradation is visually apparent as haziness, yellowing, or a cloudy appearance on the lens surface.
- The Restoration Process: This typically involves multiple steps to remove the damaged layer and restore clarity.
- Preparation: Clean the headlights thoroughly with a degreaser or car wash soap and water. Carefully tape off the painted areas surrounding the headlights with automotive masking tape to protect them from accidental sanding or polishing.
- Wet Sanding: This is the most critical step for removing the oxidized layer. It involves using progressively finer grits of automotive wet/dry sandpaper. The sandpaper should be soaked in water, and the lens surface kept wet during sanding to lubricate and carry away debris.
- Start with a coarser grit (e.g., 400, 600, or 800 grit, depending on the severity of oxidation) and sand in one consistent direction (e.g., horizontal or vertical) until the yellowing is removed and the “milky” residue from sanding turns from yellow to white, indicating the oxidized layer is gone.
- Proceed to the next finer grit (e.g., 1000, 1500), sanding in a direction perpendicular to the previous grit (e.g., if first was horizontal, now sand vertically). This helps to remove the sanding marks from the previous coarser grit.
- Continue this process with even finer grits (e.g., 2000, 2500, 3000 grit), always keeping the surface wet and alternating sanding direction if desired. The goal is to achieve a uniformly smooth, but hazy or foggy white, appearance on the lens. Wipe the lens clean and dry between grit changes to inspect progress and ensure all previous, coarser sanding marks are removed.
- Compounding & Polishing: After the final sanding stage, the lens will be smooth but hazy. A cutting compound is then used with a foam cutting pad (this can be done by hand, but a DA or rotary polisher is more effective and efficient) to remove the fine sanding marks and begin restoring clarity. This is followed by a finer polish with a polishing pad to further refine the surface, remove any remaining haze, and maximize optical clarity and gloss. Residue should be wiped off with a clean microfiber towel.
- Sealing for Long-Lasting Clarity: This step is crucial. The sanding process removes the original factory UV protective coating from the headlight lens. Without a new protective layer, the lens will quickly re-oxidize and become cloudy again.
- UV Resistant Clear Coat: Applying a high-quality automotive UV-resistant clear coat is often considered the most durable solution. A 2k (two-component) clear coat, which includes a hardener, provides superior protection and longevity. The lens must be perfectly clean and free of oils (an alcohol wipe-down is recommended ) before applying the clear coat in several light, even coats, following the product’s instructions for application and drying times. Some sources suggest that if using a 2k clear coat, sanding should not go beyond 800 grit to ensure proper adhesion.
- Ceramic Coating: Specialized ceramic coatings designed for plastic or headlights can also provide excellent UV protection and durability (e.g., Cerakote Headlight Restoration Kit ).
- Paint Protection Film (PPF): Applying a clear PPF to the restored headlights offers physical protection against stone chips as well as UV protection.
- Dedicated Headlight Sealants/Wipes: Many headlight restoration kits include a sealant, often in wipe form (e.g., 3M kits, though some users have reported mixed results with wipes ). Products like Simoniz Glascoat have also been mentioned. These may offer shorter-term protection compared to clear coats or ceramic coatings.
A well-executed headlight restoration can dramatically improve the vehicle’s appearance and, more importantly, restore nighttime driving safety.
| Stage of Sanding | Recommended Grit Range(s) | Purpose of this Grit Range | Sanding Technique Notes (Wet/Dry, Direction) |
|---|---|---|---|
| Heavy Oxidation Removal | 400, 600, 800 | Remove severe yellowing, pitting, and the bulk of oxidation | Wet sand. Start with lowest necessary grit. Sand in one direction. Ensure milky residue turns white. |
| Medium Refinement | 1000, 1500 | Remove scratches from coarser grits, further smooth surface | Wet sand. Sand in opposite direction to previous grit. |
| Fine Refinement | 2000, 2500, 3000 | Prepare surface for polishing, remove finest sanding marks | Wet sand. Continue alternating sanding direction. Aim for a uniformly hazy/foggy white lens. |
5.6. Trim Restoration
Exterior plastic and rubber trim components (such as bumper inserts, window surrounds, fender flares, and side moldings) are prone to fading, dulling, and discoloration due to prolonged exposure to UV radiation, weathering, and harsh chemicals. Restoring these elements significantly improves the vehicle’s overall aesthetic.
- Cleaning and Preparation: The first step is to thoroughly clean the trim to remove all dirt, grime, wax residue, and old dressings. An all-purpose cleaner (e.g., Chemical Guys Nonsense ) or a degreaser should be used. For heavily soiled or previously dressed trim, scrubbing with a degreaser, followed by an alcohol-based surface prep solution (like Detail King Wipe Clean ), is recommended to ensure optimal adhesion of restoration products. An exterior detailing brush is essential for cleaning textured surfaces and getting into grooves. After cleaning, the trim must be rinsed (if applicable) and dried completely; a forced-air dryer can aid this.
- Masking: It is advisable to mask off adjacent painted surfaces and glass with painter’s tape to prevent accidental staining from trim restorers or dyes.
- Restoration and Protection Products & Application:
- Restorative Dressings (Often Oil-Based Gels): Products like Chemical Guys Tire+Trim Gel are designed to deeply nourish, moisturize, and restore color and richness to severely faded and neglected trim. These are typically applied liberally with a microfiber or foam applicator, worked thoroughly into the surface, and then any excess is buffed off with a clean, dry microfiber towel to achieve a dry-to-the-touch finish. This buffing step is important to prevent the dressed surface from attracting dust.
- Semi-Permanent Dyes: For a longer-lasting solution, especially for black or gray trim, products like Detail King Black Trim Kote act as a dye that penetrates and re-colors the plastic. These are applied evenly to the clean, prepped, and dry trim using a shop towel or applicator, working in small sections. The dye is allowed to dry (typically 5-20 minutes, depending on conditions) and can provide restoration for 9-12 months or longer.
- Water-Based Dressings/Protectants: For less faded trim or for maintaining an already restored finish, water-based dressings (e.g., Chemical Guys Silk Shine, VRP, Tire Kicker; Detail King Revival Bumper & Trim Dressing ) are suitable. These products condition the plastic/rubber, provide UV protection, and add shine (ranging from satin to glossy). Revival dressing can be used as a topcoat over Trim Kote for enhanced protection and appearance.
- Maintenance: To maintain the restored look, water-based dressings can be reapplied regularly during routine vehicle washes.
5.7. Convertible Top Cleaning & Protection
 Convertible tops, whether fabric (canvas, cloth) or vinyl, require specialized care to keep them clean, protected from the elements, and looking their best.
- Identifying Top Material: The first and most critical step is to correctly identify the material of the convertible top, as cleaning and protection products are material-specific. A simple test involves placing a small amount of water on the top: if it soaks in, it’s fabric; if it beads up or smears on the surface, it’s vinyl.
- General Cleaning (Applicable to both Fabric and Vinyl):
- Work in a shaded area to prevent cleaners from drying too quickly.
- Thoroughly rinse the top with water to remove loose dirt and debris.
- Spray a dedicated convertible top cleaner, formulated for either fabric or vinyl, evenly over the entire top. Examples include Wolfgang Convertible Top Cleaner, Raggtopp Fabric/Vinyl Cleaner, Chemical Guys Convertible Top Cleaner, and 303 Fabric/Vinyl Convertible Top Cleaner.
- Gently scrub the top with a soft-bristle brush (horsehair brushes are often recommended, especially for fabric) to lift dirt and stains. Avoid aggressive scrubbing, which can damage the material.
- Allow the cleaner to dwell for a few minutes, especially on deep stains (e.g., 15-20 minutes as suggested by one source ).
- Rinse the top thoroughly with a gentle stream of water until all soap residue is removed.
- Allow the top to air dry completely before applying any protectant. For fabric tops, blotting with a clean microfiber towel can help absorb excess water; avoid using terry cloth towels which can leave lint.
- Fabric Top Specifics: Fabric tops may benefit from vacuuming with a soft brush attachment as part of routine maintenance to remove loose dust and debris.
- Vinyl Top Specifics: For vinyl tops, some cleaners like 303 Fabric/Vinyl Cleaner can be diluted with water to create a washing solution.
- Applying Appropriate Protectants: After the top is clean and completely dry, applying a material-specific protectant is vital for shielding against UV rays, water damage, stains, and mildew, thereby extending its life and appearance.
- Fabric Protectants: Products like Raggtopp Fabric Protectant, Wolfgang Fabric Convertible Top Protectant, 303 Fabric Guard, and Gtechniq I1 Smart Fabric are designed to impregnate the fabric fibers, creating a hydrophobic and UV-resistant barrier. Application typically involves shaking the product well and spraying it in light, even coats from a distance of 16-18 inches, allowing each coat to dry (e.g., 10 minutes in the sun) before applying the next. Up to three coats may be recommended for maximum protection. Reapplication is typically needed every 6-8 weeks. Avoid applying on windy days to minimize overspray.
- Vinyl Protectants: Products such as Raggtopp Vinyl Protectant, Wolfgang Vinyl Convertible Top Protectant, and 303 Aerospace Protectant are formulated for vinyl surfaces. These are usually sprayed directly onto the clean, dry top (from 8-12 inches away) or applied with a microfiber towel, then spread evenly. Any excess protectant should be wiped off adjacent paint and glass. For 303 Aerospace Protectant, a key technique is to apply a very wet, saturating coat, work it thoroughly into the vinyl with overlapping motions, and then wipe off all excess product with a clean, dry microfiber towel until the surface is dry to the touch; this aids bonding and creates a repellent coating. Reapplication for vinyl protectants is often recommended every 4-5 weeks , or when water beading diminishes.
The careful execution of these “finishing touch” services—addressing wheels, glass, headlights, trim, and convertible tops—is not merely cosmetic. These procedures are integral to a complete automotive detail, significantly impacting the vehicle’s overall aesthetic appeal, operational safety (in the case of headlights and glass), and the preservation of its value. Neglecting these areas can undermine an otherwise meticulously polished exterior.
Each material, be it metal, plastic, rubber, fabric, or vinyl, demands specific products and techniques, highlighting the specialized knowledge required for a truly comprehensive detail.
A recurring theme in the restoration of surfaces like headlights and trim is a two-stage approach: first, a controlled removal of damaged or oxidized material (e.g., sanding headlights, deep cleaning trim with potentially strong cleaners or dyes), followed by the application of a protective sealant or coating. This “correct then protect” methodology mirrors the broader process of paint correction (compounding/polishing followed by waxing/sealing/coating).
This principle is fundamental in detailing, aiming not just to reverse existing deterioration but also to proactively defend against future environmental damage, ensuring the longevity of the restored finish.
5.8. Odor Elimination
Unpleasant odors in a vehicle’s interior can significantly detract from the driving experience and resale value. Common sources include smoke (cigarette or other), pets, mildew, spilled food or drinks, vomit, urine, and general body odor. Effective odor elimination requires addressing both the source of the odor and any lingering airborne particles.
- Identifying and Cleaning Odor Sources: The first and most crucial step is to thoroughly clean the interior and remove the physical source of the odor. This may involve deep cleaning carpets and upholstery, especially the affected areas.
- The Role of Enzyme Cleaners: For organic odors (those caused by bacteria breaking down organic matter like food, pet accidents, smoke residue, etc.), enzyme cleaners are highly effective. These products contain natural enzymes and beneficial bacteria that biologically break down the organic waste at a molecular level, thus eliminating the odor at its source rather than merely masking it.
- Products: Examples include Detail King Bio-Zyme , Bio One Enzymatic Cleaner , and Does It All Enzyme Cleaner.
- Application: After identifying the soiled area, the enzyme cleaner (diluted or used at full strength according to product instructions) is sprayed liberally onto the source. It needs sufficient dwell time (ranging from a few minutes to several hours or even overnight, depending on the product and severity) for the enzymes to work effectively. Agitation with a brush may be necessary for stubborn stains. For deep-seated odors in carpets or upholstery, using an enzyme cleaner in conjunction with a hot water extractor is often recommended for thorough removal. Some enzyme cleaners are formulated to be wiped away or simply left to air dry without rinsing.
- Using Ozone Generators: After the source of the odor has been physically cleaned and removed (ideally with an enzyme cleaner), an ozone generator can be used to eliminate any remaining, stubborn, or airborne odors.
- How it Works: Ozone (O3) is a powerful oxidizing agent. The generator converts oxygen (O2) from the air into ozone, which then circulates within the sealed vehicle interior. Ozone molecules interact with and neutralize odor-causing particles (including bacteria, mold, and smoke residue) by breaking them down, eventually reverting to oxygen (O2).
- Operation and Safety:
- The vehicle interior must be thoroughly cleaned and dried first. As ozone can dry out materials, it’s advisable to condition leather or vinyl surfaces in older vehicles before and after treatment.
- Place the ozone generator inside the vehicle. Ensure no humans, pets, or plants are inside the vehicle during treatment, as ozone is harmful to breathe in concentrated amounts.
- Close all doors and windows securely.
- Turn on the ozone generator and set the timer according to the manufacturer’s instructions and the severity of the odor (e.g., typically 30 minutes to several hours; some machines have a “HOLD” function for continuous operation ).
- After the treatment cycle is complete, it is critical to ventilate the vehicle thoroughly by opening all doors and windows for an extended period (e.g., at least 30 minutes to an hour, or longer) to allow all residual ozone to dissipate and convert back to oxygen before the vehicle is occupied.
- Effectiveness: Ozone generators are very effective against a wide range of persistent odors, including smoke, pet odors, mildew, and musty smells.
The combination of meticulous cleaning with enzyme-based products to tackle the physical source of contamination, followed by an ozone treatment to neutralize any lingering airborne odor molecules, represents a comprehensive and highly effective strategy for achieving permanent odor elimination in a vehicle.
5.9. Interior Sanitization
 Beyond cleaning for appearance and odor removal, interior sanitization focuses on killing germs, bacteria, viruses, and other microorganisms that can accumulate on surfaces within the vehicle, contributing to a healthier environment for occupants. This has become an increasingly important aspect of detailing, especially with heightened awareness of hygiene.
- Purpose: To reduce the microbial load on interior surfaces, particularly high-touch areas, thereby minimizing the risk of illness transmission.
- Methods:
- Steam Cleaning: As detailed in Section 4.2 and mentioned for odor source removal, high-temperature steam (often above 212°F or 100°C) is a very effective chemical-free method for sanitizing various interior surfaces, including fabrics, carpets, hard plastics, and vents. The heat kills most bacteria, viruses, dust mites, and mold spores.
- Chemical Disinfectants:
- Isopropyl Alcohol (IPA): Solutions containing at least 70% isopropyl alcohol are recognized by health authorities like the CDC as effective against many viruses (including coronaviruses, as noted in ) and bacteria. IPA can be used to wipe down most hard, non-porous interior surfaces. It’s important to test on an inconspicuous area first, as prolonged contact or overly concentrated solutions could potentially damage some sensitive plastics or finishes.
- Specialized Automotive Disinfectants: Several products are specifically formulated for use in vehicle interiors, designed to be effective against germs while being safe for common automotive materials.
- Avoid Bleach-Based Cleaners: Household bleach (sodium hypochlorite) is generally too harsh for car interior surfaces and can cause discoloration or damage to plastics, fabrics, and leather.
- Process for Sanitization:
- Clean First: Surfaces should be thoroughly cleaned of dirt, dust, and grime before disinfection. Disinfectants are more effective on pre-cleaned surfaces because organic matter can reduce their efficacy.
- Apply Disinfectant/Steam:
- If using a chemical disinfectant like IPA, apply it to a clean microfiber towel and wipe down the target surfaces. Ensure the surface remains wet for the contact time specified by the disinfectant product or general guidelines for that disinfectant (often several minutes for full efficacy).
- If using steam, pass the steam nozzle slowly over the surfaces, ensuring adequate exposure to the high temperature.
- Focus on High-Touch Surfaces: Pay particular attention to frequently touched areas, such as the steering wheel, gear shifter, door handles (interior and exterior), window switches, infotainment touch screens, control buttons, armrests, and seat belt buckles.
- Allow to Dry: Let the surfaces air dry completely. If using chemical disinfectants, ensure proper ventilation.
- Protect Surfaces (Optional Post-Sanitization): After sanitization and drying, appropriate interior protectants can be reapplied to surfaces like plastics or leather if desired.
- Hygiene Practices: When performing sanitization, it’s good practice to use new or freshly laundered microfiber towels and disposable gloves for each stage (cleaning, disinfecting, protecting) to prevent cross-contamination.
The emphasis on sanitization, particularly through methods like steam cleaning or the use of specific disinfectants like isopropyl alcohol on high-touch points, reflects a growing understanding of vehicle interiors as environments that can harbor germs. This aspect of detailing moves beyond mere aesthetics, positioning it as a service that actively contributes to the health and well-being of the vehicle’s occupants. This is a significant value proposition, especially in contexts where hygiene is a paramount concern.
6. The Professional Touch: Why Expert Detailing is Often the Best Choice
While do-it-yourself (DIY) automotive detailing can be a rewarding activity for enthusiasts and a cost-effective way to maintain a vehicle’s basic cleanliness , there are compelling reasons why engaging professional detailing services is often the superior choice, particularly for comprehensive cleaning, advanced treatments, and achieving optimal, long-lasting results. The sheer breadth and depth of the tasks outlined in this guide, each requiring specific procedures, tools, and precautions, collectively underscore the value that professional expertise brings.
Access to Expertise, Specialized Tools, and High-Quality Products:
Professional detailers possess a deep understanding of vehicle surfaces, material compositions, chemical compatibilities, and the most effective techniques for a wide array of detailing challenges. This knowledge is crucial for achieving showroom-quality results without inadvertently damaging delicate finishes. For instance, understanding the nuances of different paint types, the safe use of acidic or alkaline cleaners on specific wheel finishes, or the delicate nature of a headliner requires training and experience.
Furthermore, professionals invest in industrial-grade equipment that is often beyond the reach or justification for the average car owner. This includes high-powered hot water extractors, commercial steam cleaners, advanced machine polishers (rotary and dual-action), paint thickness gauges, ozone generators, and specialized lighting for paint inspection. They also have access to premium, professional-grade cleaning agents, compounds, polishes, and protective coatings (like true ceramic coatings) that may offer superior performance and durability compared to consumer-grade products available over-the-counter.
Time Savings and Convenience:
A thorough automotive detail is an extremely time-consuming process. A full detail, especially one involving paint correction or extensive interior work, can take many hours, or even multiple days, for an untrained individual. Professionals, with their experience and efficient workflows, can accomplish these tasks much more quickly, saving the vehicle owner valuable time and effort. The convenience of dropping off a vehicle and retrieving it in pristine condition is a significant advantage for busy individuals.
Achieving Superior, Consistent, and Long-Lasting Results:
Due to their extensive training, experience, and access to better tools and products, professional detailers can consistently achieve a higher standard of finish that is often difficult for DIYers to replicate. This is particularly true for complex tasks such as paint correction, where achieving a flawless, swirl-free finish requires considerable skill and precision. Moreover, the professional application of durable protectants, such as ceramic coatings, ensures that these superior results are maintained for a much longer period, offering enhanced protection against environmental damage.
Handling Complex and Risky Tasks Safely and Effectively:
Many advanced detailing procedures carry a risk of damaging the vehicle if performed incorrectly:
- Paint Correction: Improper use of machine polishers or overly aggressive compounds can burn through the clear coat or paint, leading to costly repairs. Professionals are skilled in assessing paint thickness and using the least aggressive methods necessary.
- Ceramic Coating Application: This process is meticulous and unforgiving. Mistakes in application or leveling can result in high spots or an uneven finish that is very difficult to rectify. Professionals typically work in controlled environments to ensure optimal bonding and curing.
- Engine Bay Cleaning: Working around a complex engine bay requires knowledge of how to protect sensitive electronic components from water damage.
- Heavy Stain and Odor Removal: Professionals are equipped with stronger, specialized chemicals and equipment (like commercial extractors and ozone generators) to tackle severe stains and persistent odors that may prove intractable with DIY methods.
Identifying and Addressing Issues a DIYer Might Miss:
An experienced detailer often has a trained eye for spotting early signs of wear, corrosion, paint defects, or other potential problems that an average car owner might overlook. Addressing these issues proactively can prevent more significant and costly problems down the line.
Maximizing Resale Value:
A vehicle that has been regularly and professionally detailed typically commands a higher resale value and can sell more quickly. The impeccable appearance, both inside and out, creates a strong positive impression on potential buyers, suggesting that the vehicle has been well-maintained. A record of professional detailing services can further enhance buyer confidence.
When DIY is Appropriate and When Professional Services are Better:
 DIY detailing is a viable option for routine maintenance, such as regular washing, light interior cleaning, and applying basic waxes or spray sealants, especially if the owner enjoys the process and has the necessary time and basic equipment. It can foster a closer connection with one’s vehicle.
However, for more intensive tasks—such as deep interior cleaning and shampooing, comprehensive paint decontamination, paint correction, application of long-term protectants like ceramic coatings, heavy odor elimination, specialized services like headlight restoration or engine bay cleaning, or preparing a car for sale—professional detailing services are generally recommended. This is also true for individuals who lack the time, physical ability, specific skills, or inclination to undertake extensive detailing work themselves.
The consistent emphasis on “protection” and “preservation” throughout all facets of automotive detailing—from safeguarding paint with advanced coatings to conditioning interior leather , preventing undercarriage rust , restoring UV-damaged trim , and protecting convertible tops —highlights a crucial point.
Automotive detailing, especially when performed by skilled professionals, is more than a cosmetic treatment; it is an investment in the vehicle’s longevity, structural integrity, and financial value. Professionals are better equipped to apply higher-grade, more durable protective measures, ensuring that the benefits of the detail last longer and provide a greater return on investment.
7. Final Thoughts
Automotive cleaning and car detailing represent a comprehensive and multifaceted approach to vehicle care, extending far beyond superficial cleaning. The meticulous processes involved in exterior washing, drying, paint correction, and protection, combined with thorough interior cleaning, specialized treatments for areas like the engine bay, undercarriage, wheels, glass, trim, and convertible tops, and advanced solutions for odor elimination and sanitization, all contribute to a vehicle that is not only aesthetically superior but also better maintained and preserved.
The detailed steps for each sub-task, from the initial pre-rinse to the application of sophisticated ceramic coatings or the safe operation of an ozone generator, require specific knowledge, appropriate tools, and careful execution to achieve desired outcomes and avoid potential damage. While DIY efforts can be suitable for routine upkeep, the complexity, time commitment, and specialized nature of many advanced detailing procedures underscore the significant advantages offered by professional services.
Professionals bring expertise, access to industrial-grade equipment and products, and the efficiency born of experience, leading to results that are often superior in quality and durability. Their ability to safely handle risky tasks, identify underlying issues, and apply long-lasting protective measures makes professional detailing a valuable investment in a vehicle’s longevity, safety, and resale value.
Ultimately, the decision to utilize professional detailing services hinges on the owner’s goals, resources, and the level of care desired for their vehicle, but the evidence strongly suggests that for comprehensive and lasting results, the expert’s touch is often indispensable.


